Carrie Bradshaw Month 2: Drunk at Vogue!
And for the Grand Finale of Carrie Bradshaw Month (2)…. one of my favourite ever Carrie outfits!
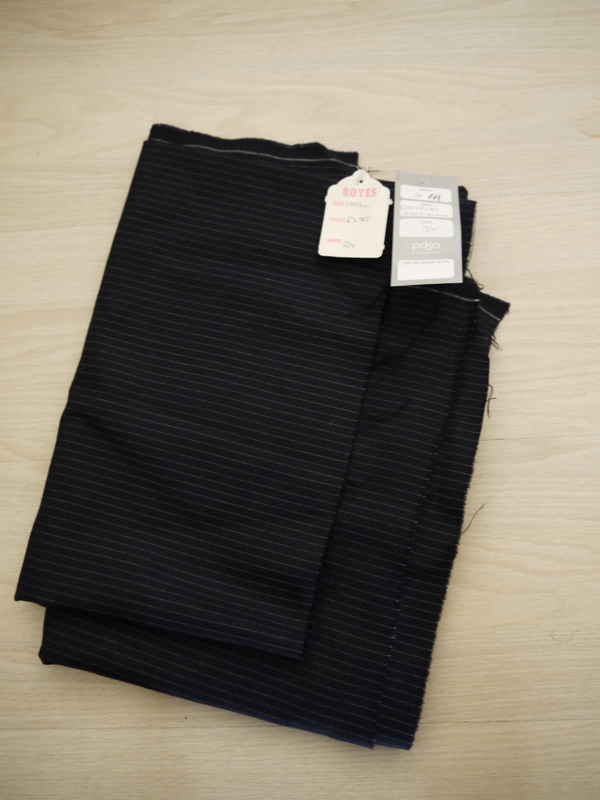
But first… this story starts with a coincidence. It’s often tough to find things in charity shops when you have something specific in mind. I had been looking for pinstripes for quite some time, but they had been eluding me, until I found this:
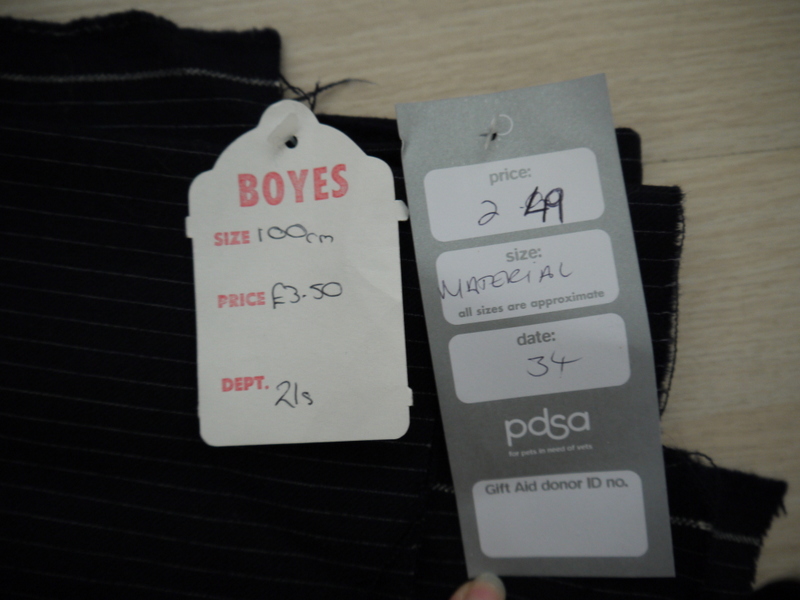
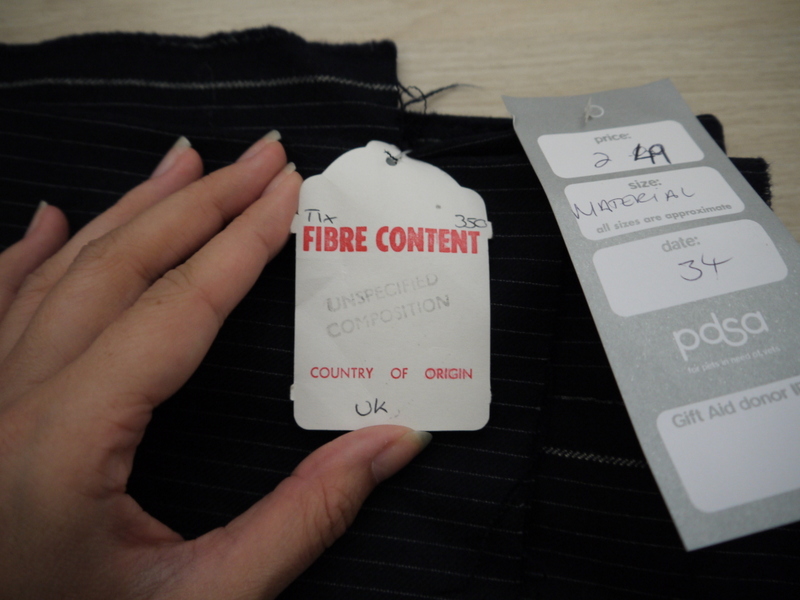
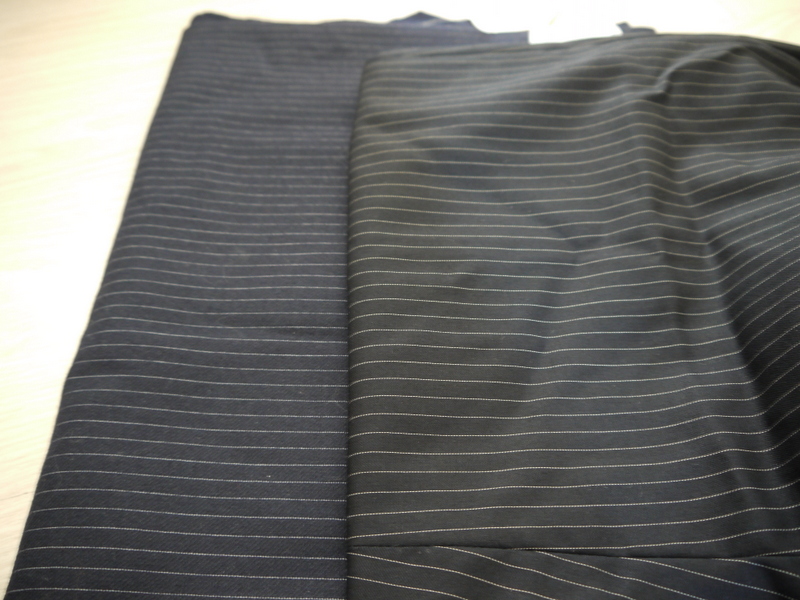
It’s pinstripe material! It’s so rare to find material in charity shops here that I grabbed it and ran to the cashier as quickly as possible. This was in the PDSA shop in Whitby and I paid £2.49. The original label was still attached, telling me that the fabric had originally been bought at a shop about 50 yards away on the same street and that it had cost £3.50.
Unfortunately, the label couldn’t tell me what the material was made of, but I’m guessing wool-mix.
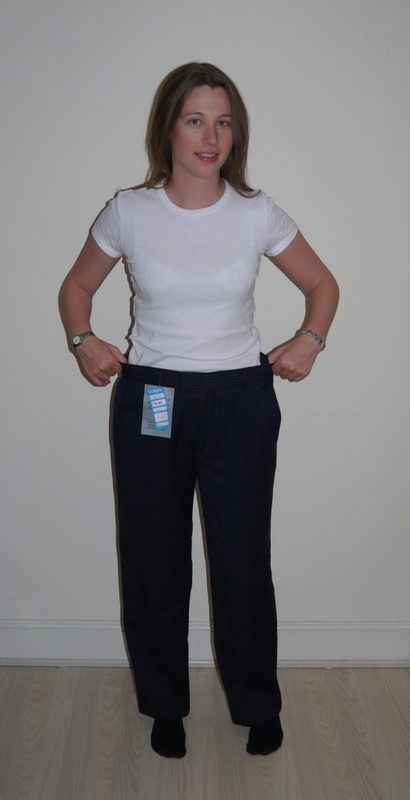
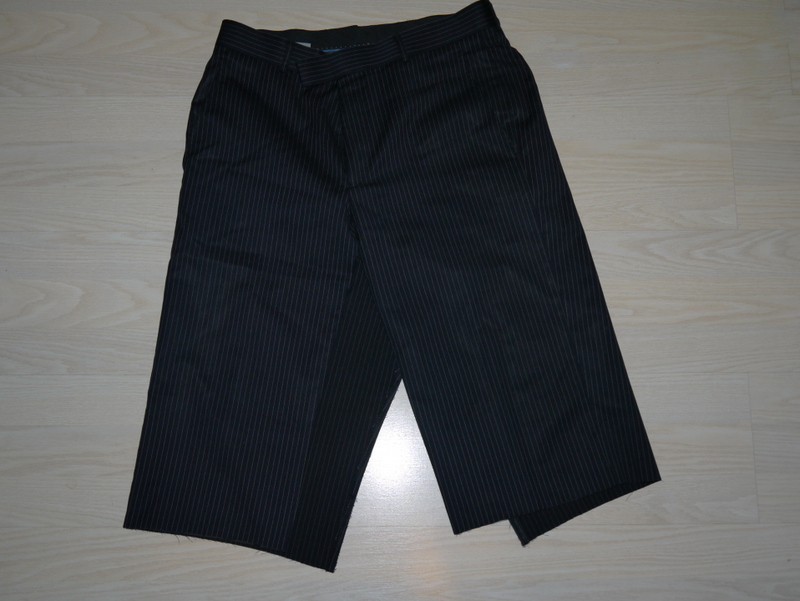
Here’s the coincidence part. After searching for pinstriped stuff for so long and striking gold at PDSA, not 5 minutes later I came across these babies in the Scope shop, which is practically next door!
They are mens pinstripe suit trousers and they are 100% wool. I paid £7, which is rather a lot. They were carrying a label which proclaimed them to be especially high quality.
Of course, I had the pinstripe material in my hand from next door so I was able to compare them in the shop, and happily, they are a very decent match (better in real light than in the photo below).
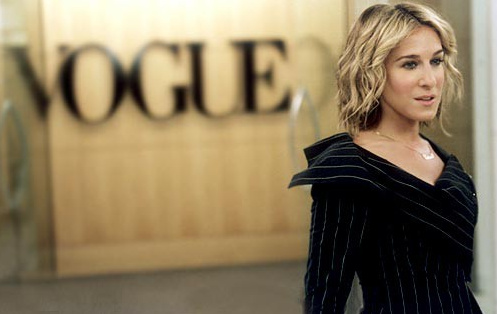
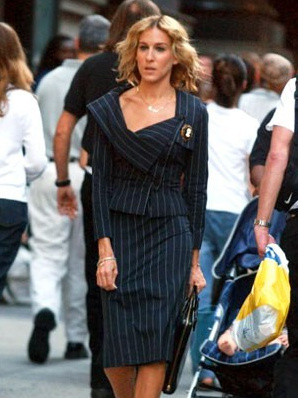
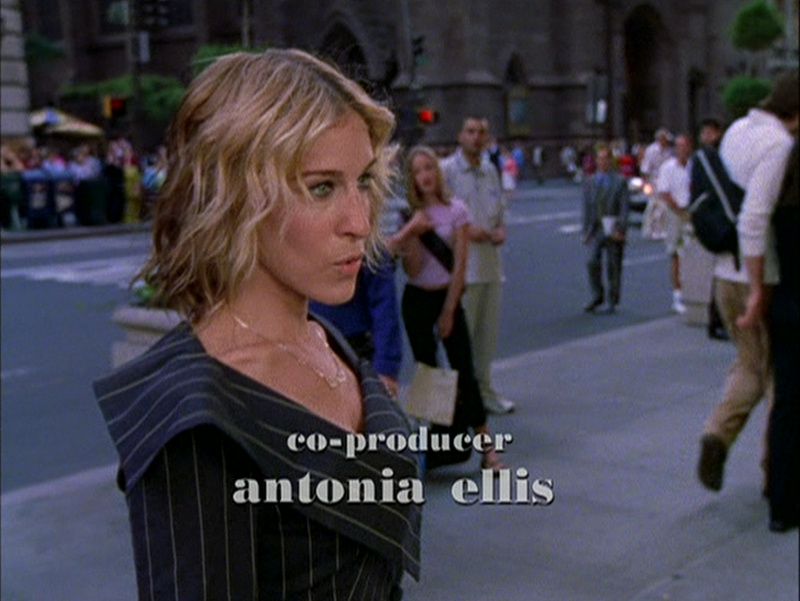
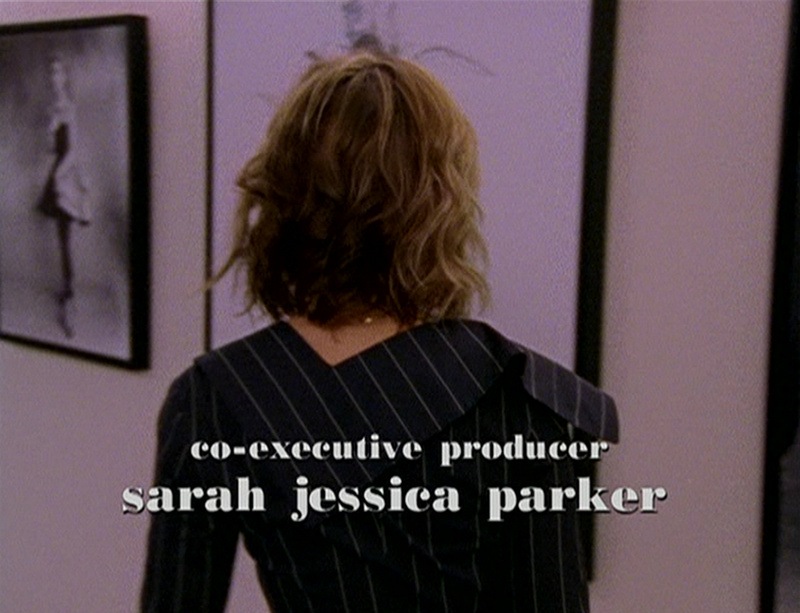
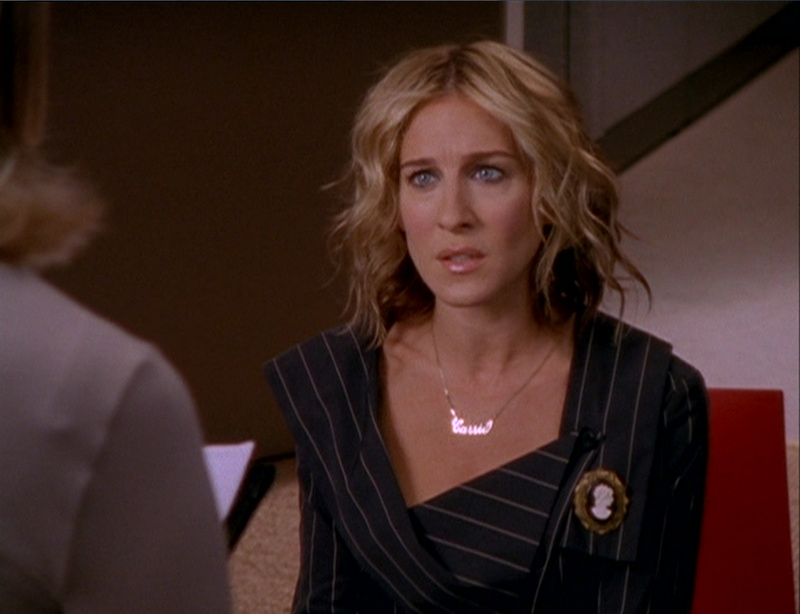
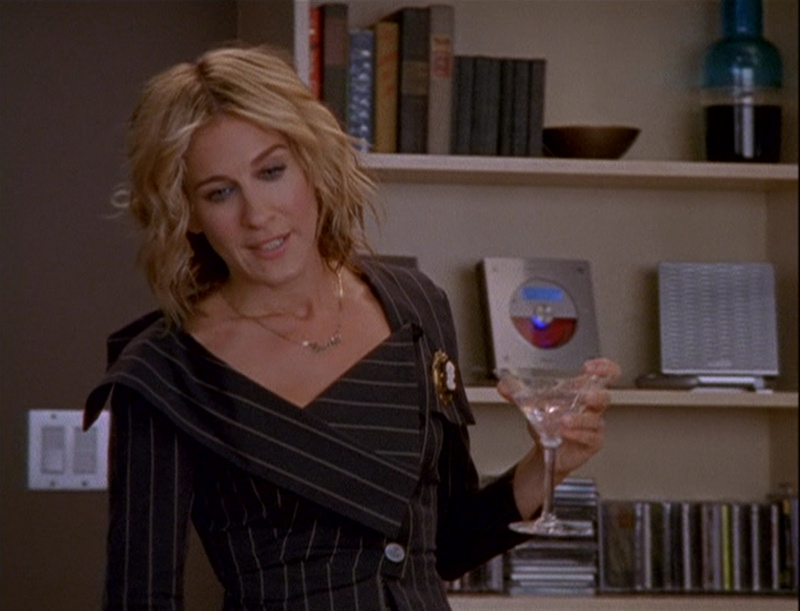
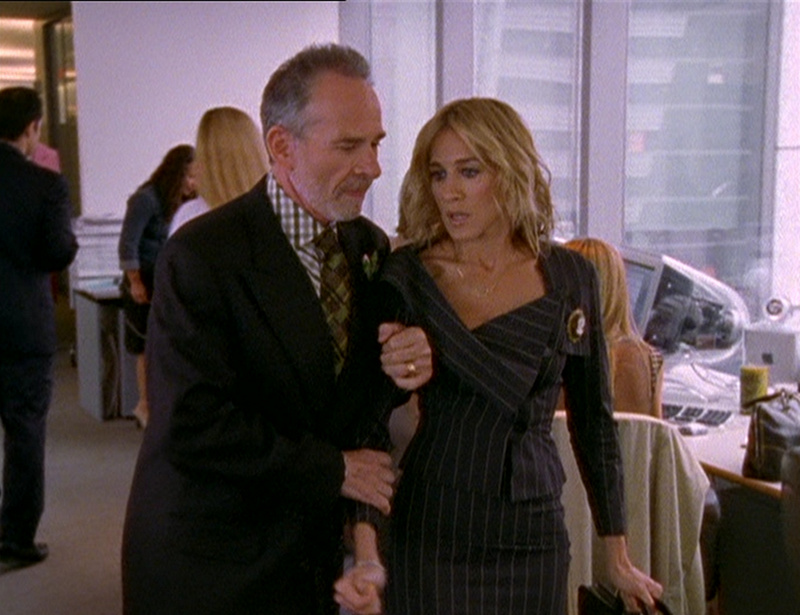
The outfit I had in mind is the absolutely fantastic suit worn by Carrie when she goes for her first meeting with her new editor at Vogue! This is a personal favourite for me and I was delighted to finally have the chance to attempt this.
I read online somewhere that this suit is by Vivienne Westwood, but wasn’t able to find any catwalk pictures or anything to back that up. It certainly looks like it could be Westwood; that collar! Wow!
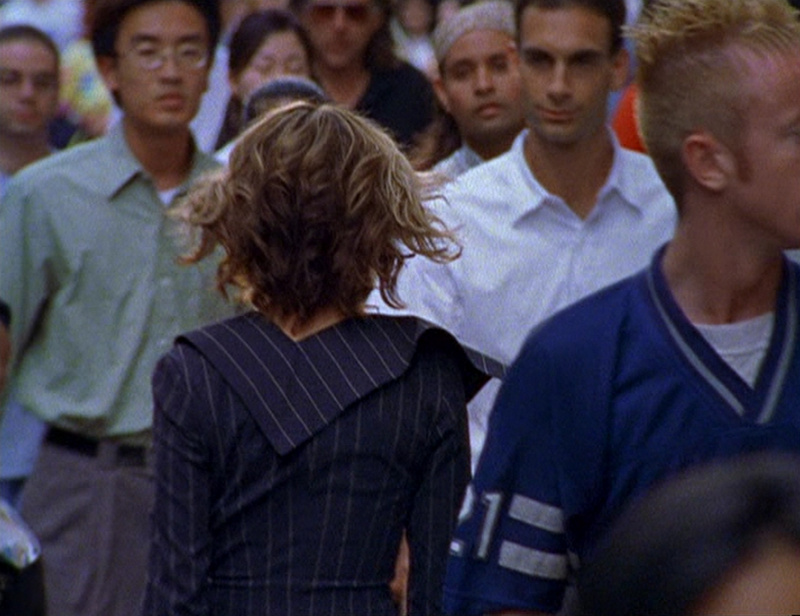
Here’s a closer look at it.
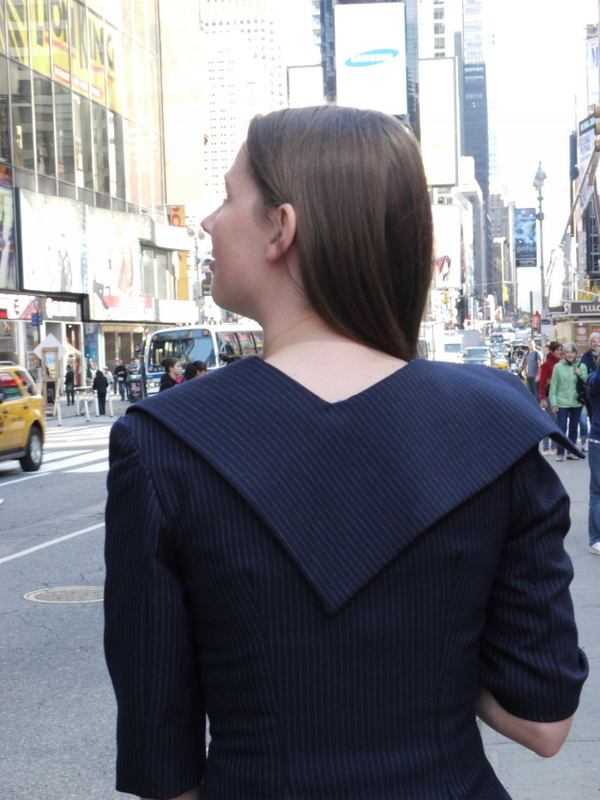
I am SO in love with this collar. It’s just fabulous. It’s a mixture of two parts stockbroker to one part sailor.
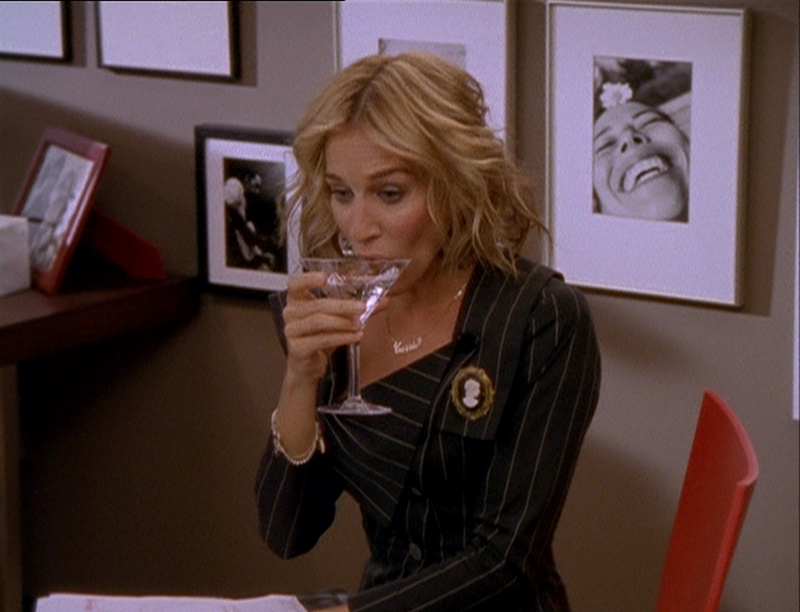
In the episode, the suit is new to go with the new job and new mortgage. She ends up having a martini or three after her article doesn’t go down too well, and gets “Drunk! Drunk at Vogue!”
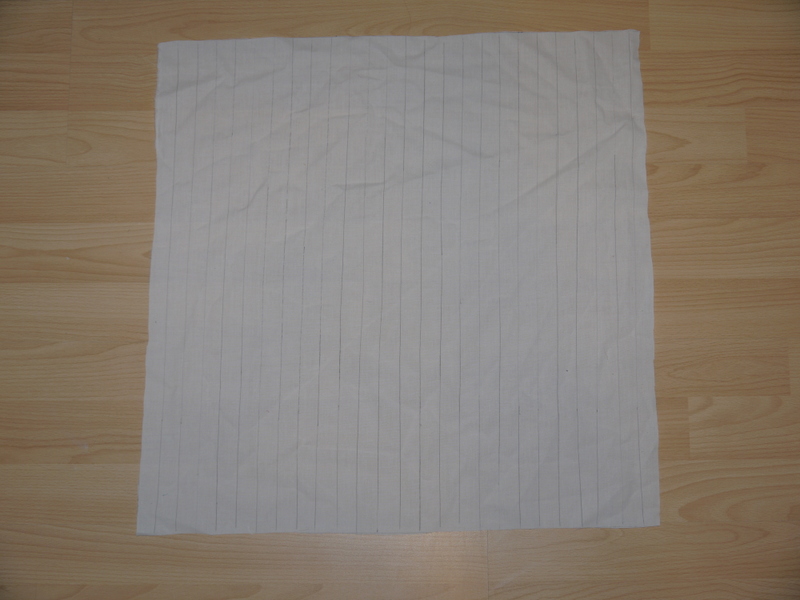
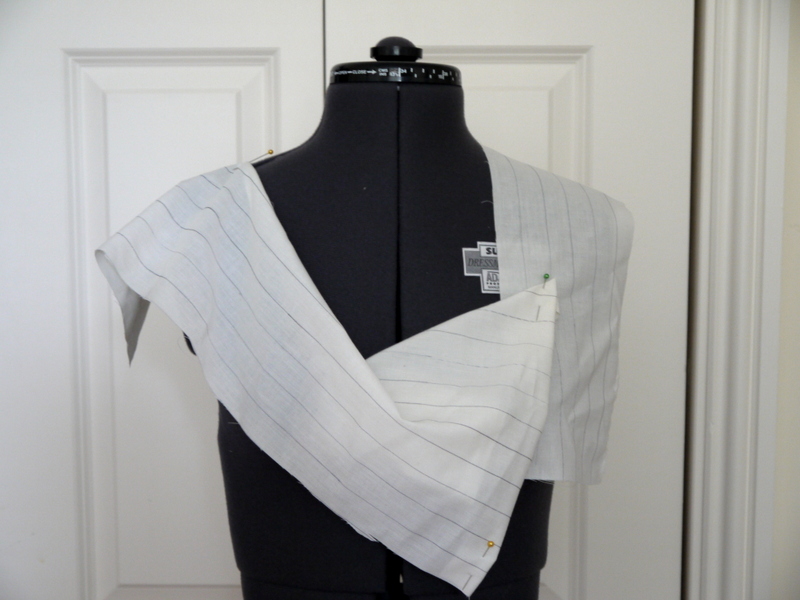
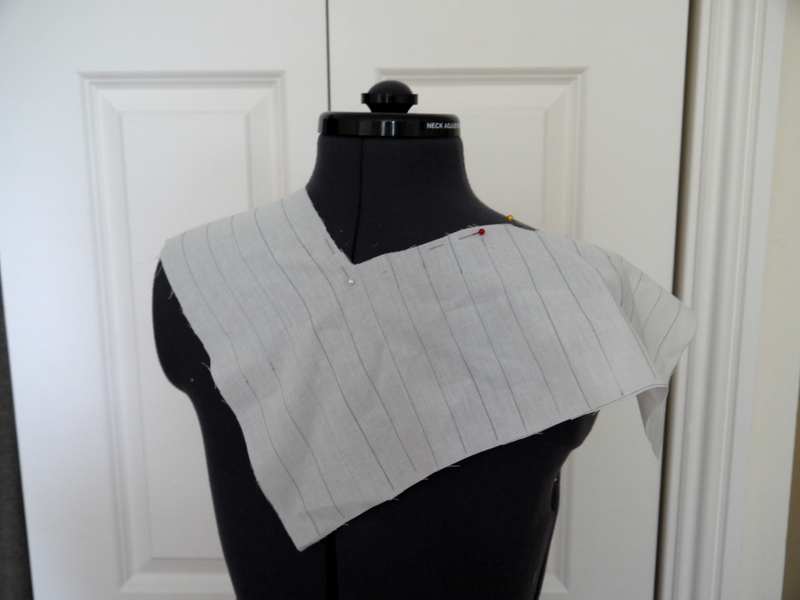
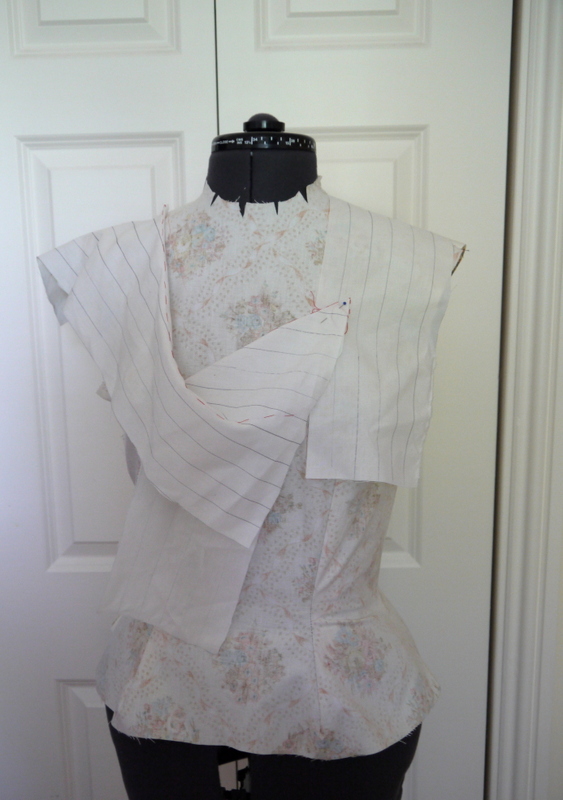
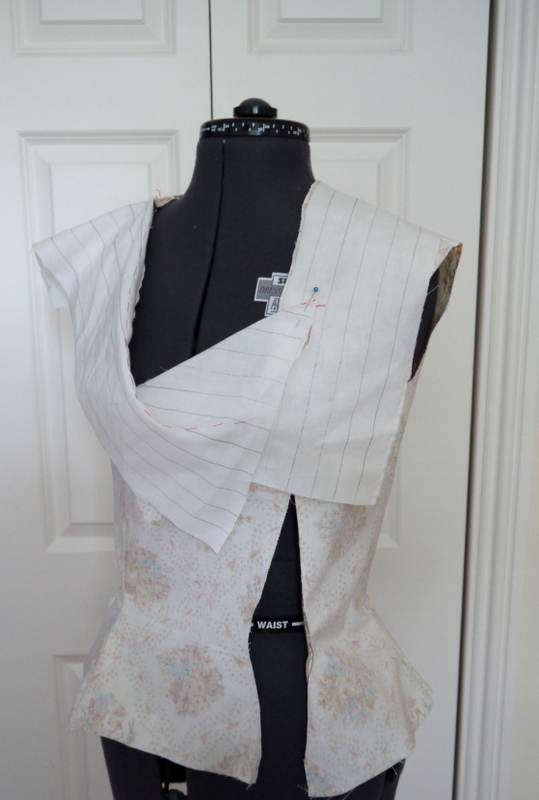
I started by draping the collar. I cut a square of muslin and drew some parallel lines on it to mimic the stripes. The lines helped me tell whether I had draped it correctly, you’ll see how below.
I estimated the width of the right hand collar and gingerly cut into the muslin. When I reached the same distance from the back I started cutting at ninety degrees (because we can see from the photos that the back neckline is roughly a right angle) until I reached the same distance from the left hand side, at which point I moved to the stand. I draped it until it looked right, folding where necessary.
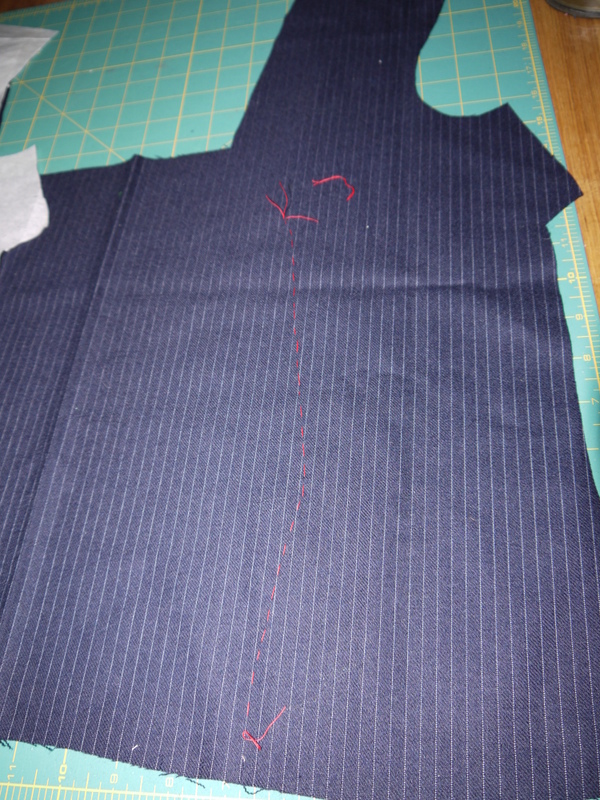
When I was happy with it, I traced the roll line (actually, lines) with red thread, as well as the point where the left collar meets the right collar. I ended up with this:
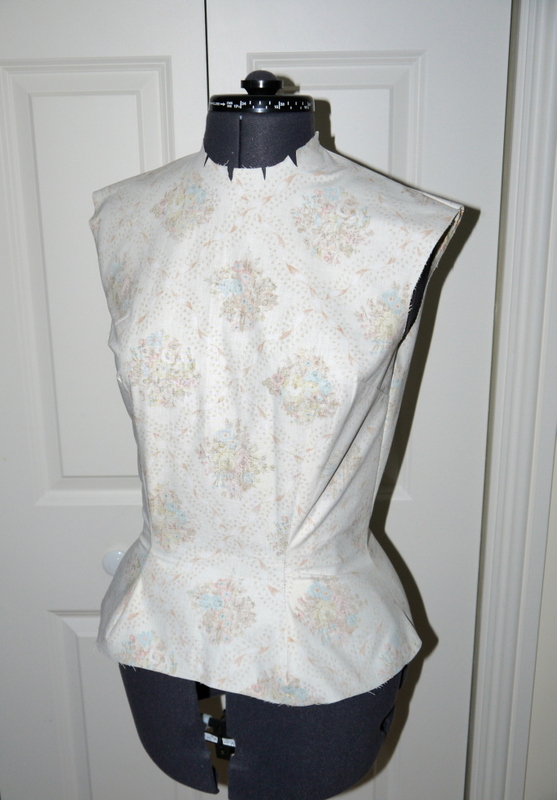
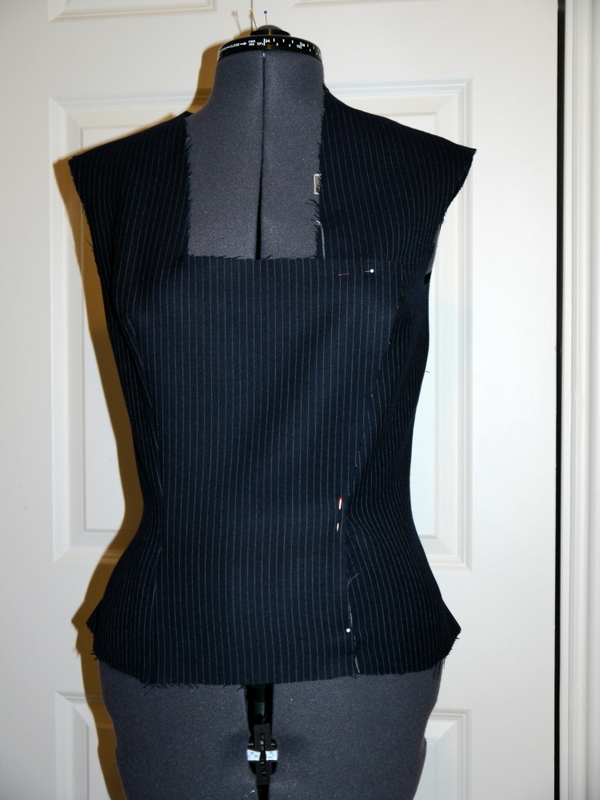
Next, I made up a bodice from my normal block, extending it below the waist, as you can see below.
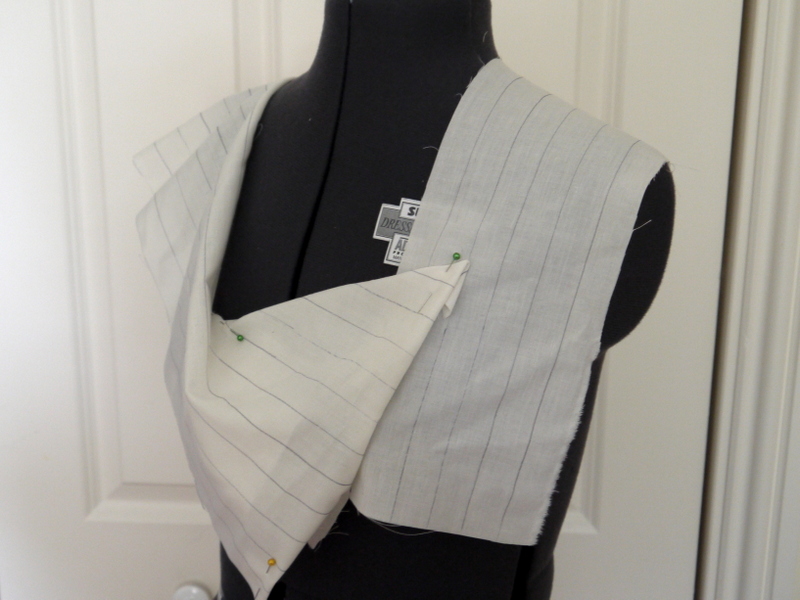
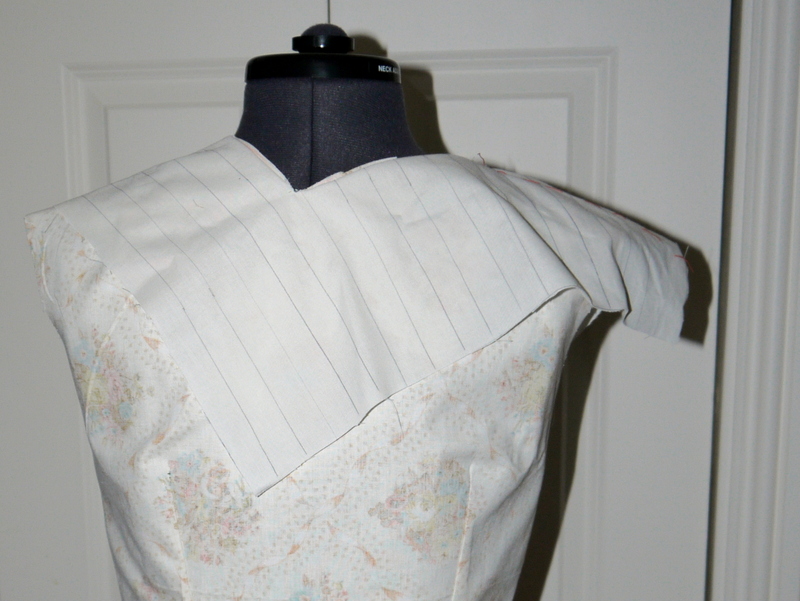
Then I hung the collar over it…
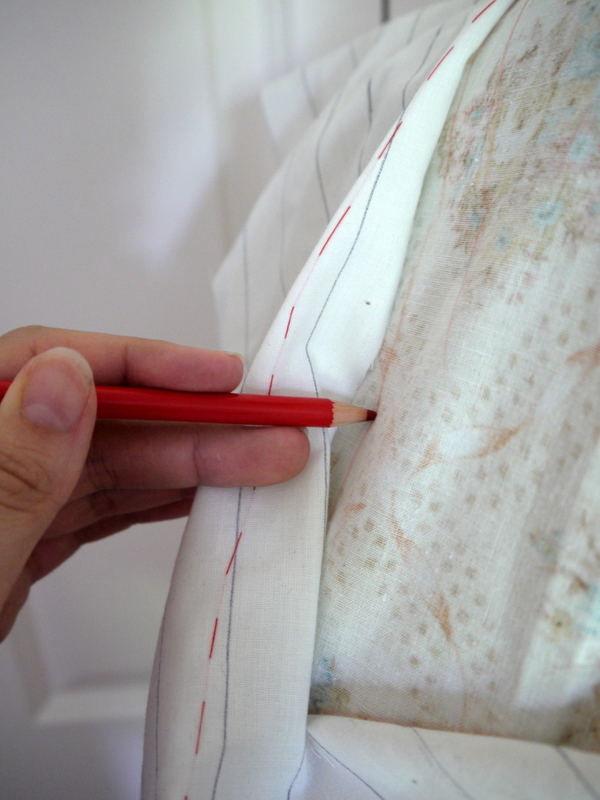
…marking the places where the collar meets the bodice with a chalk pencil.
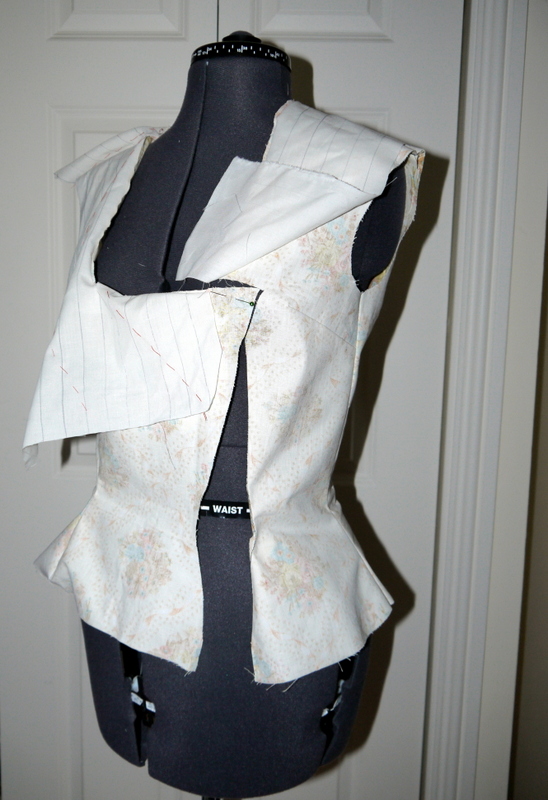
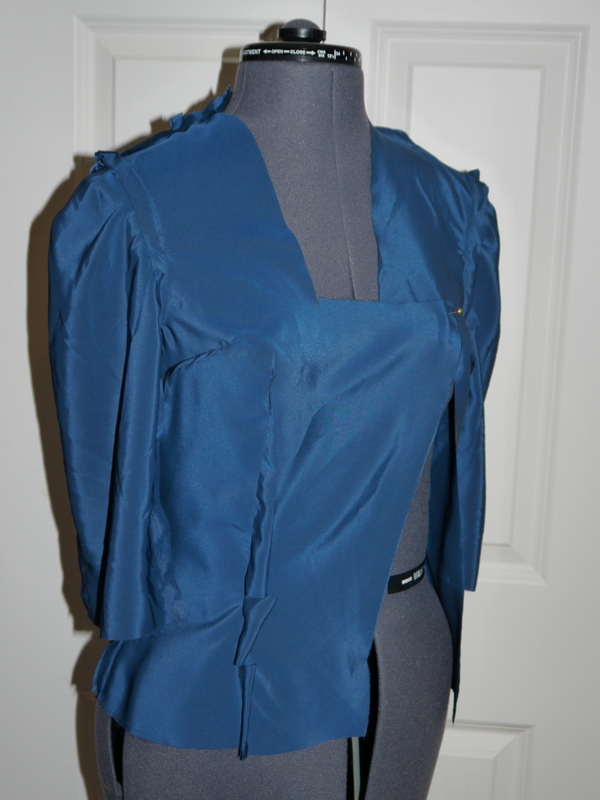
I sewed the muslin collar into place so that I could take it off the stand to check it. The front had to be opened up so I guessed where the opening should be, based on the pictures, and got the scissors out.
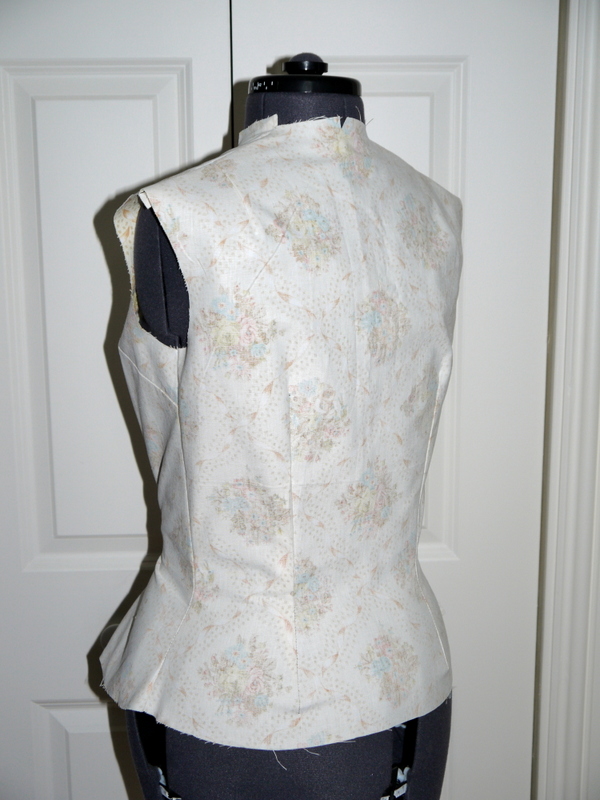
The back looks pretty good too! You can see what I mean here about the lines on the muslin being a great help to make sure everything was draping and hanging as it should.
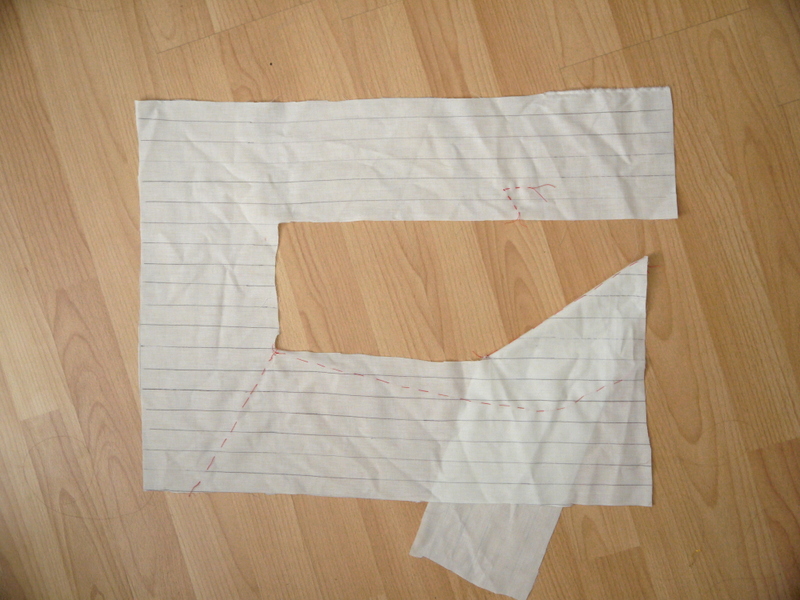
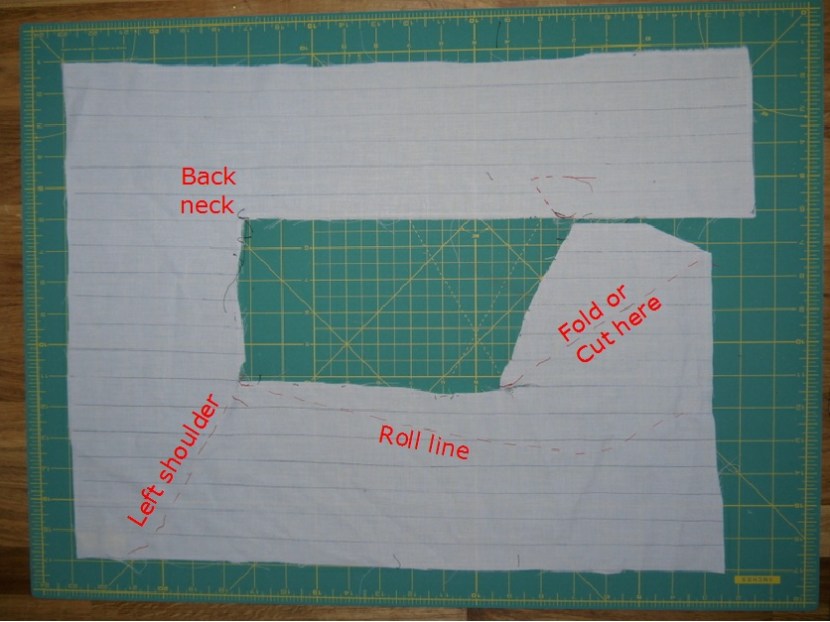
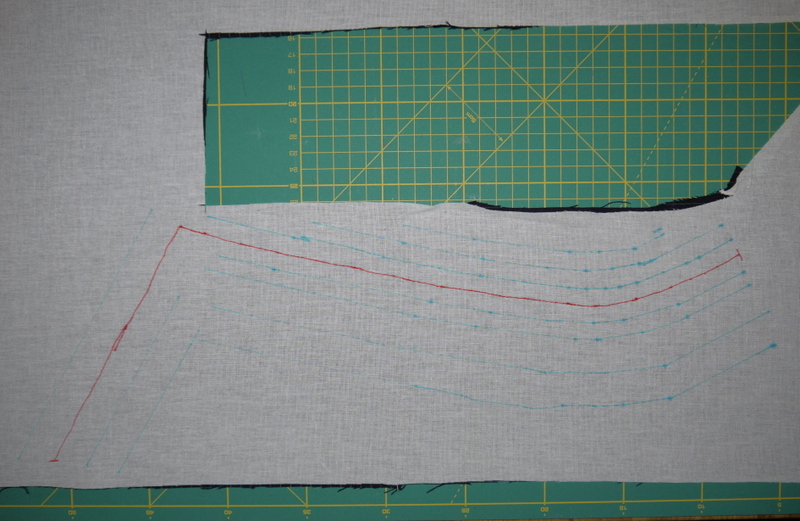
I detatched the muslin collar to use as a pattern for the real collar, here’s its final shape. You can see that where the front collar meets the right collar (near the V shaped red stitches), they almost exactly meet, that is, there is no room to add a seam allowance on to the pattern there. I decided therefore to cut the collar in two along the lower neckline – this is marked ‘fold or cut here’ below. Actually, this was a mistake, I should have kept it in one piece, more of which later.
I also took apart the bodice and used that to make a paper pattern as well. For the sleeves, I borrowed them from Burda 01/2010 #119, not that they fit, of course – more on that later as well.
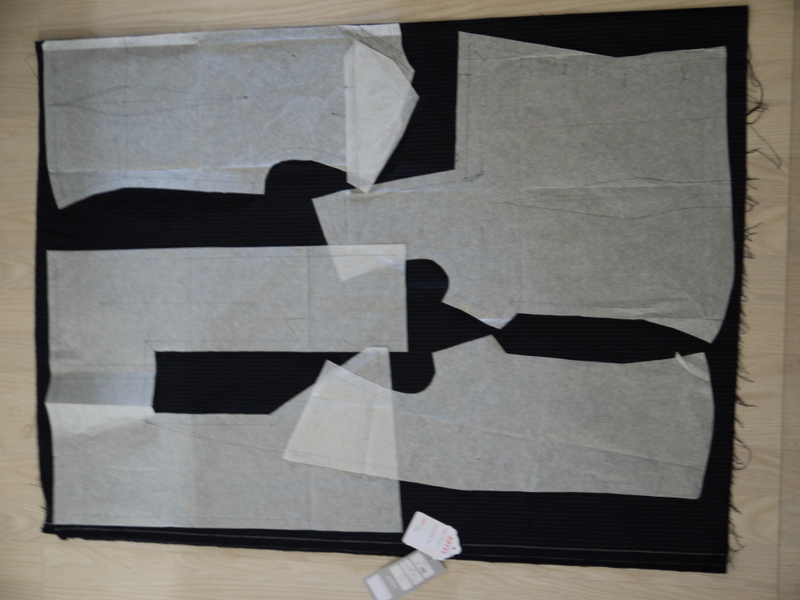
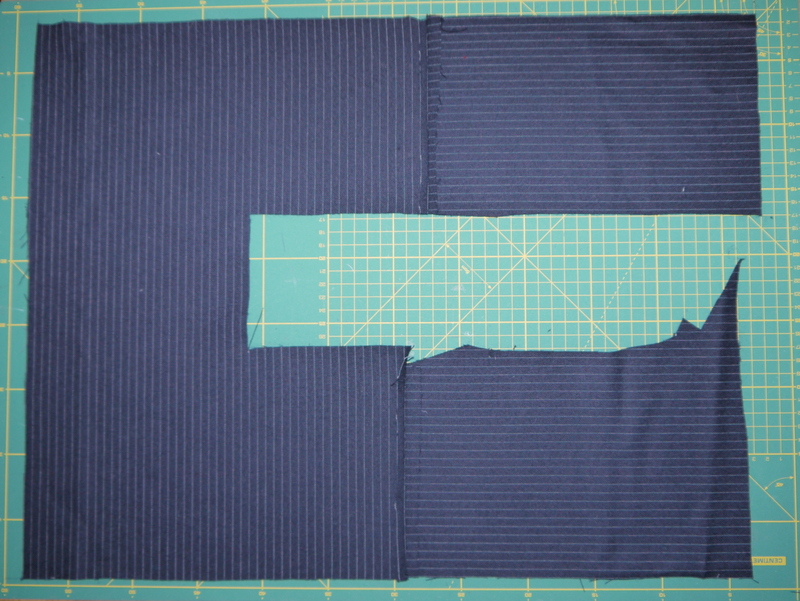
Just to give you an idea of scale, here’s how little fabric there was (it’s folded double in this picture and the sleeves wouldn’t fit on…). The undercollar had to be pieced, but the rest of the pieces came out whole. I later cut some facings from the scraps for the front edge/button stand and those were also pieced.
After cutting, I marked my asymmetrical, non linear darts with contrasting thread for ease of sewing!
Here’s an in-progress shot of the bodice.
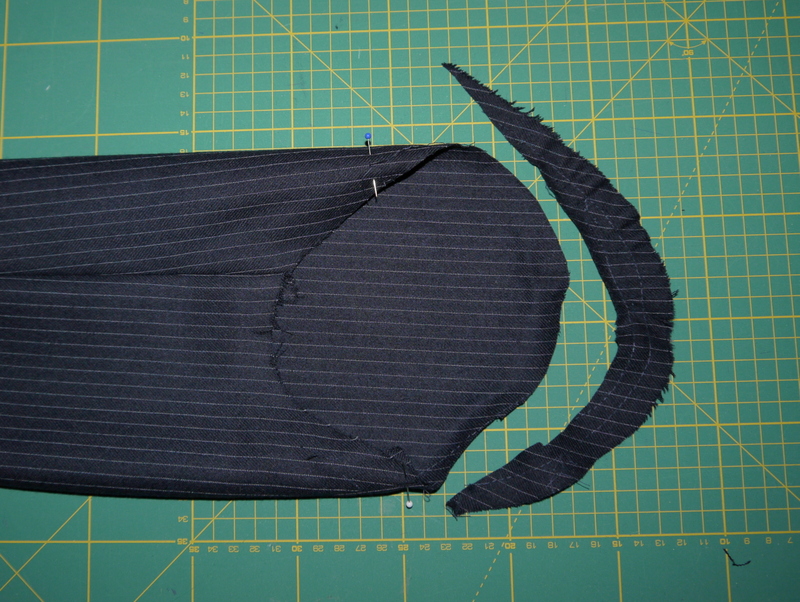
Of course, the sleeves were an epic fail, so I cut more than 3cm from them at the highest point to shorten the curve. I should have measured the curves on the pattern pieces really, before cutting them out and sewing them on. That’ll teach me.
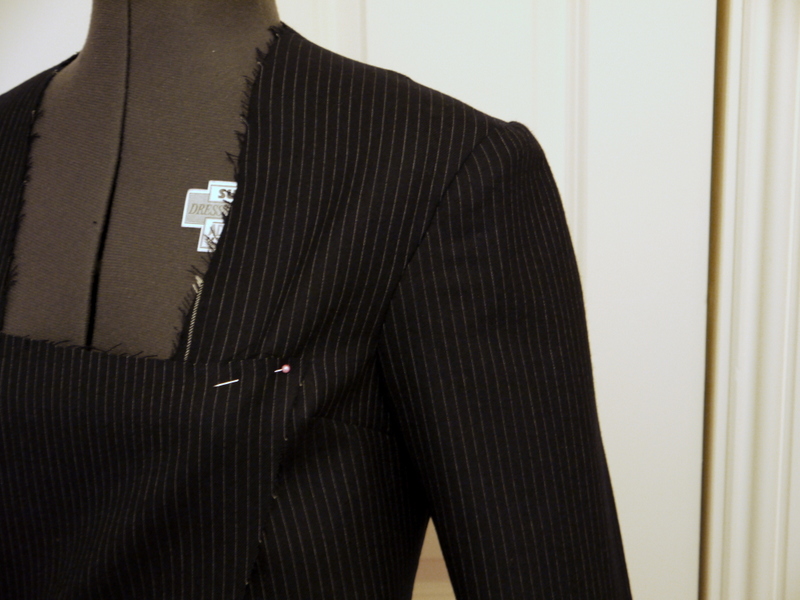
I added some shoulder pads which were reclaimed from the mustard yellow jacket. It looked SO much better with them in.
Here’s the pieced undercollar. Note the ninety degree grainlines… couldn’t be helped!
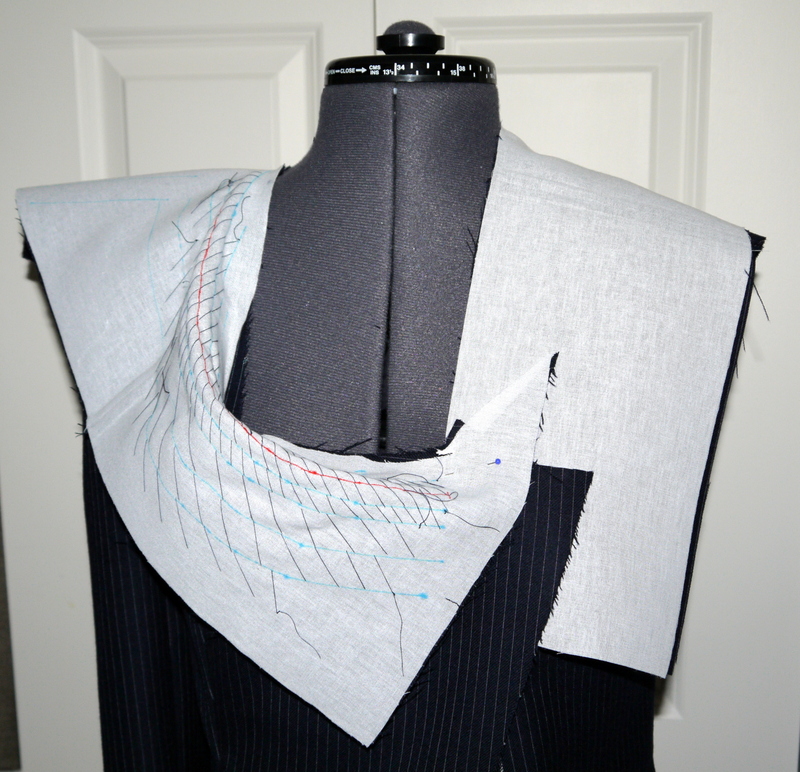
After adding fusible interfacing, I drew some lines on it to serve as a guide for padstitching. The padstitching was done by hand and although I only covered about 20% of the collar, it seemed to do the trick.
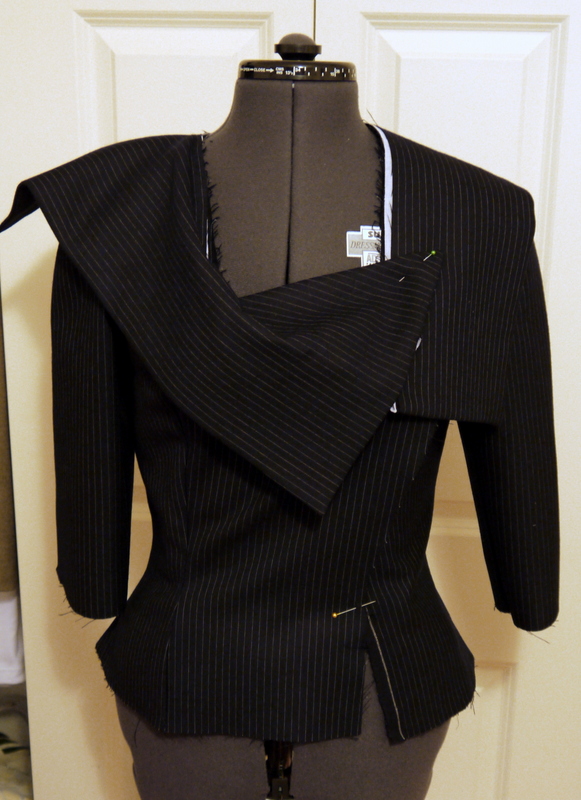
Here’s how it looks with the over collar attached. It’s taking shape!
Here’s a closeup of the join between the collar and the bodice…
…which is completely hidden when the flap is closed.
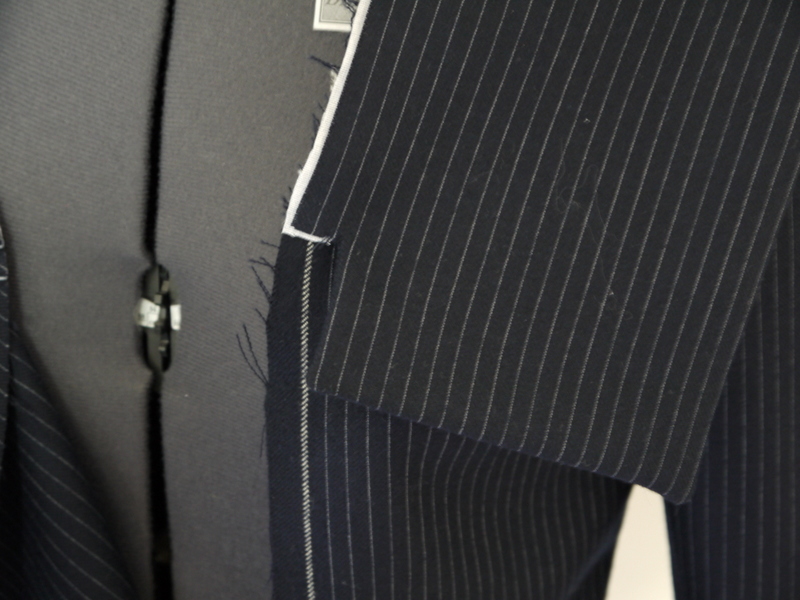
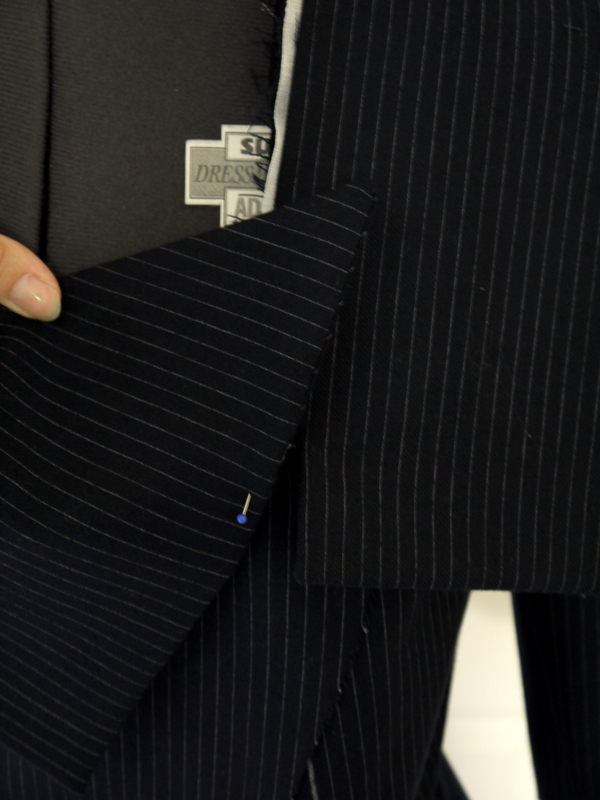
See that lower part of the neckline in the picture above, where my thumb is? That’s a seam, which joins the overcollar to a collar facing which lies flat against the chest. That facing is also sewn to the other side of the ‘point’ on the right. In fact, it’s totally wrong. The reason I put a seam in the collar and made a separate facing, was to include space for seam allowances as stated above. But it’s clear from looking at photos of the inspiration jacket that this should be a fold, not a seam. I think this is the most obvious error in this project, but it doesn’t affect how I feel about it. It just would have been a whole lot easier if I’d done it right :-)
I made a lining from some leftover material that I had in stash. It’s almost the right colour!
The pic below is supposed to show that I bagged it out…
…not forgetting to leave a small hole through which the entire thing could be ‘turned’.
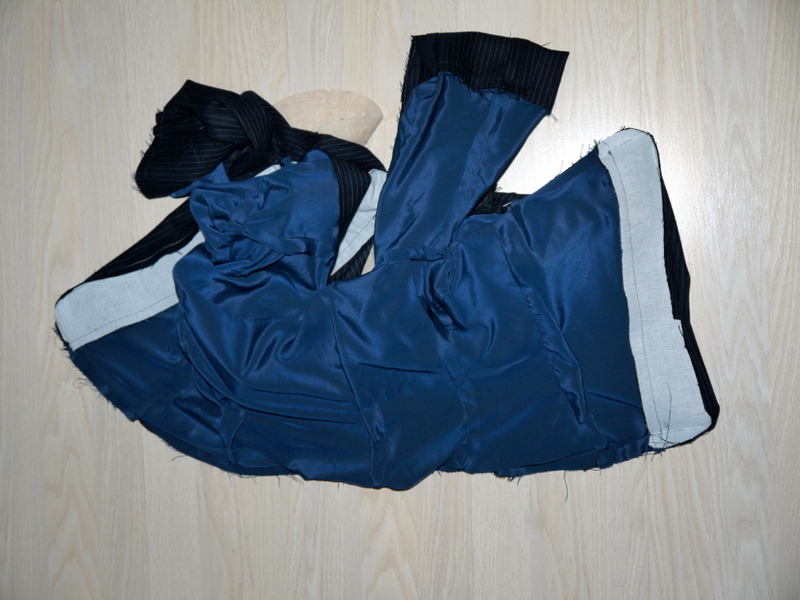
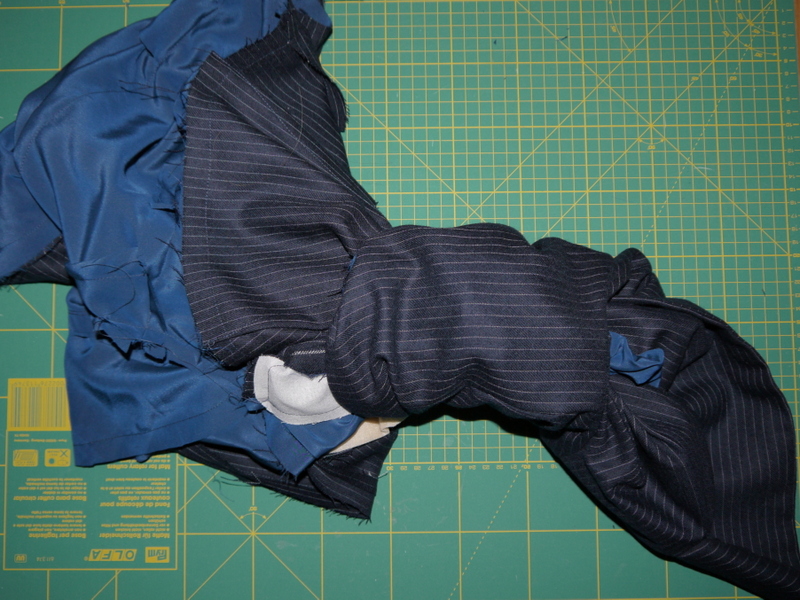
I love bagging out as it’s a great shortcut, but there is a scary moment in the middle when it all looks like this:
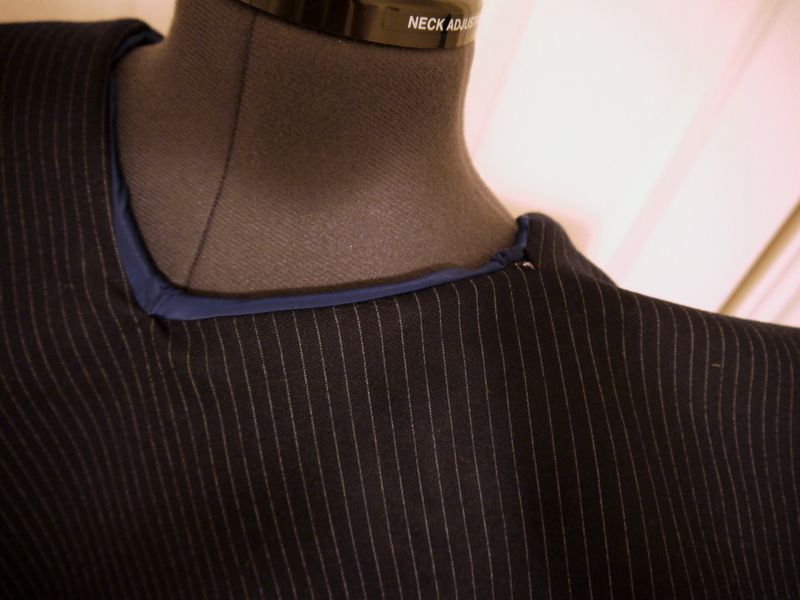
After turning there were a few issues to sort out, primarily at the points of the neckline, but they were easily fixed with a bit of TLC.
I had to add buttons, which were salvaged from an upcoming project and happily were a great colour match for this fabric. Buttonholes were required too, obviously, but I’m not giving you a close up of those!
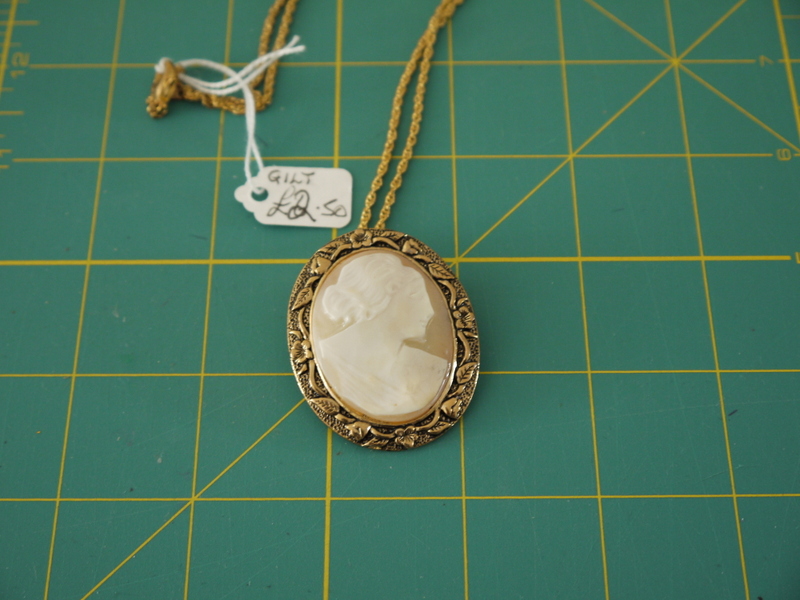
I also added the piece de resistance, which was a cameo brooch I found in the Rainbow Trust shop in Upminster for £2.50 (same shop as these shoes). The chain is run through a loop on the back and is detatchable, and there’s a pin on the back too. Unfortunately when trying to pin it, I broke the damn thing, so I had to sew it on using the loop instead; no big deal.
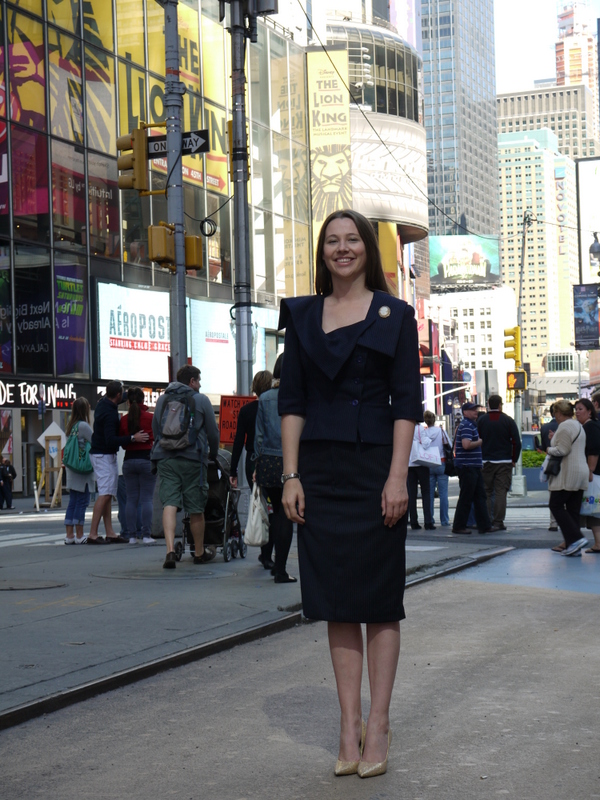
The final jacket is revealed below, but first, here are a few notes on the skirt.
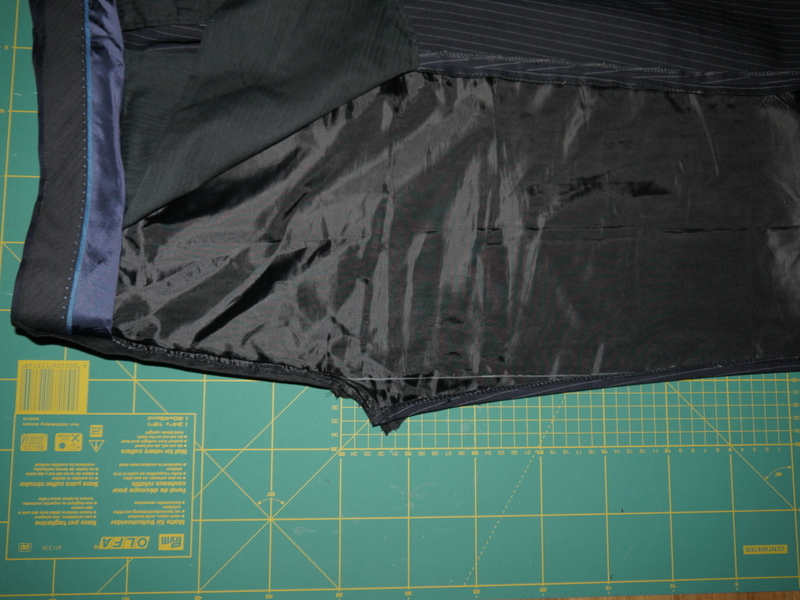
First I cut off the trousers to roughly the right length, and I ripped the inside leg seam.
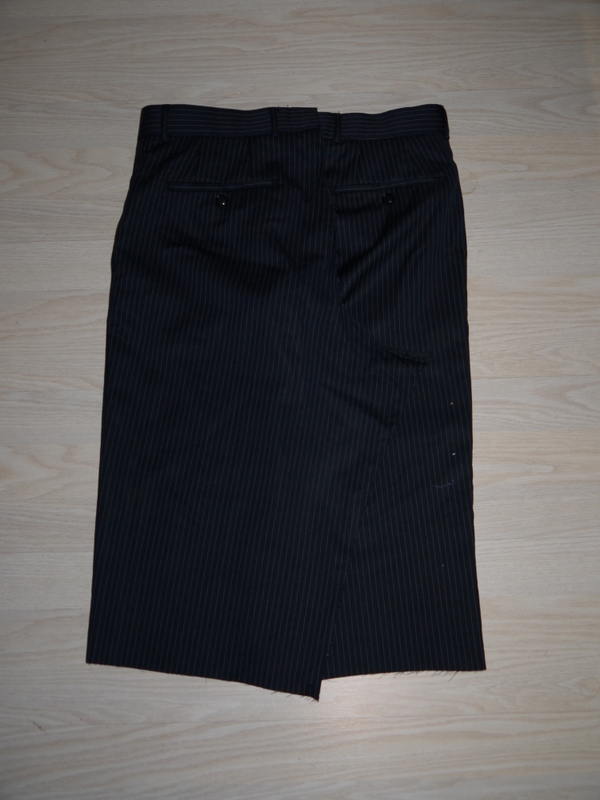
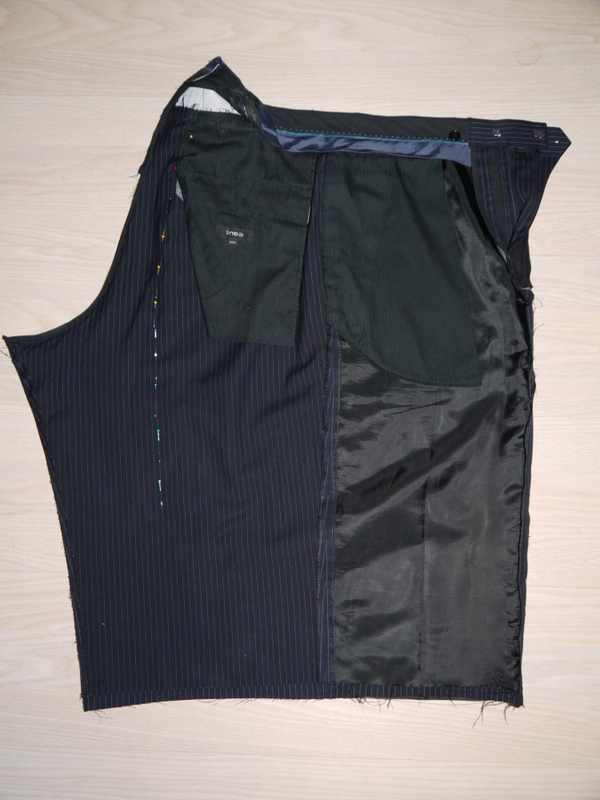
The idea is to sew both legs together so it looks like a skirt. Most of the slack had to be taken in at the back because of the front fly, but unfortunately that meant the back pockets got really, really close together. I couldn’t do any adjustments at the sides because of the front pockets.
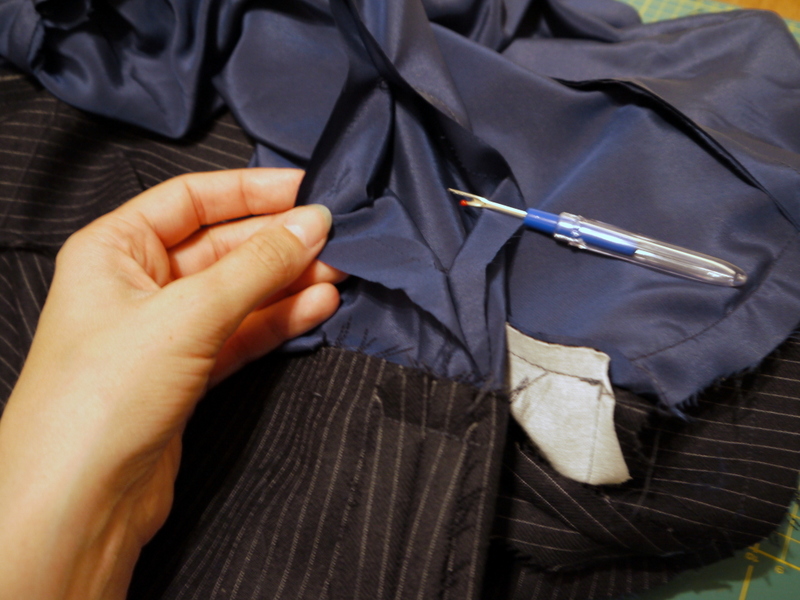
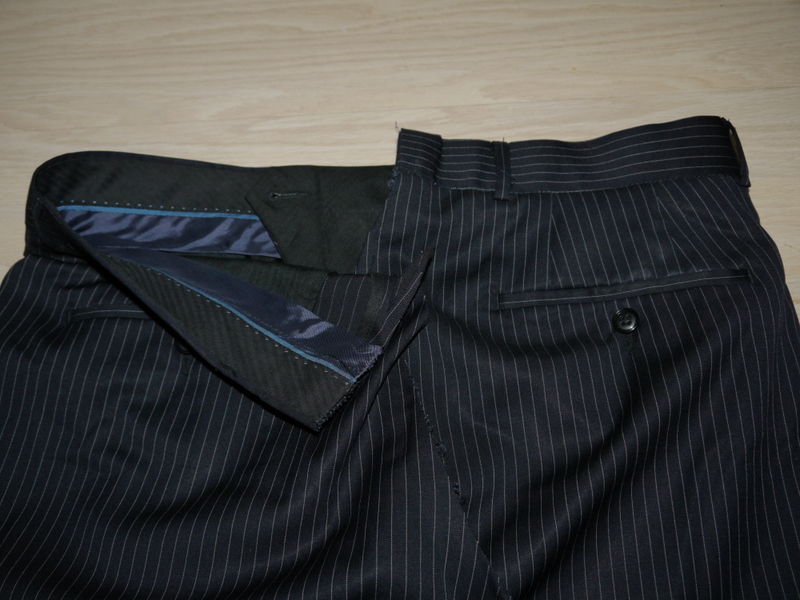
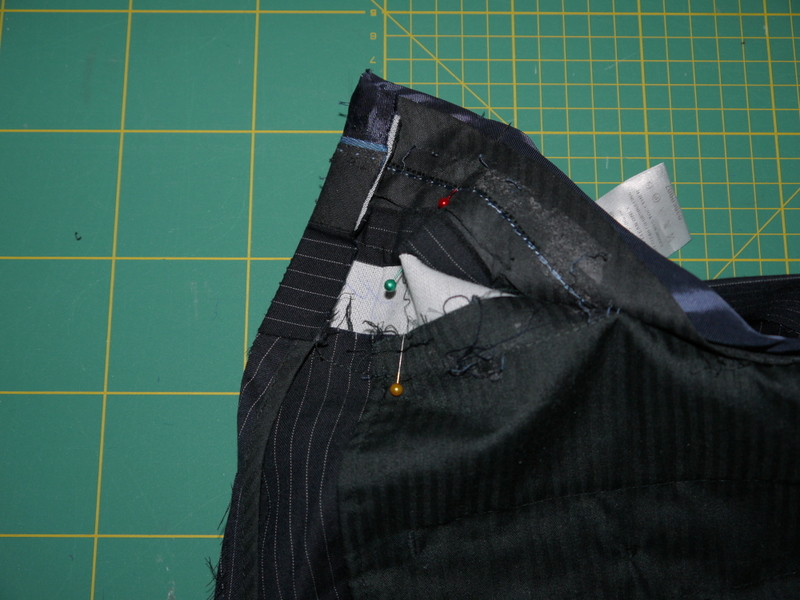
To join the back pieces together I had to cut the waistband down the centre back and unpick it quite a way to get enough to join together.
Here’s an in-progress shot of joining it together.
To join the front legs together, I drew as straight a line as possible in chalk and seamed it.
After trying it on, here’s a quick indication of how much I removed from the back…
I left a vent up the centre back so that I could walk, and plenty of space for a hem. The final thing looks pretty passable.
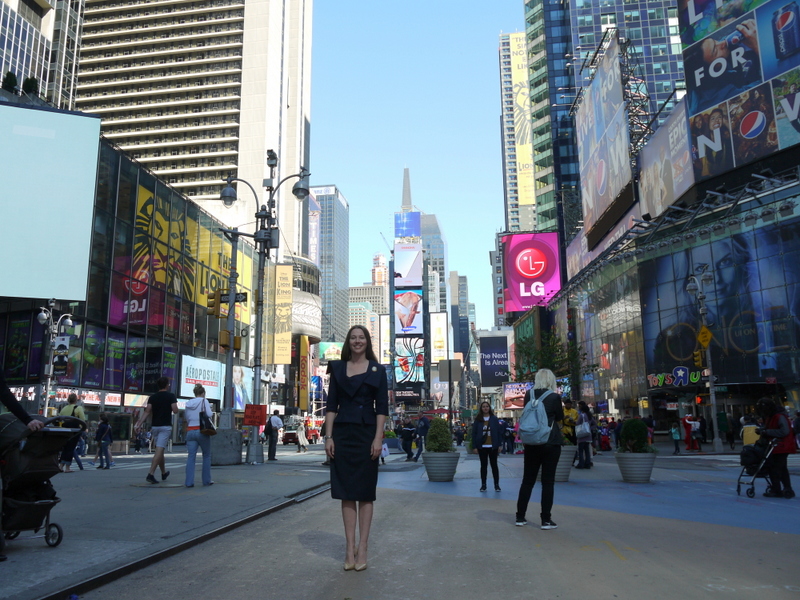
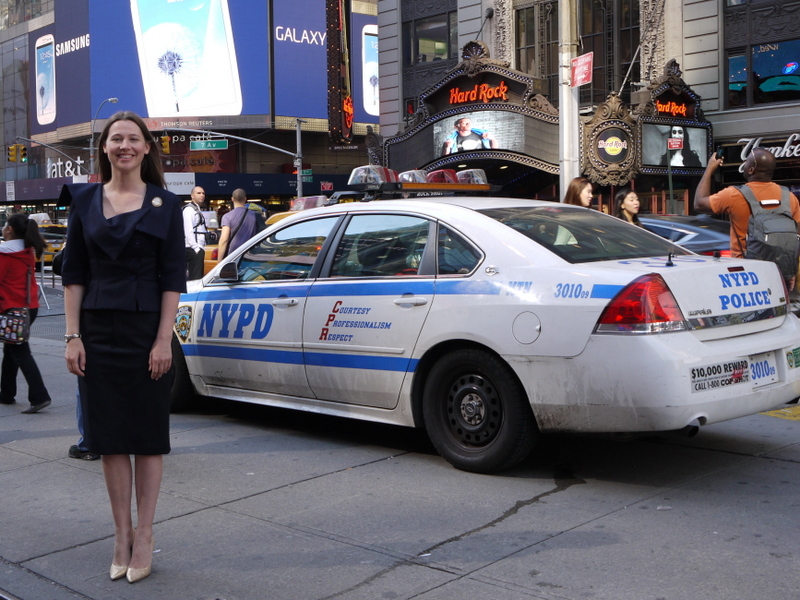
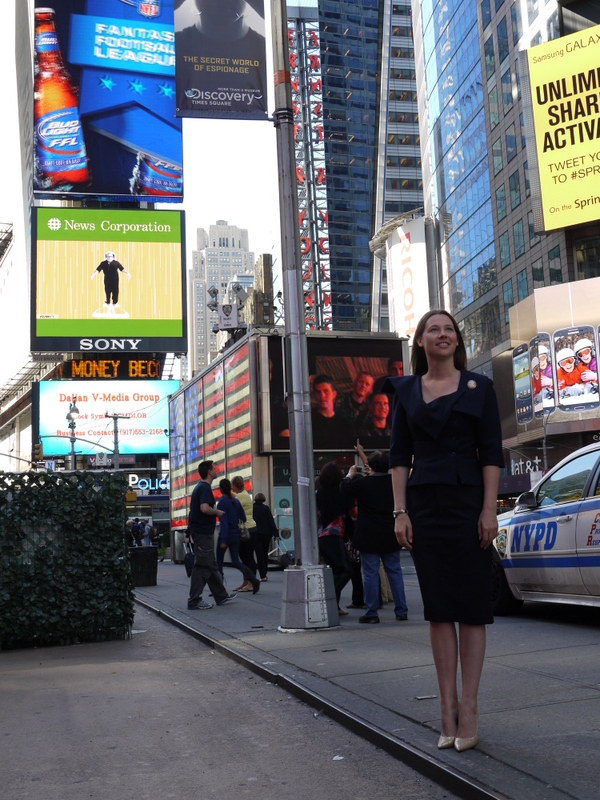
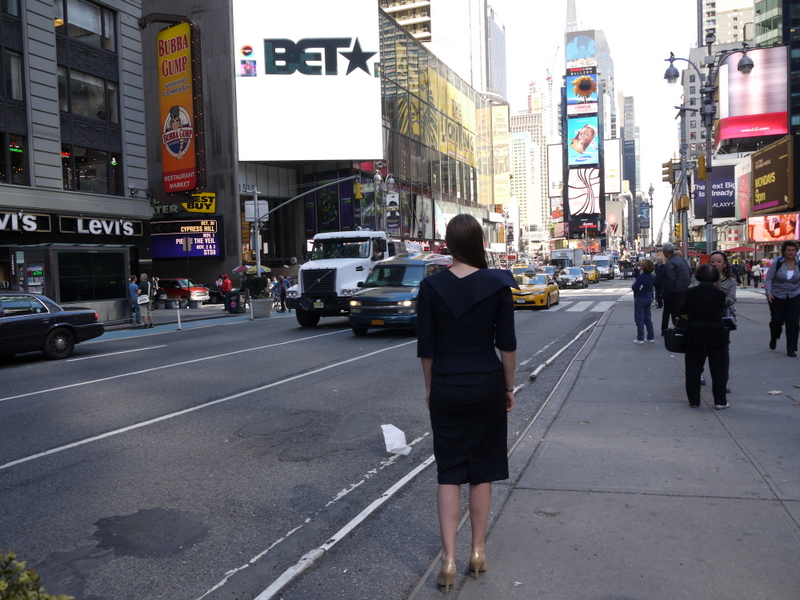
Now, clearly I couldn’t just go wandering into the Vogue office to have some pictures taken, drunk or otherwise. So I had to make do. We took the pictures at Times Square, possibly the most iconic New York location, and actually, it is just around the corner from the real Vogue office. So I was happy. Hopefully you can see enough detail of the front and back below.
This the final post in this Carrie Bradshaw series, at least for now. I do hope you have had as much fun reading about these projects as I have had making them! If you enjoyed these, why not sign up to follow my blog using the links on the right hand side so you’ll be first to know about whatever it is I’m doing next. Thanks everyone for your continued support! I’m off to take a well-earned rest with a well-earned Cosmo! Cheers!



Very impressive! You are gifted!! Congratulations.
Thank you Mag, thrilled that you like it :)
Yet again, I am completely amazed by your skill at creating something utterly fabulous from any old scraps. This is really something. You are very talented. I don’t know what you do for a living but it really should be fashion-related. I’ve really enjoyed the Carrie B month, especially the NY shots. Really, really clever and entertaining.
Wow, thank you. Such a sweet comment! I’m so happy that you’ve found this second CB month entertaining. :)
This is my favorite outfit that you have made from the Carrie Bradshaw month.
Thanks K2, it’s my favourite too :)
This one is my favourite! It looks fantastic and it’s clear from your pics that you’re really pleased with it. I’ve really enjoyed Carrie Bradshaw month, it’s such a good idea and has given me some inspiration to refashion my favourite outfits of hers too. Hoping to see another Carrie B month soon!
Thanks! I am really happy with it, a lot of hours went into it, and it was a great feeling to be wearing this in NYC! I have no shortage of Carrie Bradshaw outfits to refashion, so I’m sure I can cook up another series soon ;-)
That is AMAZING. I can imagine a suit, especially that jacket in particular, is not a simple undertaking. And it looks like something you bought out of a high end shop! Wow!
It wasn’t straightforward, but it was great to take on a big challenge and so satisfying when it was finished. Really glad you like it, thanks for the kind comment.
Wow, absolutley amazing, what a gorgeous outfit!
Alison
x
Thanks Alison, it felt great to finally be able to wear it after all that work!
Once again you have left me speechless – not something easily achieved. Fantastic work and you look stunning in the outfit.
Thank you so much Kim for your continued support. I’m so pleased you like it!
You are so talented. I wouldn’t have been able to put that together,
Thanks Foster :)
The suit looks amazing. It must have been hard work! Congratulations!
Thanks Eszter, it was really hard work but I’m thrilled to see the final result. Hope you enjoyed reading.
OH. MY. GOD! I love this! You look terrific!
Thank you so much! :)
Very, very impressive. The fit is so well and I find it quite remarkable that you don’t use any patterns but make up your own. It looks smart, chic and sexy. All the things a hood suit should… and looking professional, of cause.
Hi Katarina, thanks for the lovely message. I’m thinking of abandoning commercial patterns altogether. Making your own is so much more fun! Really glad you like the suit.
Oooh, this is so elegant – it looks stunning as a suit, but also works so well over a different skirt or dress! Again, I’m rendered speechless at your talent and creativity!
Thanks so much Marie! I think the jacket and skirt will definitely be getting worn as separates in the near future. :)
Incredible. Just incredible.
Thank you :)
Wow! Wow! Wow! This was such an ambitious project and it came out awesome. This is really inspiring: my favorite of the Carrie’s to date :)
Thanks so much Gwen. It’s my favourite too!
I’m bloody impressed!
Carries number looks very Vivienne Westwood (probably is), and you’ll pulled it off nicely!
Bagging out always freaks me out! :)
Cheers Helga! In my mind this is definitely Vivienne Westwood so I’m going to continue to think of it that way.
Bagging out is so useful but I always panic halfway through that I’ve forgotten to leave a hole somewhere!
Wow, you are a genius. I think yours looks even better than Carrie’s. Great job.
Thank you so much for the lovely comment! :)
Wow, this is amazing! I think this is my favourite outfit in this series, I hope you get lots of wear out of it after all that work :)
Joyce, thank you for commenting. I am really glad you like it. Yes, this one will definitely be entering my permanent wardrobe!
This is just amazing! That was a lot of work, but it was really worth it! It looks like an expensive designer suit, and fits you perfectly. Great job!
Thank you Charity, I am happy if you think it looks RTW. It was a lot of work, but I am pretty pleased with it!
UNBELIEVABLE. Truly, that is the most amazing jacket ever. I loved seeing every bit of your progress – it is positively AMAZING!!
Haha thank you Meg! :) This was a pretty long and involved post so I’m glad you liked seeing the detail. It was rather a complex project so those 60-70 photos couldn’t really be avoided!
Wow you have mad draping skills! I love how you broke it down to the elements to understand it. I think it looks so much like the original, well done :)
Thank you! Yes, draping a jacket like this seems easier when you break it down into different elements and tackle them one at a time. Thanks for stopping by!
This is absolutely fabulous! Thank you for showing step by step how to “drape” the neck – I never would have figured out how to do it. Just lovely :-)
Mariah, thank you so much! Glad you liked the collar explanation. I had been thinking about that collar for years so it was great to finally get started on draping it.
Wow! Simply amazing! I envy your pattern drafting skills!
Beth
Thank you so much Beth for your continued support! :)
What an amazing creation! And I notice the gold shoes made another appearance :-)
Haha yeah they are just too fabulous not to be worn! Thanks for the comment :)
I love, love, love that Westwood suit and the episode is one of my faves! To be able to make an outfit like that and capture Vivienne Westwood tailoring is amazing! :)
Thank you so much! The suit is one of my absolute favourite ‘Carrie’ outfits. So pleased to finally be able to take a stab at it. Thanks for reading.
Another great series! You look like you had a blast and I enjoyed all your outfits, it’s hard to pick a favourite. Thanks for documenting your draping process for the collar, that was really intriguing.
Thank you for reading Sarah, I am glad you enjoyed it! Hope you could follow the collar stuff, it’s a bit of a Heath Robinson method but it seemed to work OK.
I agree with NorthernStar, if you’re not in the fashion business you should be! You have incredible talent and no fear. Awesome.
Maybe someday, Ricki… someday! Thanks for stopping by. :)
lovely!!!
http://glamourgirl-bg.blogspot.com/
Thanks!
WOW! You have really created an amazing refashion this time! The outfit is stunning. Absolutely love the jacket–what a versatile piece. Love the way you show us step by step “the how-to” of your thinking. Thanks so much for sharing your refashions.
Thank you Shelley, I am really pleased you like it. The jacket and skirt will certainly be worn as separates. Thanks so much for your kind comment. Keep reading, there are a lot more interesting refashions coming up over the next few months!
Waouh, Félicitations, c’est splendide !!!
Merci beaucoup!
that is incredible! every part of it from the muslin to the lining to the finishing! holy crap. your carrie bradshaw month really makes me want to like sjp. but… eesh.
HAHA thanks Liz, I know Carrie/SJP isn’t everyone’s cup of tea.
I love this suit. I don’t watch the show, did not know who you were talking about (I know!!! Do I live in a box?) I really like the look
of the collar. You did a fantastic job.
Hello Teresa, SATC is really popular over here but you don’t have to be a fan to appreciate the beautiful clothes that were used in the series!
Thanks for the kind comments on the suit. It’s a firm favourite already.
wow, you are so talented!!
Thank you!
You are incredibly talented! Love the suit. Thanks for taking the time to show us the process. :)
You are very welcome!
Wow, timeless, chic, inspirational
Thank you so much :)
hi! i’ve been checking out quite a few of your refashions, when i got to this one i just had to comment….wow! great job on reworking the slacks into a skirt, and especially creating that collar-way to go!
kudzu from mississippi
Hi there, glad you liked this project! It was a bit of a mammoth undertaking but I am pretty happy with the result, and had SO much fun wearing this around NYC. Thanks for stopping by!
Wow you are so talented.. so glad I found you:)
Thanks very much, glad you’re enjoying reading!
wow! very impressive!
Thanks :)
MY MIND IS BLOWN. Just discovered your blog and may now spend the rest of the day losing my shit over your work – I loved loved loved this suit/episode. So impressed you freaking recreated it.
Hi Heather and thanks for the feedback! This episode was a personal favourite, that outfit in particular, so I’m thrilled that other people ‘get it’ :)
this one just blew my mind.
Mine too…
Clever you!!! This is so Hugely inspiring – and you’re so much prettier than “Carrie”, to boot. Keep having fun :)
Thank you Sally! I want to do more ‘Carrie’ stuff in the future, so keep reading!
This is amazing! Your pattern drafting is incredible. I love this outfit so much. Great job!
Thank you, Leah! Glad you liked it. Looking back on this project almost two years later, it’s clear there are some major flaws… I am totally tempted to re-do it ;-)
Wow,this is just gorgeous! I admire your skills! great compliments and thank you for showing the process!
You are welcome Martina – thanks for reading!
You are such a great seamstress. Have you considered giving online lessons? I like to sew but am so discouraged by the fact that I’m not so good at patterning and cutting. I don’t like patterns, but like you, I want to be able to replicate a nice design whenever I see one. I really hope you think of giving classes :)
Thank you so much, I work continuously to improve my skills. There are already loads of good courses on Craftsy and the like if you are a visual learner – not sure what I would add to the conversation!
oh! i love this! do you do this custom made?