
Chanel-style jacket
This post has been a long time coming!
I bought this fabulous colourful jacket last year in a thrift store in San Francisco called ‘Out of the Closet’ (!!). The first time I saw it I knew that its loose weave fabric with golden threads wanted to be a Chanel-style jacket, but didn’t really want to take on such a large project. I changed my mind and had to go back and get it the day after! I paid US$ 8.50.

Making a jacket in the famous Chanel style was not a quick project, but I do love the finished jacket and wear it often, so it was worth it…
Here’s another picture of the original garment. The fabric is pretty saggy in places and it’s not looking good. There are large slubs in some places which I did my best to cut around, and reversed the fabric where necessary (it has two good sides).

I used Butterick 9476 as a base for my pattern, which I know fits me well.
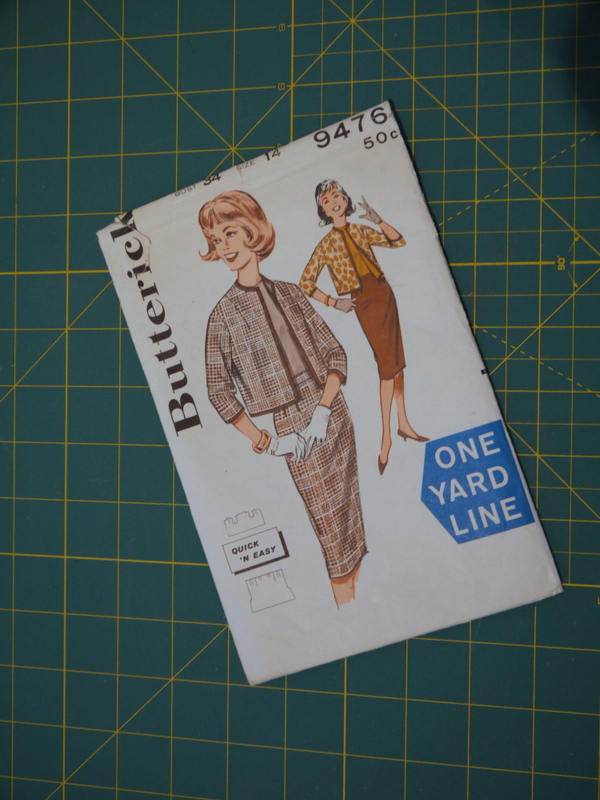

The original jacket pattern has no side seam and the front darts at the shoulder. I traced it and cut it down the side seam, and moved the front dart to under the arm, where it would be less visible.
I cut the front from the jacket front, back from the back and sleeves from the original sleeves – happily, there was just enough, though it was touch and go on the sleeves. I cut off the buttons and kept them for another project!

I also cut a lining from the same pattern pieces from some black satin that I had in my stash.

Now, for the tailoring techniques, I used a mixture of the excellent ‘Couture sewing techniques’ by Claire Shaeffer and annrowley’s fantastic flickr photostream which was also incredibly helpful and very detailed. However, I am not a tailoring expert — this is just what I did to get a result that was acceptable to me. If you want to see what perfection looks like, either buy a real Chanel, or check out annrowley’s flickr photostream that I mentioned.
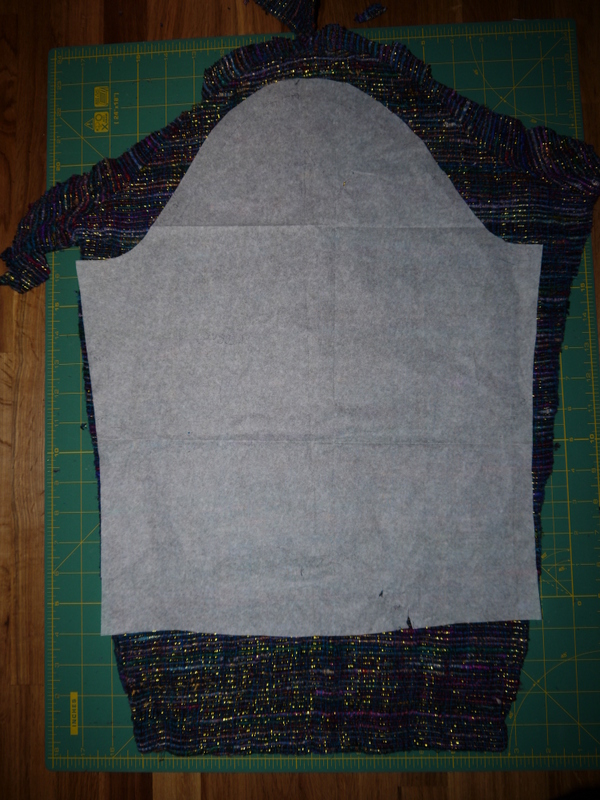
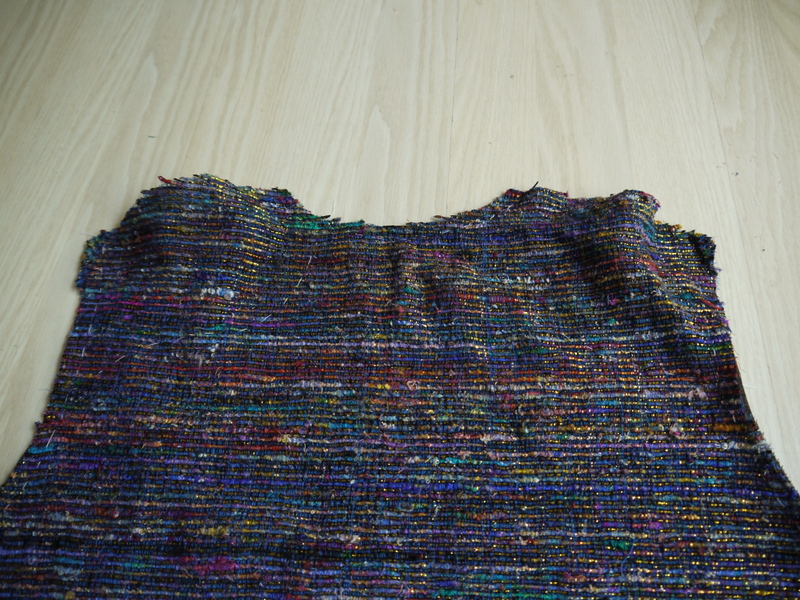
I cut a back stay from some strong muslin and made the darts in it, basting it to the fashion fabric (which does not have the darts in it).
I based around the bottom of the dart to mark the area that will be steamed to shrink it.
This is how it looks from the right side (before steaming).
After steaming, it looks more like this. I am not 100% sure that the steaming did not stretch the back stay, but either way it looks OK [the muslin stay was flat against the ironing board, so although it received a lot of steam, I did not explicitly stretch or try to shrink it with manipulation]. Not great, but good enough.

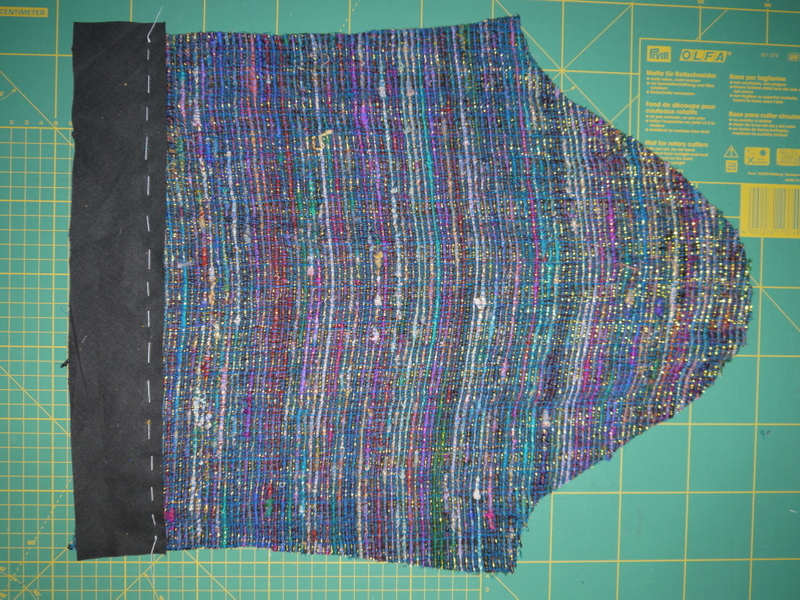
I added stabilising to the vertical seams to prevent stretching (I am using muslin selvedge). The muslin strip along the bottom is cut on the bias and is intended to give a nice stable line along the hem.

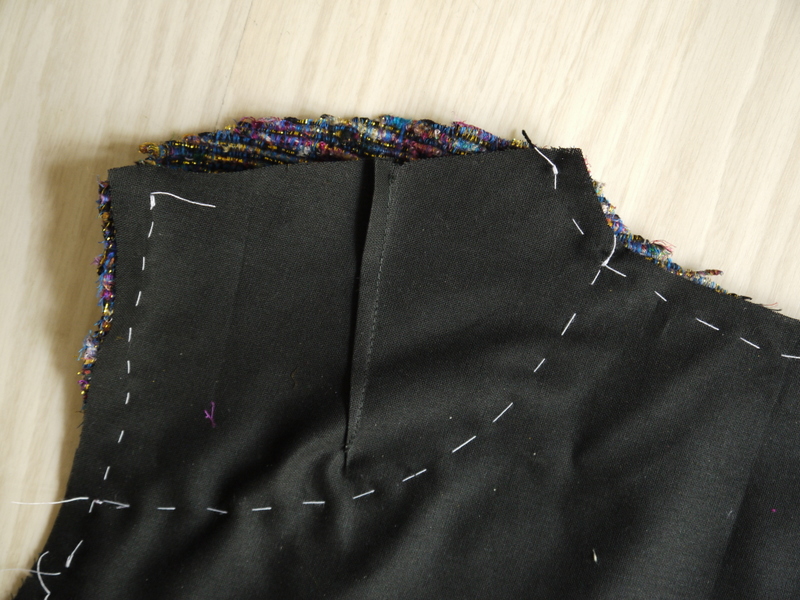
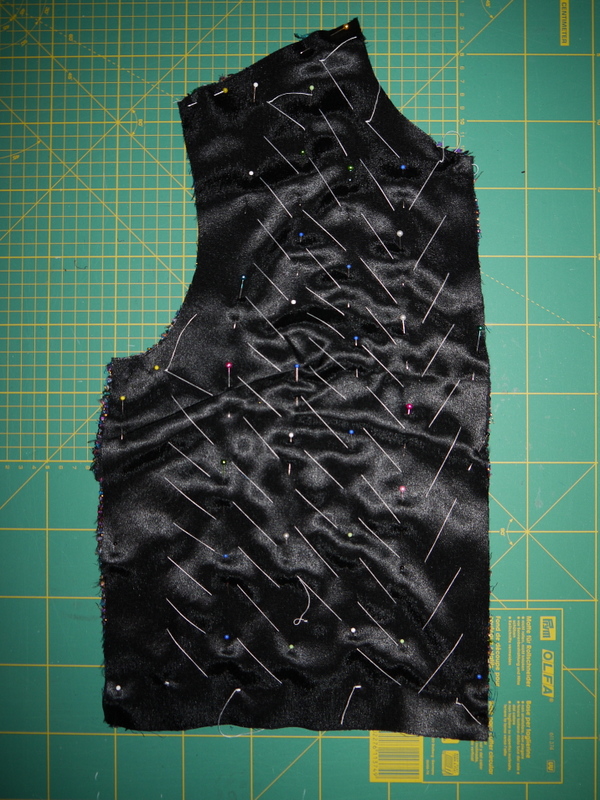
Here’s the quilting part! I pinned the lining to the fashion fabric in straight lines and diagonal basted between them.

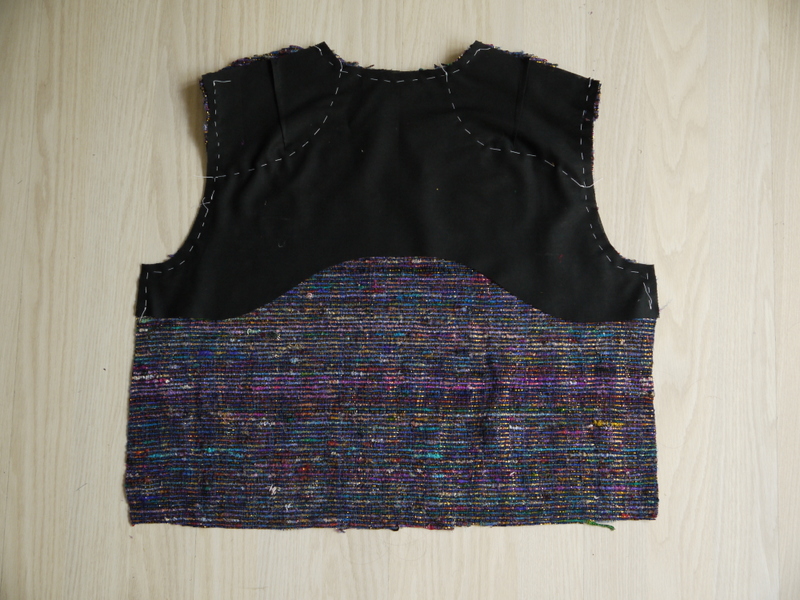
Then I sewed along the pinned lines, without backstitching or finishing the ends of the seams, and removed the basting. Looks pretty good! (Note that the lining already has the shoulder darts in it).
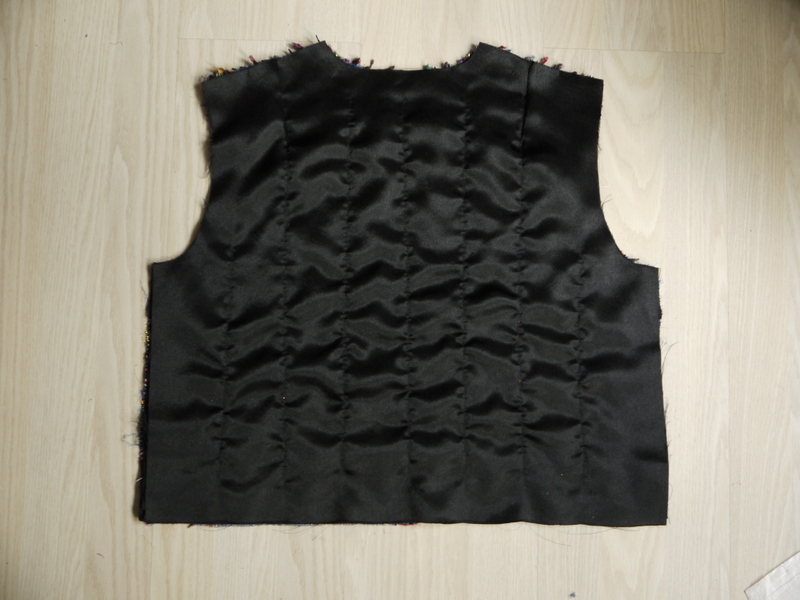
Here’s what to do to make it really neat. Working between the shell and the lining, pull both threads through to the inside and tie them in a double knot, trimming the ends. I had to do about a million of these which took ages, but it’s worth it. You can see that I am using black thread on the top (lining) side, and had blue thread on the bottom (fashion fabric side) bobbin, to roughly match the warp of the fashion fabric. The blue stitches are not noticeable from the outside of the finished jacket!

For the front, I stabilised the edges I didn’t want to stretch with selvedge, and the hem with bias muslin as described above. I later realised that the trim would have been stabilising enough for the centre front edge, so I could’ve avoided some thickness by skipping it – but you live and learn.
Note that there is a large dart in the front. This wasn’t small enough to be shrunk out, so it had to be positioned where it would show least, I put mine under the arm.
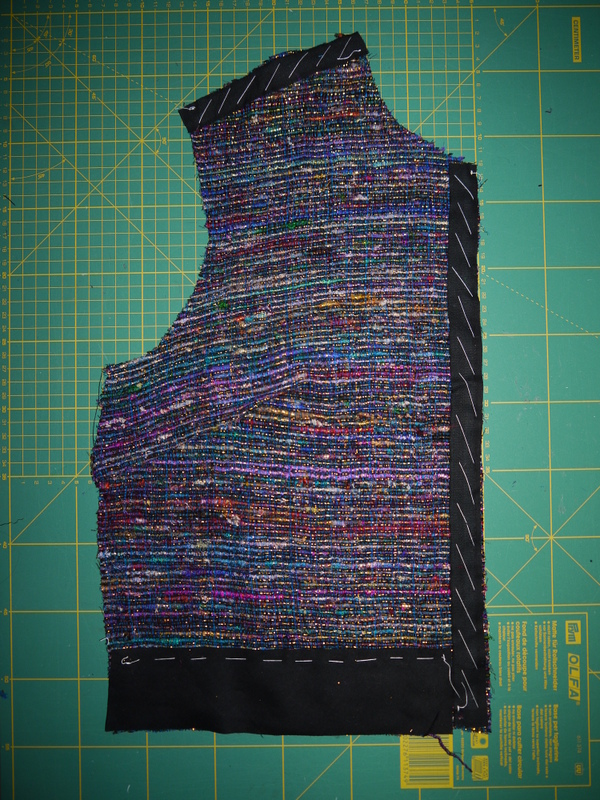
Then followed the same quilting process as for the back…
…and repeated again for the sleeves.

Finally, after many hours invested in this project, came the time to sew the pieces together. I cannot tell you how exciting this was.

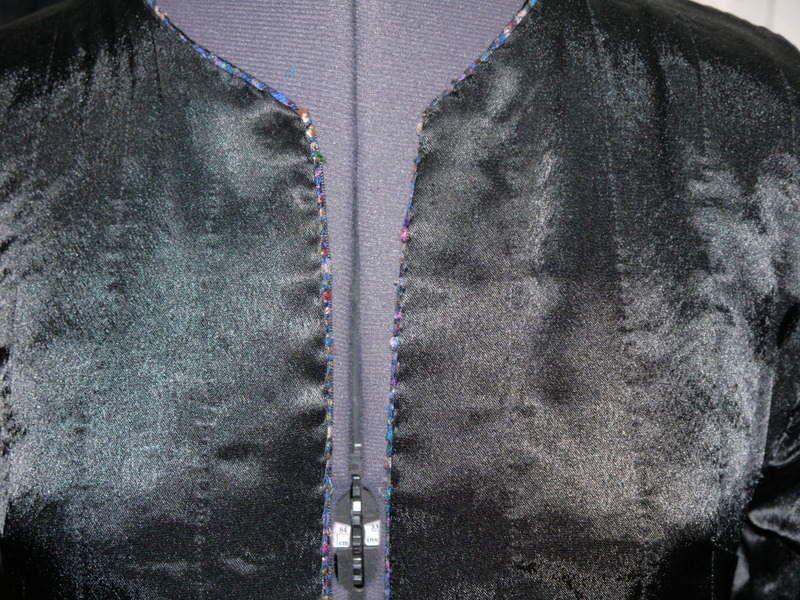
For the trim, I’m using plain grosgrain ribbon. I like to keep it simple :-)
But, how did I get it to curve around the neckline without pleats?
The answer is: I got the technique from annrowley’s flickr photostream… drew out a newspaper pattern of the edges of my jacket using the original pattern, drew on the position of the trim that I wanted, ran a running stitch along the inside of the curved portion of the ribbon, pinned it to the pattern on my ironing board, pulled the running stitches tight, and attacked it with steam from the iron (I did NOT iron it), pressing down with my fingers when the iron was a safe distance away….

…it was tough to avoid burning my fingers, but I took care.

Here’s how it looks pinned to the outside!

When I was happy with the positioning I sewed it down (only to the outer shell, mind).

The inside of the jacket still looked like this:
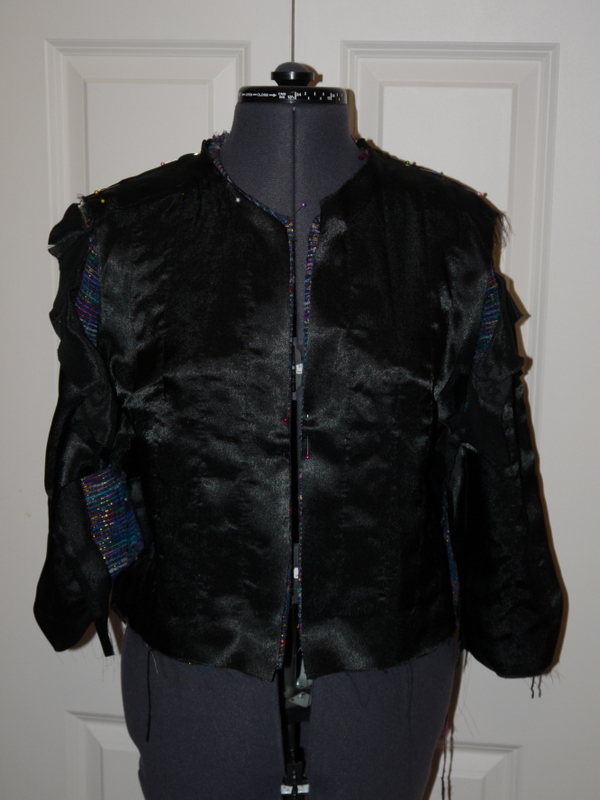
Basically the next step is to hand sew the lining to the fashion fabric around all the edges, and make the joins between the lining pieces in much the same way, using tiny stitches. Finally, press the hem and sleeve hems up, and sew those lining seams too. Not forgetting to remove any visible basing stitches from earlier, of course.
In the end I decided to add trim around the sleeve hems too – negating the need for the stabilising I added there earlier, but oh well.
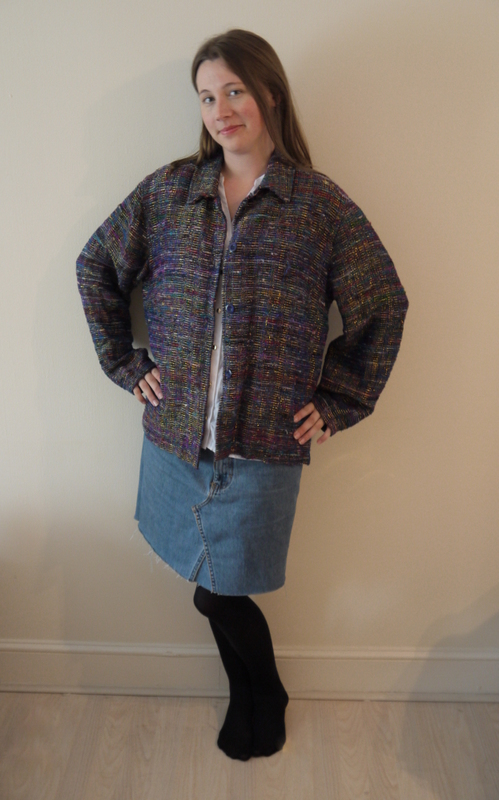
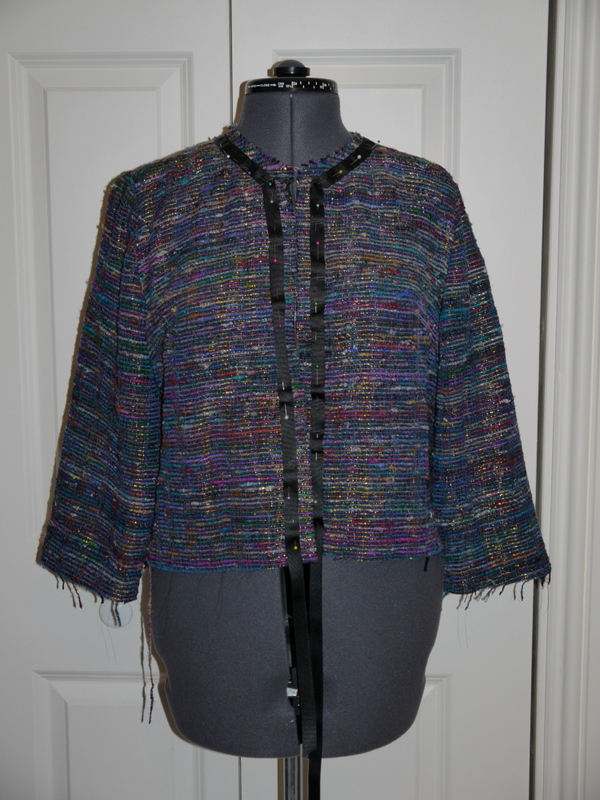
Here’s the inside of the finished jacket:
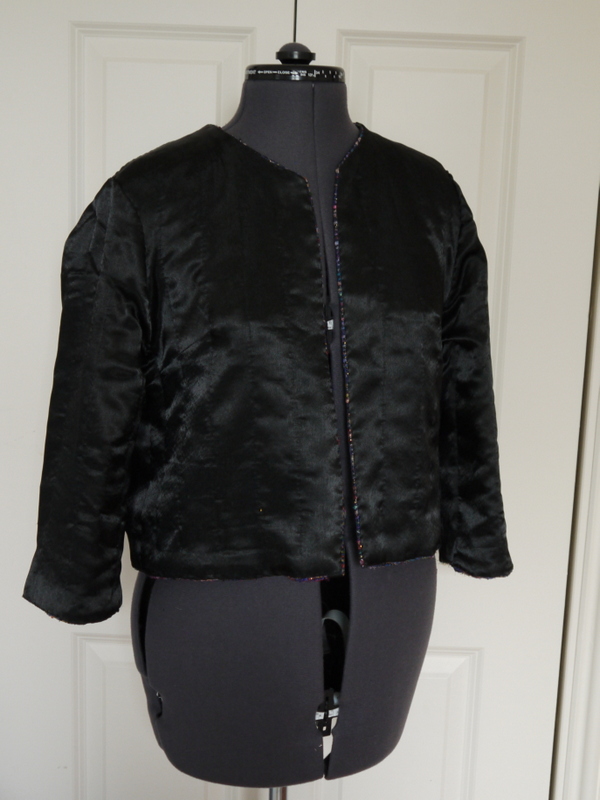

And the outside:

All I am missing is the famous chain weight from around the bottom hem to help it hang nicely. I didn’t have any, and haven’t had much luck buying this anywhere, but when I find some I will add it.
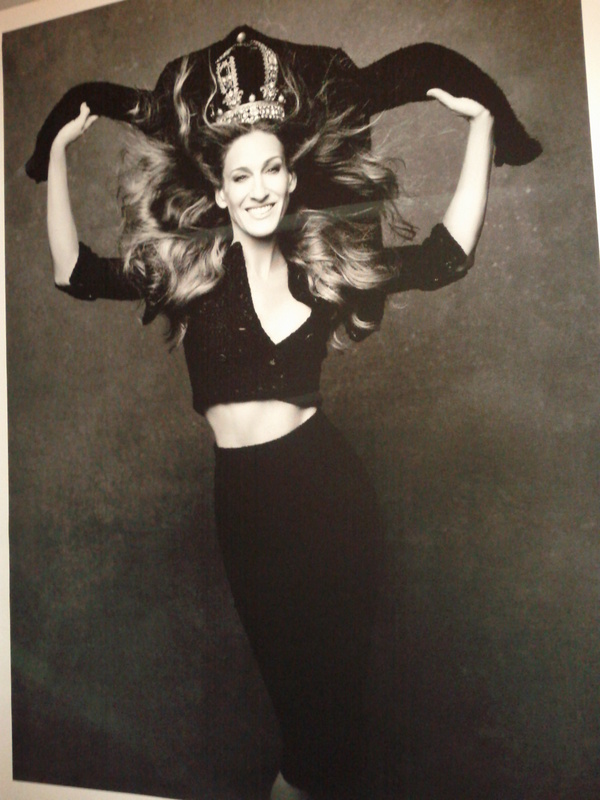
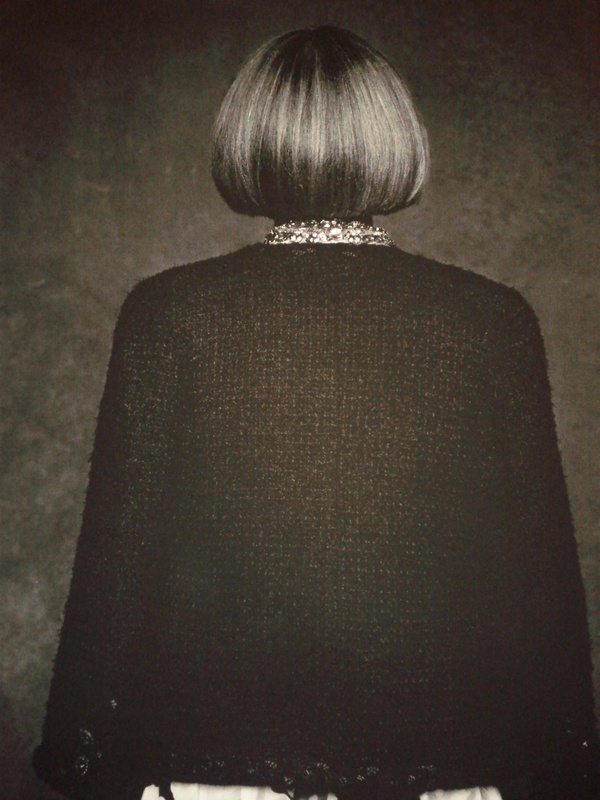
I took this jacket on its first outing back in November… to the ‘Chanel: Little back jacket’ exhibition! The exhibition is Lagerfeld’s black and white photos of famous women, and some men, wearing the famous Chanel jacket in black. They are all wearing it in different ways. I really enjoyed it… even got a free poster of one of the photos to take home! Very exciting!
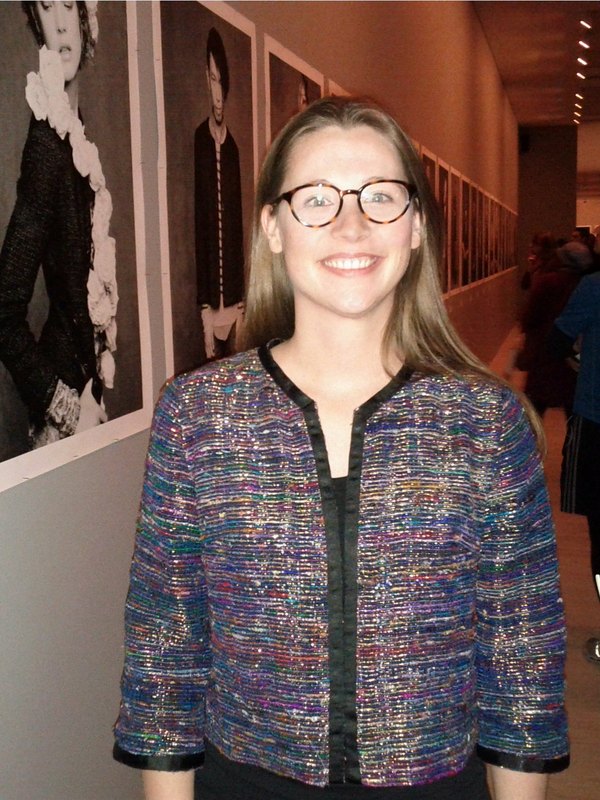

My favourite images were SJP…
…and Anna Wintour, who must have a sense of humour after all!


Wow … what talent! Wow, this is beautiful.
Thank you very much!
This looks so awesome! I know it was probably a ton of work, but it is so worth it! I eagerly await your next refashion with pleasure! One of the best ones I’ve seen in a while!
Thanks so much for commenting! It was a LOT of work but I am pleased with it! Next refashion coming very soon!
I read this with my mouth agape and eyes wide! Wow. Congrats seems faint praise indeed, but well done!!
Cheers
Lori
Haha thank you Lori, really glad you liked this piece! :)
Fabulous indeed! I always am so inspired by the work you put into your pieces! I love how the gold thread really shines in the photos at the exhibition.
Thanks Sarah, yes the gold thread looks much better in real life than in the photos – it glints in the light! Part of the reason this fabric had to be ‘saved’ ;-)
WOW! Fantastic! and, yes, a LOT of work – but it was so worth it!
Thank you – it’s great to attempt large projects once in a while to flex one’s sewing ‘muscles’ ;-)
Wow! I’m SO impressed! Your work is amazing, and the result is stunning! What an inspiration! :)
Thanks for reading, I am so glad if you found this inspiring. I’m pretty pleased with the jacket so your comments mean a lot.
Oooh, what a great job! You’re so clever! And that exhibition sounds like it was a blast…very cool!
Thanks Marie – you missed out if you didn’t see that exhibition, it was lovely!
Another brilliant project. Congratulatons.
Thank you :)
It’s lovely, and I’m jealous.
Haha thanks Lizzi, you’ll have to make your own ;-)
Looks like it was alot of work, you are very talented and it turned out quite nice. How appropriate for the venue you wore it to. Enjoy your posts and looking forward to the next one.
It was a lot of work, but I am so happy with it. I have been wanting to try something Chanel-esque for a while. Next post coming soon!
Genius, pure genius! Way to go!
Thank you so much :)
Wow, great job! Great pictures of the steps. Looks great.
Thank you, glad you found the pictures helpful!
Great sewing. Wonderful jacket. Love the way you breathed new life into the jacket. Happy wearing
Thanks, Sheila! :)
Love this, well worth the wait. Seriously inspiring.
Thank you so much! Really glad you liked it. It was months in the making and it took weeks to write it up as well!
simply amazing!!
Thank you!
You managed to turn that ugly jacket into a wonderful, wearable piece. Amazing.
Thanks Foster, it’s had plenty of wear already!
Amazing transformation!!! That fabric was well worth the second chance!
Yeah I just couldn’t leave it in the shop, had to go back for it after thinking about it all night! So glad I did though!
I did that once with a gold shirt. The fabric was sheer with little modern geometric squares. So intriguing, but I left it at the shop. I had no idea what to do with it. But I thought about it all night and went back the next day to get it. Luckily it was still there. Haven’t done anything with the shirt yet, but I know, some day inspiration will hit and I’ll be glad I have it.
I am sure you will come across the right idea eventually! It would be much worse to have a flash of inspiration having not bought the shirt :) If in doubt, buy! If something languishes in my stash for too long I can always re-donate it.
My sentiments exactly. Now I just need a bigger space to keep it all organized and easy to access.
Me too ;-)
What a lovely result! All that time you spent on transforming the jacket really shows in the final piece :)
Thank you for reading Joyce, glad you liked the jacket!
Fabulous.
Thanks! :)
I followed a link to here from So Zo this morning and two hours later, having read the last gazillion posts on here, I am in AWE of you! What a fabulous eye for the potential in an unprepossessing garment, and I absolutely love how you ninja your way through a make. I am sending all new sewists over here to read your blog as I love the way you go through a make and explain it. I hope your confidence and surenes of hand and scissor rub off. Bless!!
Hi Maryanne, thank you so much for the lovely supportive comment! Glad you’ve enjoyed reading about my projects and that you found them easy to follow. I sometimes worry that my ‘ninja’ approach means it would be difficult to recreate these projects, but hopefully people are inspired anyway! I think it’s partly because I work with such unprepossessing garments that I can be so confident – no risk of ruining expensive fabric – and if it all goes wrong, at least the charity got a few quid out of it! Rather liberating, really!
PS I am now seriously considering renaming myself ‘the sewing ninja’ :)
Woah that is crazy amazing!! Well done :)
Thank you so much! :)
Hi Sally, I meant to comment on this post when I first saw it but got distracted, the recent ‘Refashioners’ posts have reminded me of it! I just want to say that I think what you’ve done with this jacket is truly a work of art. It’s one of the most impressive makes I’ve seen on any sewing blog, ever. Wonderful, wonderful work! x
Hi Jane, I’m so touched! Thanks so much for commenting, it means a lot. This jacket was a lot of work but I wanted to show that refashioning isn’t ‘the underdog’ and that complex and interesting projects are possible. It gets a lot of wear and is a permanent part of my wardrobe. :)
OMG. That it the most amazing amazing refashion ever. Such a lot of work but wow what a gorgeous priceless jacket you have made for yourself! :-)
Aw, thank you! :) Yep, it was a LOT of work, but I’m happy with it! (also happy in the knowledge that no-one else has a jacket like mine!)
Very nicely done! I have a drapery shop and have chain weight if you would like to add it let me know.
Hi Grace, as a matter of fact I managed to buy some chain of about the right weight a couple of weeks ago and have added it to the jacket a couple of days ago. Maybe I’ll do an outfit post for this soon so you can see it! :)