
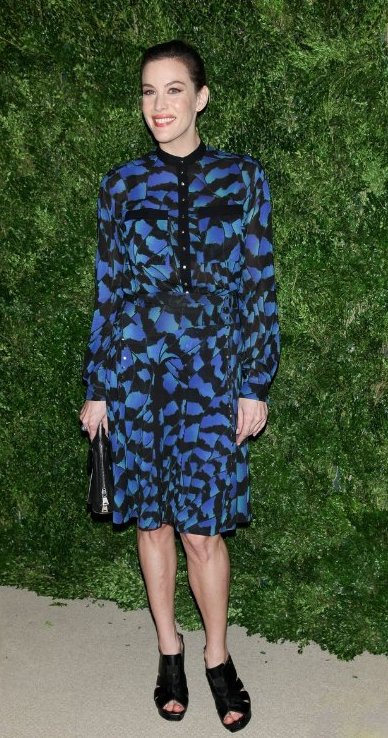
Red Carpet Copycat: Liv Tyler in Proenza Schouler
When I saw this picture of Liv Tyler at the 2012 CFDA/Vogue Fashion Fund awards, my first thought was… I’ve got a dress like that!
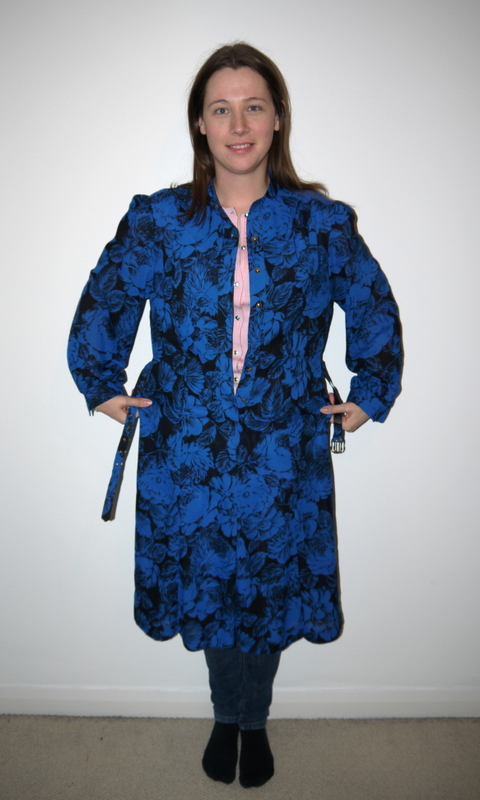
Except mine looks like this….
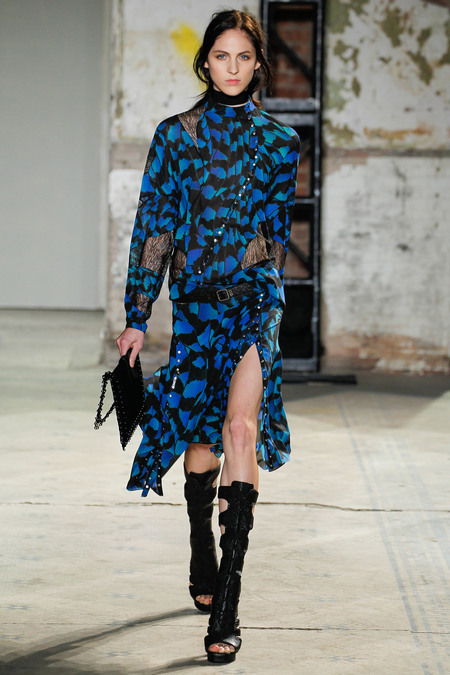
Liv’s is the commercial version of this Proenza Schouler Spring 2013 number….
…and mine was US $ 4.99 from Thrift Town in San Francisco about two years ago.

Still, with a few nips and tucks (to the dress, that is)… I think I can pull it off!
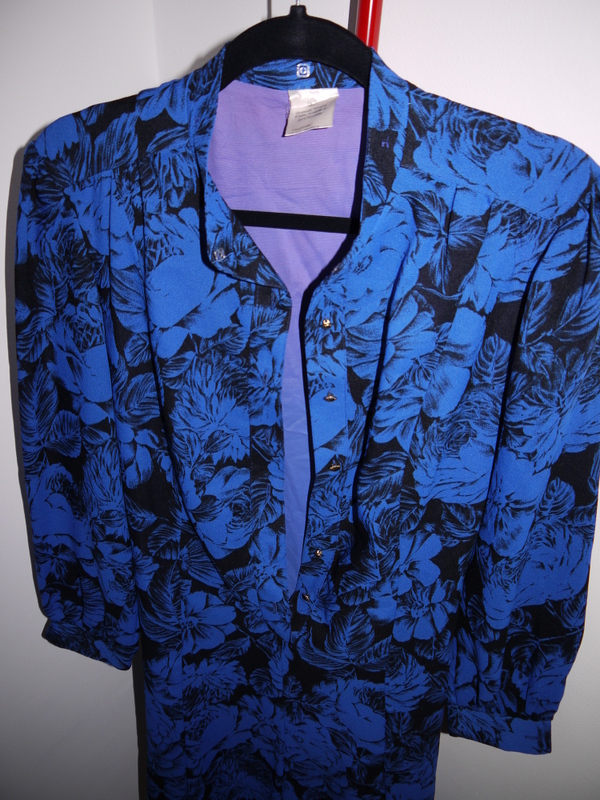
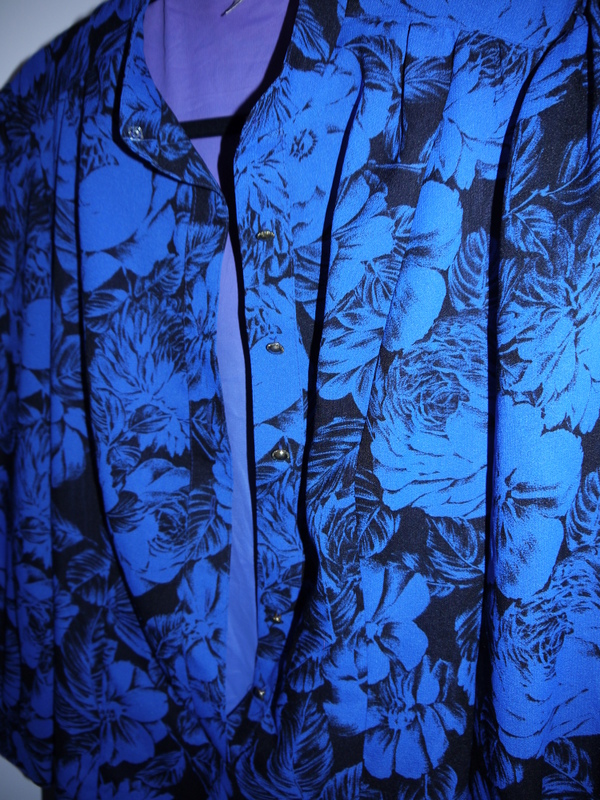
This polyester monstrosity was far too big and very blousy. It had press studs around the collar stand for attaching different collars, which were missing of course.
It also suffered from missing button syndrome.
First thing to go was the purple polyester lining, which was absolutely heinous.
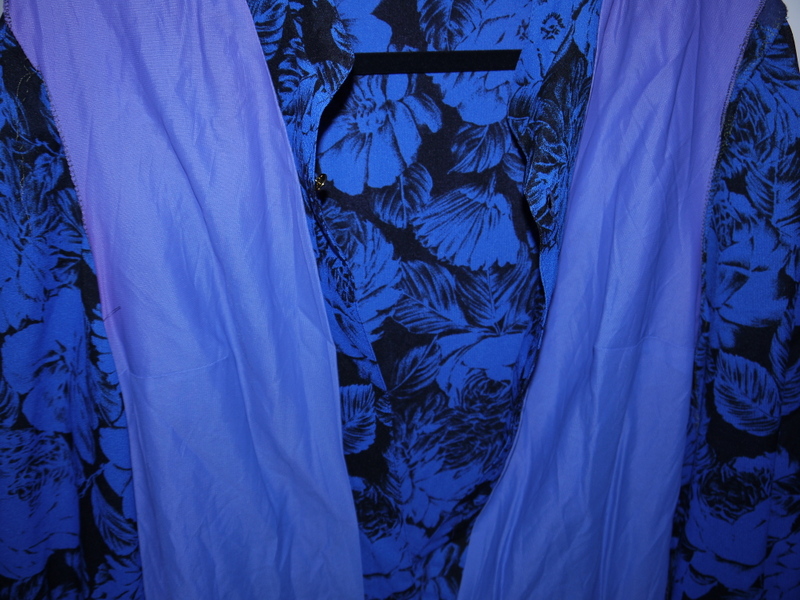
Yuck!
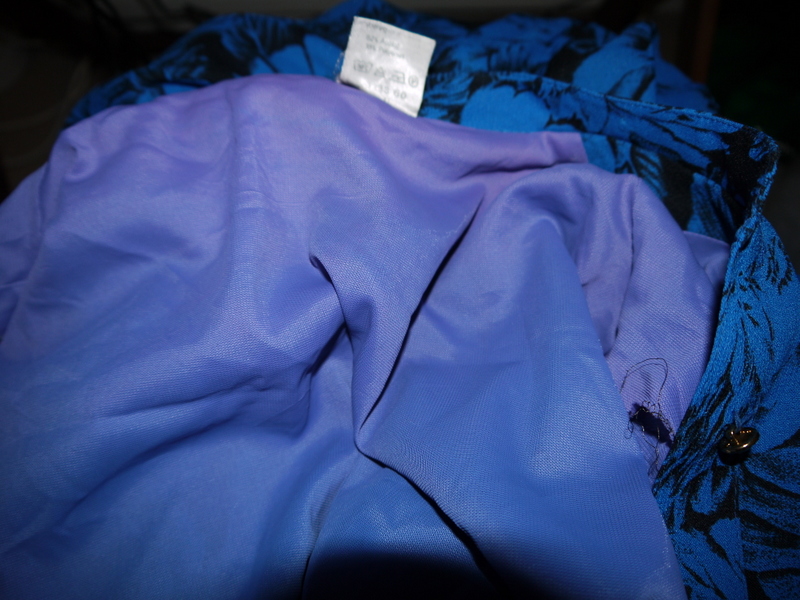
The dress did have some noteworthy features, though. Although I bought this in the US, its tag was in German, so it must’ve started life in Europe.

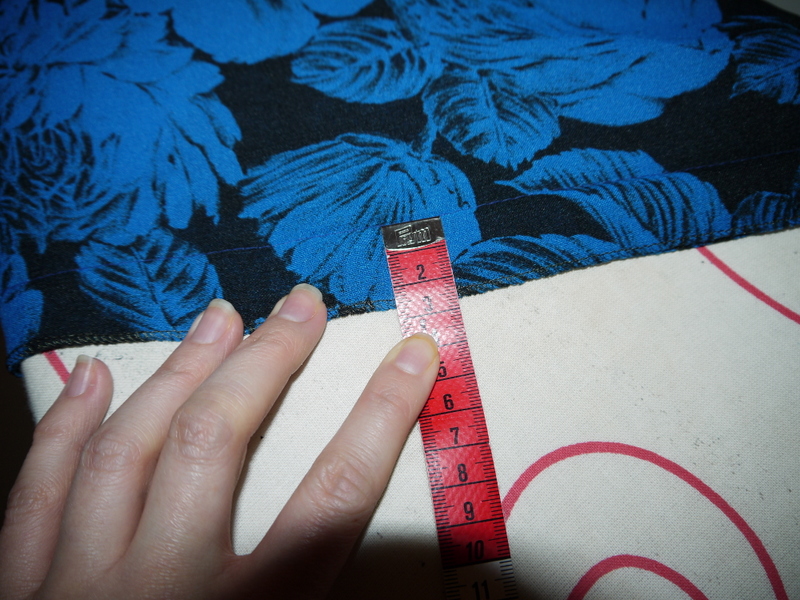
It had differing seam allowances for different seams. 1.5cm for the front and back section seams. 1cm for the collar and facing. And 2.5cm+ for both the side seams, as if leaving room for adjustment. I couldn’t find any evidence that this had been taken in, but I suppose it’s possible.
The edges (well, most of them) were finished by overlocker, except where there was a notch, where they had ‘skipped’ the edge finish to leave the notch visible. I had never seen this before – intriguing! (or maybe I just don’t get out much)

First thing to do was to take the bodice in by about 3cm under each arm, tapering to nothing at the cuff and waist. I also cut about 12cm off the finished length.
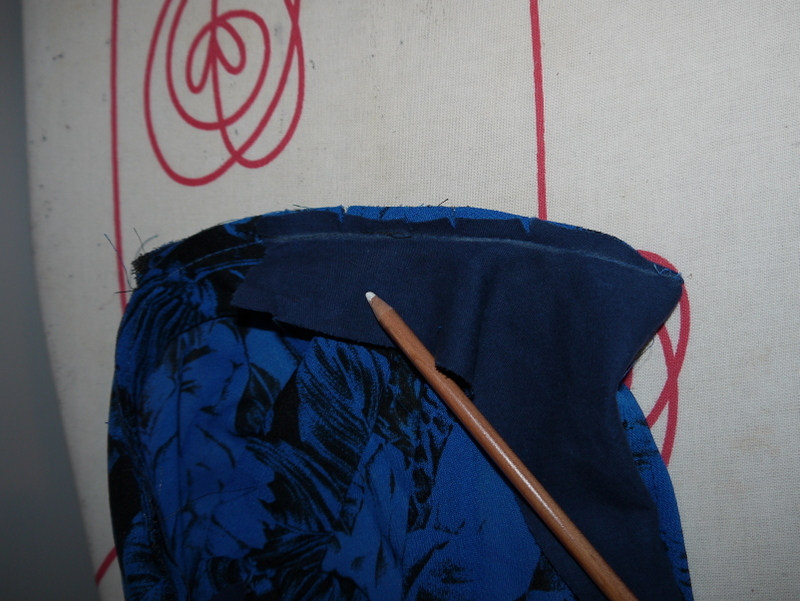
After unpicking the collar stand, I used it as a pattern for my new mandarin collar. I drew it onto paper as I wanted to add a consistent seam allowance – the original had of course been clipped and graded. I cut two new collar pieces from a piece of very nice black wool crepe (from stash) which is so old its origins are unknown… and one from interfacing.

Here’s how it looks assembled:

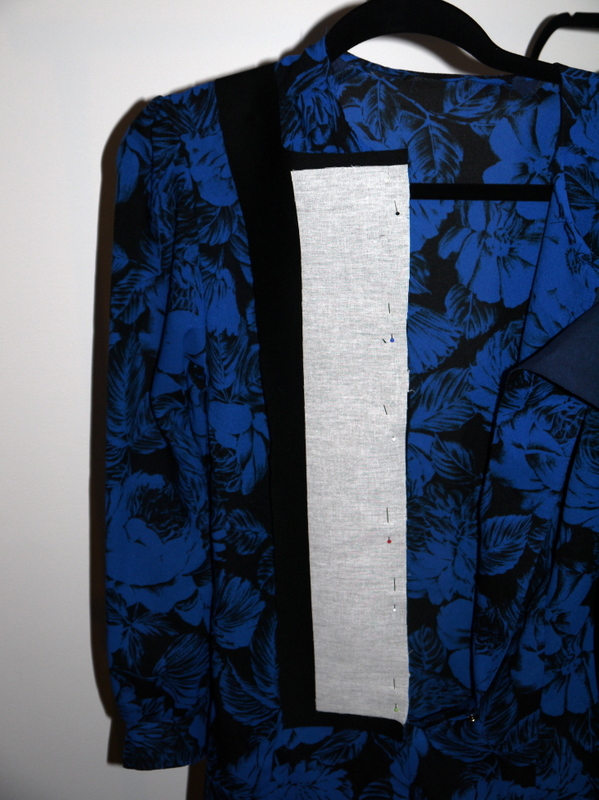
I also unpicked the right hand facing as this was cut together with the button placket on that side, which was going to be replaced with a new black placket. Since this seam allowance has already been trimmed, I drew on the original seam line with chalk before unpicking it.
I made a pattern for the new facing/placket in the same way and cut some interfacing. Note that since I only had white interfacing, I only interfaced the parts that would not show as the dress is semi-sheer.
After attaching both the new collar and new placket, I was rather happy with it. To avoid having to make new buttonholes, I just sewed the buttons straight onto the black placket, through all the layers, holding the dress closed. I left the first one on the original side to look ‘unbuttoned’ and to leave a sufficient head hole. The dress is loose enough to pull on without any openings. To cover up the fact that one button is missing, I moved the space to below where the belt is going to be, so it’s not visible when wearing the belt.

The dress did come with a self-fabric belt, but I’m styling it with a thin black patent belt here, plus the heaviest black sandals I could find… these are Zara A/W 12 and were a sale purchase! These are black velvet and really beautiful not to mention versatile… oh and they have 6″ heels ;-)
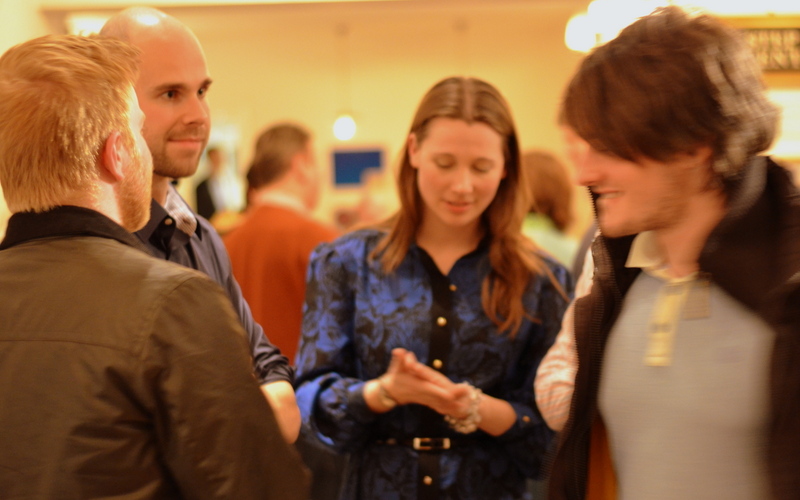
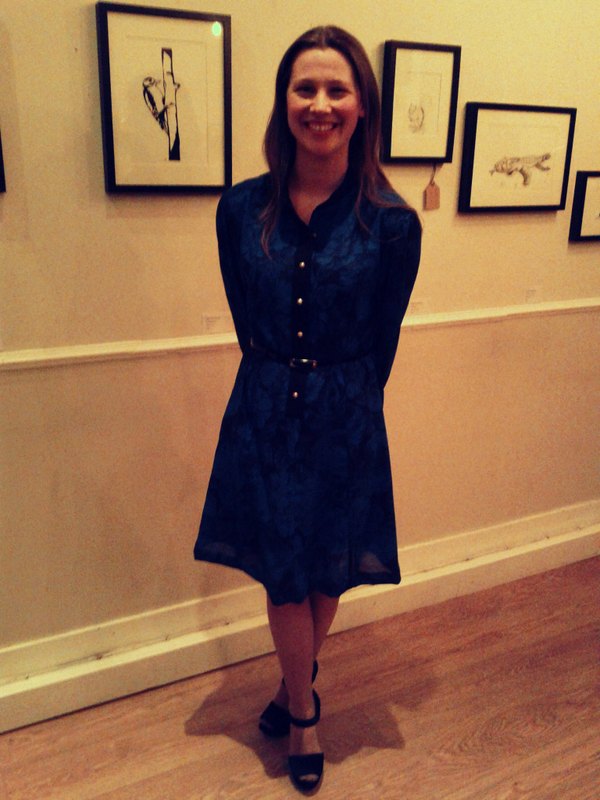
Here are a bazillion pictures of me wearing the dress to the opening of my friend D’s art exhibition! (Thanks RW for the third and fourth pics!)


Wow . . . that turned out BEAUTIFULLY! Love it!!!
Thank you! :)
It looks fantastic, especially with those shoes! I’d fall over in heels that high, I’m such a klutz.
I confess it was rather tricky to walk. Sub zero temperatures + uneven pavements + 6″ heels = nearly killed myself on the way there
You are such a clever person, well done
Thank you very much :)
This is one of my favorite refashions that you’ve done! It looks fantastic!!!!
Thanks so much! Glad you liked it!
Wow that is beautiful!
Thank you Carlee!
Beautiful!
Thanks :)
So much better now!!!
Thanks Beth, it definitely deserves its place in my wardrobe now (if not on the catwalk)
This looks so much more elegant than it did before you got to it… and in my opinion, is prettier than your inspiration. =)
Thank you so much Charity, it’s not quite the same as the inspiration picture but I rather like it!
I like this much better than Liv’s or the runway models. And especially like your shoes! Gorgeous! Thanks also for such a detailed explanation of all the steps! :)
~Jen
Thank you very much for the kind comment. Yes, I’m in love with the shoes. They’ll definitely be getting more wear!
turned out great! Liv’s frock sucks compared to this crafty re-do!- I actually think hers looks like a ‘before refashion’ dress. I found some dresses that look like the one you have and I think there will be some sewing done to them tonight! Thanks for the inspiration!
Haha thank you! Yes, get those old dresses out and start cutting! :)
Love the update and the length. You never cease to amaze!
Thanks for reading, Foster :)
I like your version better than Liv’s. You look great in it and the shoes are perfect with the dress.
Well thank you! And thanks for stopping by!
Eeep, love this…it turned out so pretty!
Thanks Marie :)
Your refashion looks much more elegant than Liv’s version – I think the floral print helps!
Yeah I like the floral print too – hers is more abstract. Thanks for the comment, Joyce.
It looks really nice!
Thank you very much Eszter, glad you liked it!
This is really amazing. You are very clever!! love your blog! and thanks for posting.
Thanks so much for the kind comment. Glad you’re enjoying reading! :)
When I saw Liv Tyler’s dress and your before dress, I was getting really excited to see the final version. I love what you’ve done and it looks great! You rock !!!
Thanks for commenting Agy, really glad you liked this dress. I’m really pleased with it and it’s definitely going to be worn again!
It looks awesome, wish I could sew this well! Do you have any tips for getting started with refashioning?
Thank you so much. You don’t need to be a great sewist to start refashioning. Here are some tips.
– Start with something simple, like making a skirt shorter. You’ll quickly develop your sewing skills and move on to more ambitious projects.
– Don’t be afraid to be ‘scissor happy’. Just dive in! Be confident! If it doesn’t work out, bin it (or recycle it) and move on, don’t dwell on it.
– Re-use features of the original garment that are hard to sew, like collars and buttonholes.
– Keep a stash of scraps and any buttons or zips you cut off that can be used in future projects.
– If in doubt, buy large!
Have fun!
Thanks! :D
:)
Awesome job!! This dress looks amazing on you!!
Thanks so much :)
This is lovely and I agree, much better the Liv’s dress – the fit is perfect, for one! I wish I could wear 6 inch heels as I am only 5’1″ but I would kill myself trying to walk! LOL.
Thanks so much, Diane! Haha, there’s certainly a time and a place for 6″ heels… I call mine “taxi shoes” ;-)
That looks amazing! You are so clever!
Hannah x
http://www.hannahelleni.blogspot.co.uk
Thanks for reading!
Hi admin, i must say you have hi quality posts here.
Your page should go viral. You need initial traffic only.
How to get it? Search for; Mertiso’s tips go viral