
Category: Uncategorized
Polka Dot Panache

I just couldn’t leave this brown and white polka dot dress in the shop when I saw it (bought at the same time as the grey lace one in Whitby Scope, £4.95).

Of course (and I’m sure I’m not alone in this), I can’t see brown and white polka dots without thinking of this:

So the task for this dress became turning something very ordinary into something chic, with a hint of polo spectator.
The Refashioners 2016: Jeanius
This year’s challenge for “The Refashioners” refashion series is to remake a pair of jeans into something, with the majority of the finished project coming from the source garment, that is, it should be a mainly denim item.
Personally, I rarely work with denim as I do worry that I’d get carried away and end up with something like this (below), that is, something very obviously having been made from a pair of old jeans. It looks a bit strange because there are very few garment types that are typically made from the same heavy denim as jeans are – even denim jackets use lighter weight denim.

So, my target garment for this fabric had to be another pair of jeans. Cut up jeans to make more jeans, you ask? What is the point?
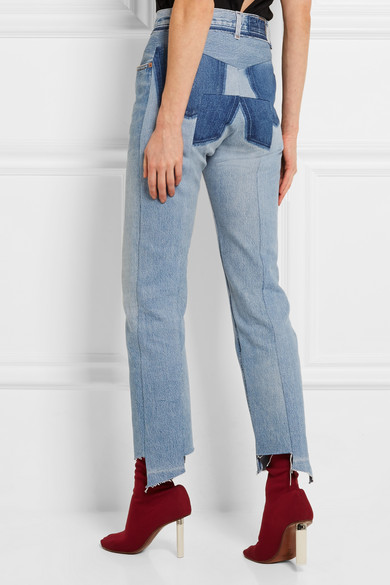
Well, the look I’m hoping to emulate is a designer pair of jeans which is made from… old jeans. These Vetements Fall 2015 jeans originally retailed at $1450 (images borrowed from Net a Porter) and they came in several different styles. The label basically bought up loads of vintage Levi 501s (!!) and cut them up using their own pattern to make an interesting new style.

Key to the look is the ‘pocket within a pocket’ shapes on the back (no actual back pockets), seams down the front and back legs, and uneven, unfinished hems.
These were absolutely everywhere at one time… like you could barely read a fashion blog without seeing them at some fashion week or other.

I actually read quite a few articles praising these jeans before coming across one that mentioned they use TWO pairs of vintage Levis for each finished pair. Two! Pairs! Of vintage, wearable jeans!

Of course, I’m going to emulate these using something ugly and turning it into something… interesting, if not 100% beautiful.
I started with a pair of ordinary jeans.

These particular jeans are bog standard Marks and Spencer dad-jeans of absolutely no fashion merit of any kind (no vintage Levis were harmed in the making of this project). The only criteria for selection were that they were a little big on me (but not massively outsized) and they are a fairly light wash (so the pocket shapes will show up once the pockets are removed).

I picked these up in my local Cancer Research shop for £2. Bargain!

Longer Lace
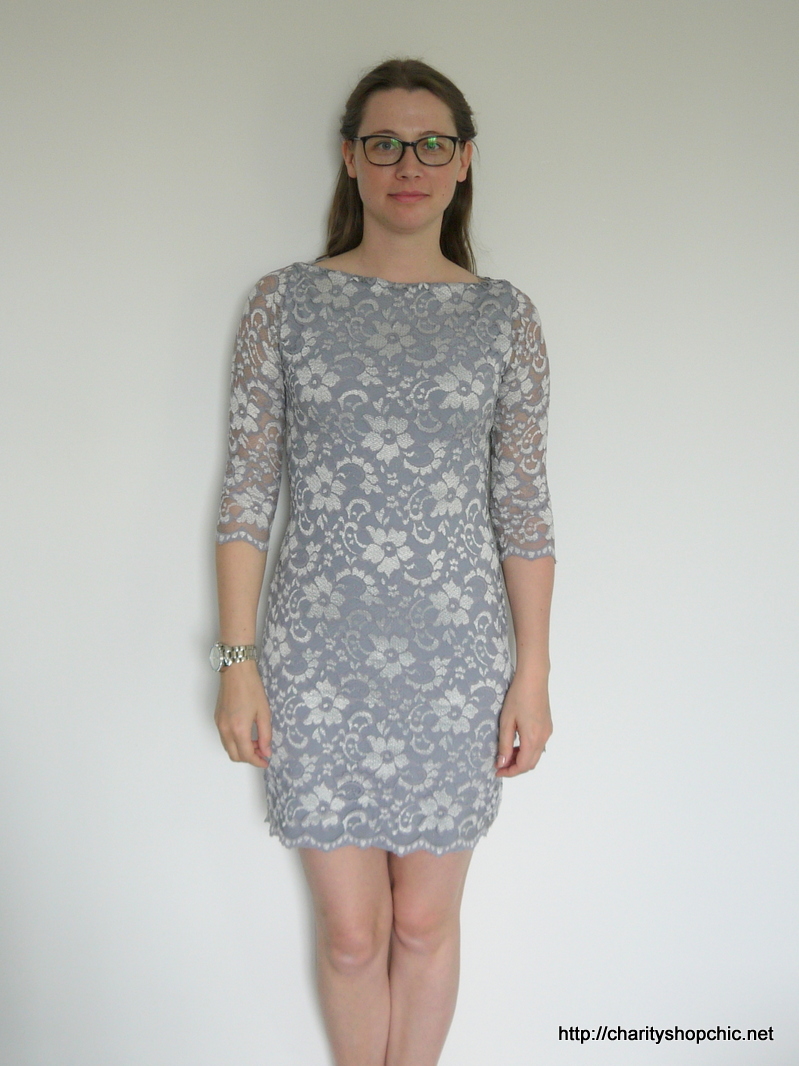
I bought this dress in the Scope shop in Whitby (£5.95) a while back; it’s silver and grey stretch lace with beautiful lace sleeves. Unfortunately when I tried it on at home, it was just too short to be wearable. The options were (1) cut the bottom part off and wear it as a weird looking top, which meant losing the scalloped edge along the hem, or (2) add something to make the skirt longer.

Embellishment: Embroidery on Embroidery
I’m sure you remember this viscose embroidered blouse from last year:
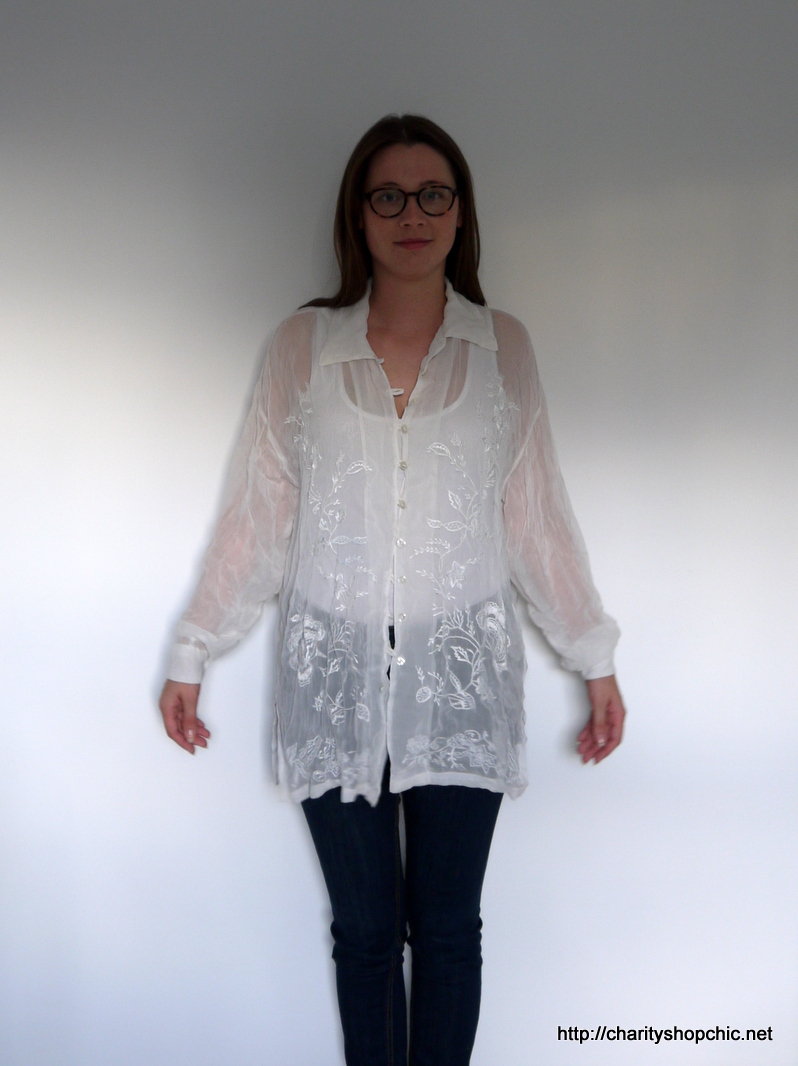
In case you don’t: the back of the blouse became a transparent panel with an illusion neckline for my “Elvis” wedding dress which you can read about here.

Just to recap, the blouse was originally £4.50 from the Mind shop in Whitby.

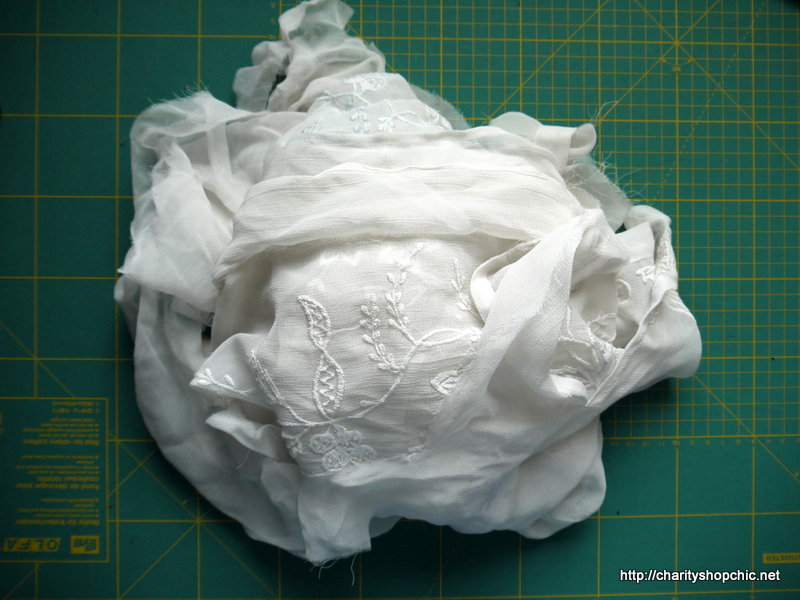
I still had the front and sleeves left in stash. The front had a lovely tonal embroidery on it which was too good to throw away!
Making Shoes (With Mixed Success)
So… there have been a few people in the world of sewing blogs (notably Carolyn, Sue and Jodie) who have ventured into making their own shoes. It’s kind of a natural progression from making your own clothes, except it isn’t, because you need an entirely different set of materials, tools and skills. Still, inspired by the work of Carolyn, Sue and Jodie, with the appealing idea of having custom made shoes in whatever colour/fabric I choose, I did a little research. There are some resources available online for making shoes – I know Jodie took an online class at Shoemaking Courses Online and rated it highly – but there wasn’t much around for free. And most of the stuff I found on Youtube required a full setup of specific styles and sizes of shoe lasts and specialist hand tools, not to mention materials and hardware that are not available for easy purchase by total amateurs. Rather than do the sensible thing and invest time and money in skills, tools and materials, I continued to research shoe making with the idea of attempting to make a wearable pair of shoes from household objects with only basic tools. (Ambitious? Moi?)
I probably should have started with sewing a rope washing line into a pair of espadrilles or something, but frankly, I have never worn espadrilles… my summer shoes are more the 6″ tottering wedge variety. Still, sandals are simpler because that eliminates the need for toe puffs and heel counters (specially shaped pieces of plastic that help the heel and toe hold their shape), and the lasts are not as critical to the process. Flat sandals would probably have been a good option (I considered both Greek style leather sandals and Pakistani style Khussas – I may yet make both of these) as they don’t need the metal shanks and heel hardware you need for high heel sandals, which are really hard to buy anywhere. Also, considering it from the refashioning/recycling angle, options for refashioned shoe projects are minimal if you’re not keen on wearing pre-loved shoes (it’s so hard to clean them!). One option was to butcher an old pair of shoes for the hardware, but without the lasts to help you put it all back together again, it was going to be tricky. I thought cork wedges would be a good compromise as they don’t need the metal shanks, and cork is easily available. Another idea was clogs or some kind of wooden soled shoes, but that would have required a lot more in the way of carpentry skills.
Of course, I googled “how to make shoes out of cork” and straight away came back to Shoemaking Courses Online, which looks like a super site. They have a whole course on how to make cork wedges, and the course description page has a breakdown of the steps involved along with video stills from the lessons. I should note here that I did not purchase the course, but looking at those few images was enough to make me believe that it could be done with minimal tools, and to give me the basic steps. So what follows is in no way a review and is not a reflection on the quality of the course, just to be clear, though it looks excellent.
I gleaned three key pieces of information from the course page. One, you can build up the 3D shape of the wedge by glueing layers of cork together. This allowed me to use abundant, cheap cork placemats instead of going for more expensive items such as cork yoga blocks. Two, you can shape cork easily by hand using a file. And three, you can use the file to take a fairly simple extrusion of a sole shape into a more complex 3D object that looks like an elegant shoe (I was finding it hard to visualise this initially).
I started by gathering raw materials. First, one packet of IKEA cork placemats. There are four and they are 42 x 32cm and 3.5mm thick. Compare this with the materials in the online course – hers looks to be about 1cm thick which means a lot fewer layers and therefore a lot less work, but this is what I had.

Next, some fun fabric for the uppers. This top I bought several years ago in the Marie Curie shop in Middlesbrough. I recognised the fabric immediately as Minerva used to carry it – Clare made a stunning dress with it at the time.

This was £4.00 and I snapped it up with the intention of wearing it as-is, but it was just a bit too big to be flattering.

Lastly, another type of IKEA placemat which I earmarked for the shoe soles. These turned out to be not terribly suitable, but read on to find out why…

Embellishment: Ruffles
Do ruffles count as an embellishment? In my book, they do!
I’m sure you’ve noticed that the pie crust blouse is back in fashion at the moment. Well, the joke’s on me, after cutting that one up that time. Anyway, here’s how the reverse transformation can be done. I’ve seen a few of these tutorials online but here is my version of it.
Take one vintage blouse that looks as though someone maybe wore it to escape from the circus…

Fun fact – I actually bought this on the same day I bought the pie crust blouse that I cut up, so it’s been in stash for a while. It’s from the Swedish Red Cross (Röda Korset) shop in Jörn, on my trip to Northern Sweden. I paid SEK30:- (about £2.50).

BONUS POST: Wedding Dress Refashion!
Calm down, I didn’t refashion my actual wedding dress. It’s been put away in two specially made garment bags for safe keeping.
But I did refashion “a” dress to wear at “a” wedding…
I bought this vintage (wedding?) dress in a shop in Deptford a few years back. The fabric is so, so pretty, but as much as I tried to believe it did, it just didn’t fit. The waist was far too high. The bust was too big. The torso was too short. The sleeves were too short. Basically it was made for a much shorter person.
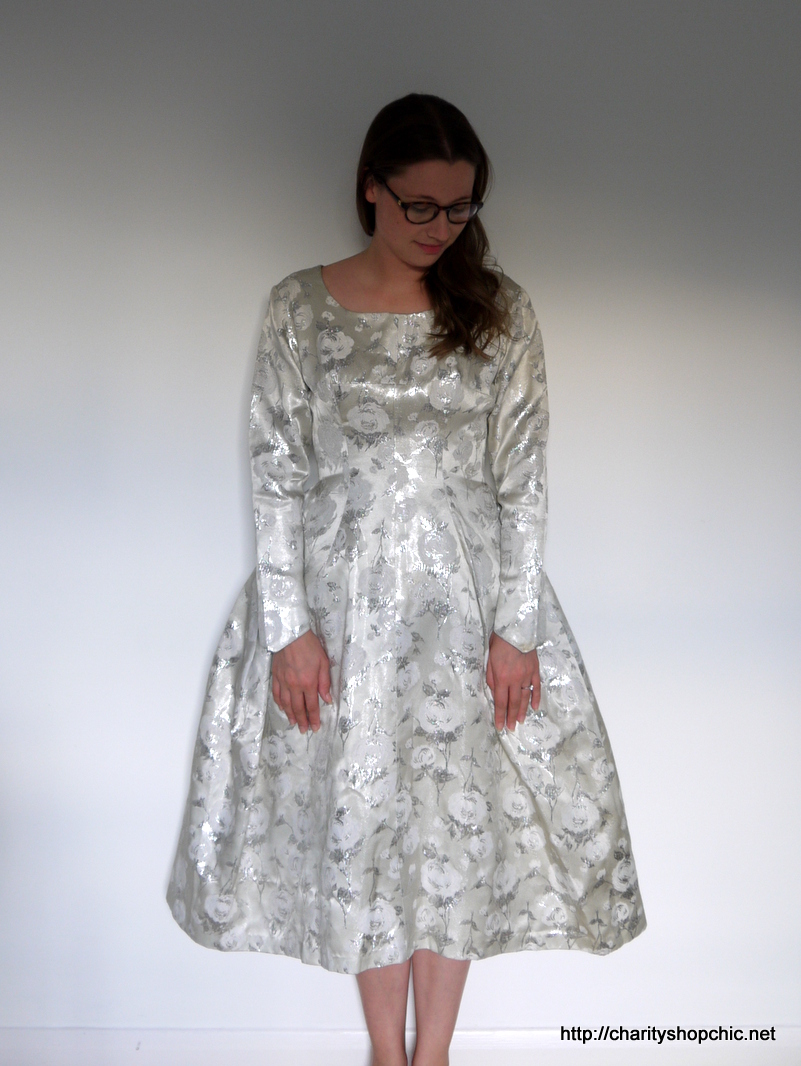
My plan of action was to remove the sleeves and make the bodice longer by chopping it off above the bust and adding a (longer than the original) contrast section instead. I considered adding a transparent section like you see on some wedding dresses, but didn’t really give it any serious thought until coming across this old blouse in my stash. It’s rayon and very thin, and the perfect colour to match the cream tones in the dress.
For the record, the blouse was purchased at the Mind shop in Whitby for £4.50.
Wedding Dress: Part 7 (The Big Reveal)
I hope you’re still following along this epic series and haven’t gotten too horribly bored by the whole thing. It will be over soon, I promise!
I’ve written at length about all the different parts of the dress… the corselette, the underskirt, the dress shell and even the veil, but seeing at all come together was a very satisfying moment.
Wedding Dress: Part 6 (The Veil)
Let’s talk veils! There was no doubt in my mind that I wanted a veil, and I quickly earmarked the kind of thing I was looking for (white, long, nothing that comes over the face). Here are some of the images I was working from.


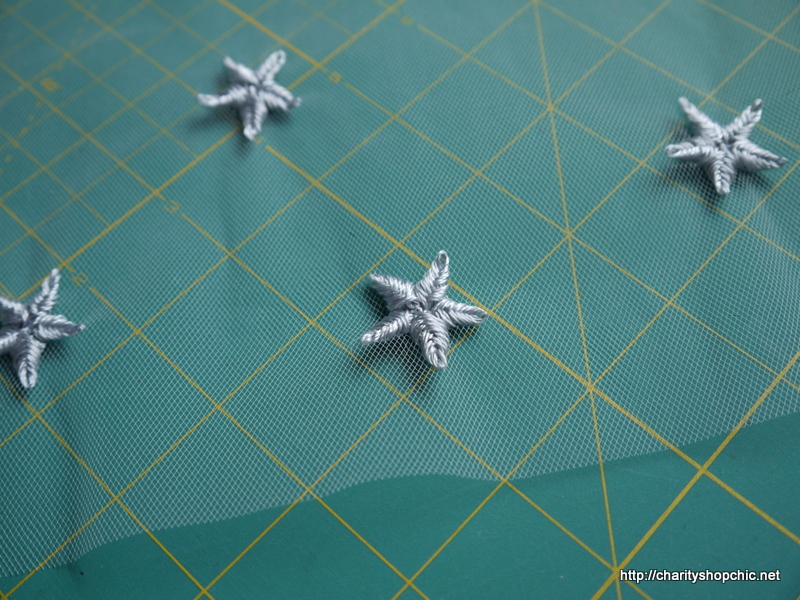
Since I had to give up the idea of embellishing the dress because of time constraints, I thought it would be safe to play around with embroidering the veil and making a jeweled ornament for the comb – both could be abandoned at any point and a plain veil made in half an hour, if the deadline got too close.
Since my wedding motif was a star, stars were the obvious choice for the embroidery. I did quite a few samples, trying to make a star shape that looked as good on the front as it did on the back, which turned out to be tricky – the veil is of course seen from both the inside and the outside, so it was important that the reverse looked good. Also, there couldn’t be any stitches on the reverse outside the shape of the star, because the veil tulle is of course see through, so they wouldn’t be hidden. I considered this star stitch before dismissing it because thread showed through to the right side between the points of the star. What I eventually settled on was a modified raised fishbone stitch, times five for each star. I don’t mind telling you I got halfway through doing these stars in pink before deciding it was too harsh against the white dress and switched to silver. Metallic thread was not terribly easy to work with, so I ended up with a satin grey.
Wedding Dress: Part 5 (The fabric and The Dress)
I hope you’re as excited to talk about my fabric as I am!
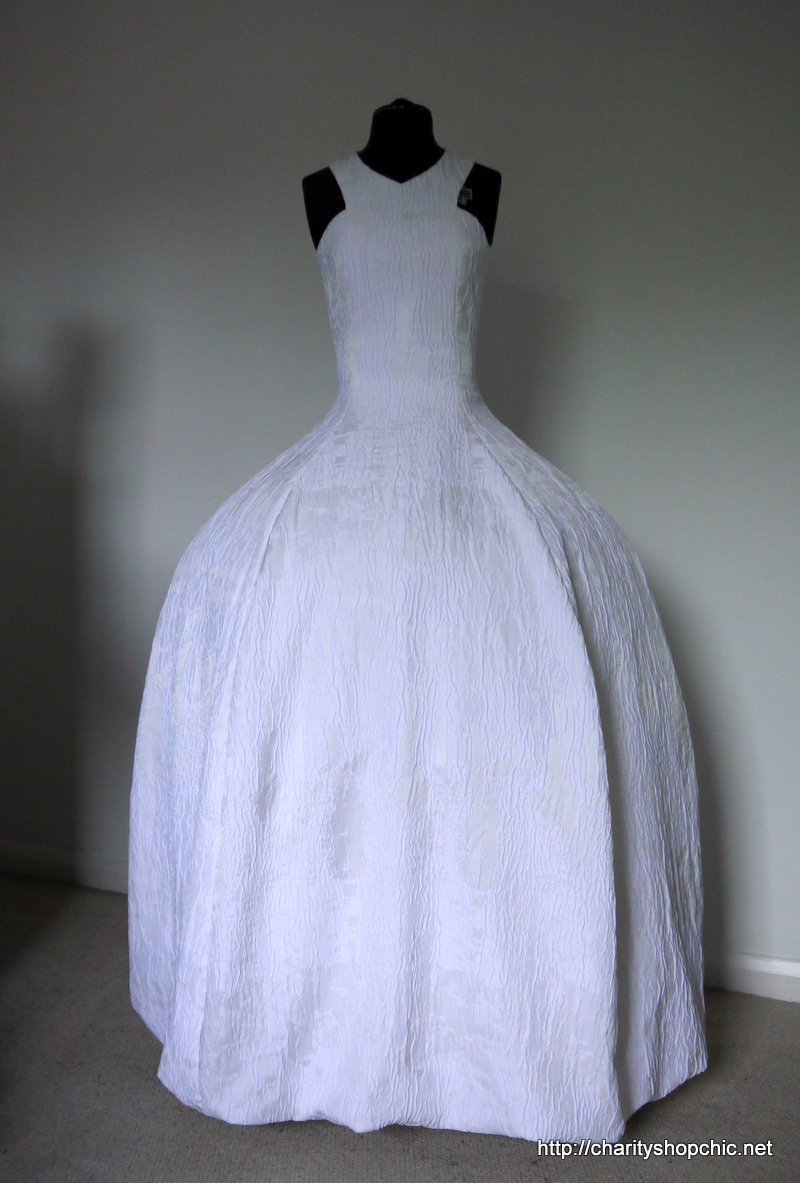
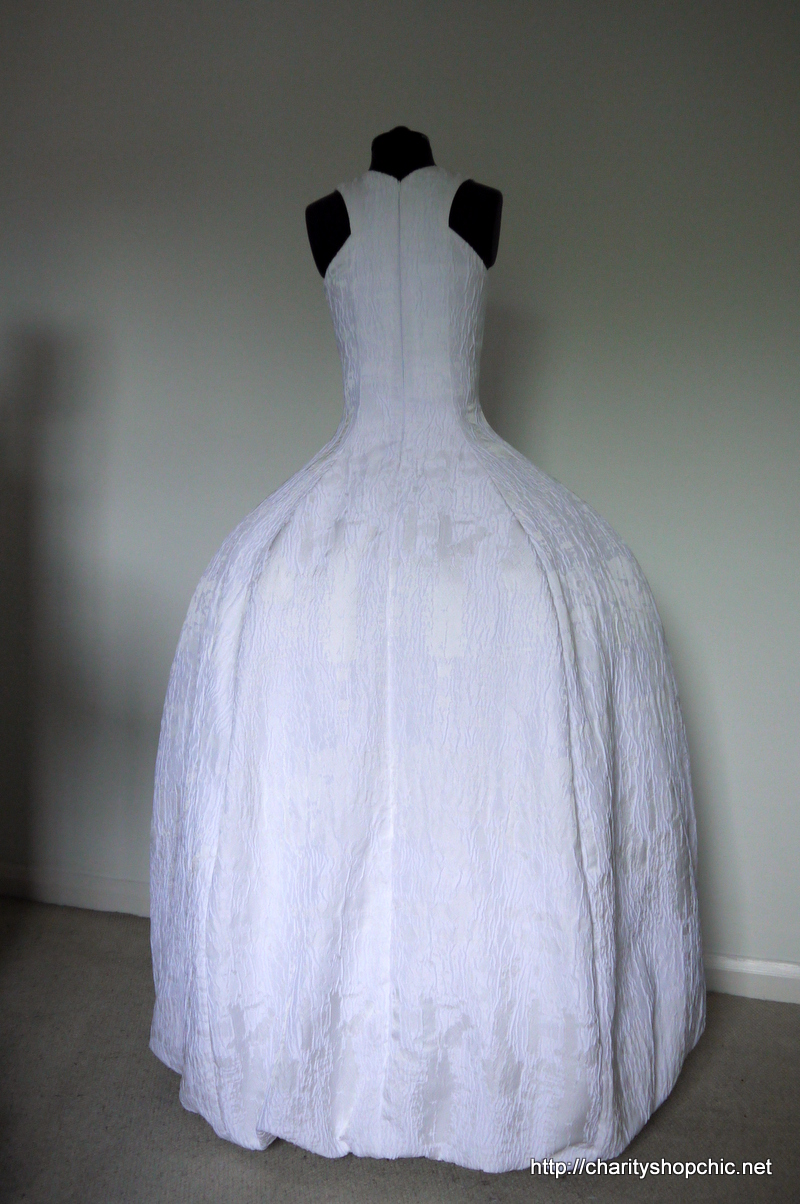
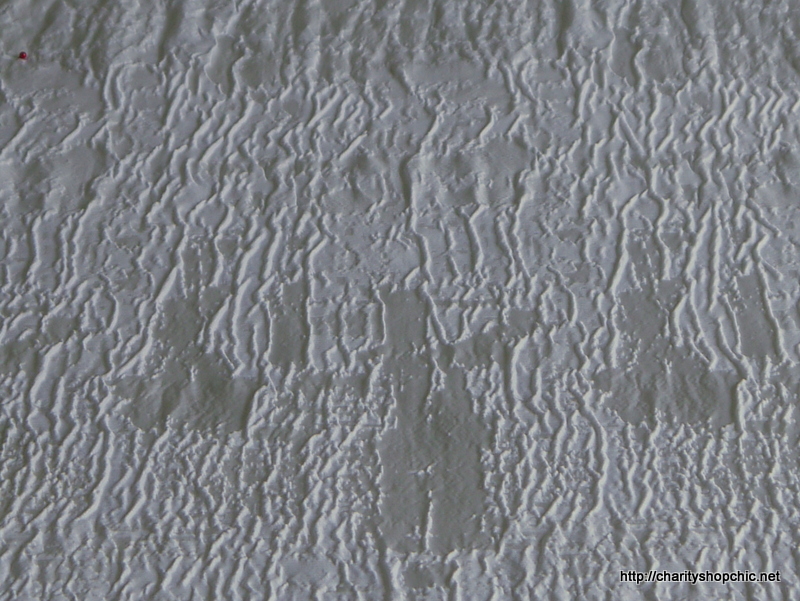
I bought my final fabric from Misan Fabrics in London (unfortunately they don’t have stock online so I can’t point you towards the exact fabric). It’s pretty special. It’s a cloque jacqard, mixed fibres. Parts are white, parts are off-white. Parts are shiny, parts are not. Parts are rippled, parts are flat. Hopefully you can see what I’m talking about below.
The whole thing is textured. Quite unusual for a bridal fabric, but I love it.
I transferred my adjustments from the dress muslin to my paper pattern and started playing with the placement. Right up until the moment I laid a long length of the fabric out on my kitchen table, I’d thought of it as abstract, which of course it isn’t. There are clear repeats in the pattern forming ‘bands’ of similar blobs all the way down. This presented a dilemma; whether to cut the pieces to preserve the ‘bands’ all the way around the dress, or whether to do something different? To make things worse, I had just over 6 metres of fabric and was cutting around two fabric flaws/stains. After much placing and pinning, and replacing, and repinning, I flipped some of the pieces upside down so that there would be no band effect on the dress, to try and make it look as abstract as possible. It took a few goes pinning it all so it would fit and avoid the stains at the same time (and my table is only 2 metres long), but eventually, I took a deep breath and started cutting.

