
Epic Yale
Hi folks! OK, I just got back from a well-deserved holiday, so I hope you are ready for a trillion posts with a gazillion pictures telling you all about it. Sorry, not sorry.
My trip to New England this autumn started with a visit to New Haven, home of Yale University. I was extremely excited to visit this great ivy league institution. But what does one wear around campus, bearing in mind one’s wish to remain stylish while including a nod to one’s academic surroundings?
Of course, I studied all the available cultural references.
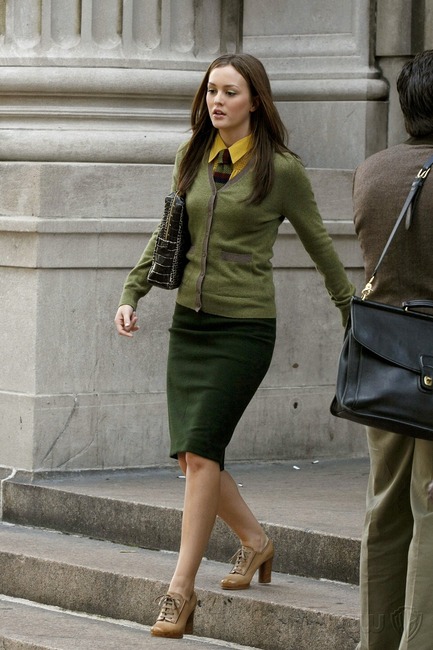


Yes, I know Elle Woods went to Harvard, but it’s realising the reason behind a newly engaged Vanderbilt is ‘first year, Yale law’ that made me think to include her here.
Both Blair and Elle have picked up on the wearing a tie thing, but I’m more enamoured with Serena’s incredible blazer. I believe this is the ‘Goodman’ crested blazer from Ralph Lauren, which I found out courtesy of the lovely Devra over at Puu’s Door of Time. Devra made a beautiful blazer based on this a while back, which I’d encourage you to check out here and here.

Anyway, I’m going to follow Ms Van Der Woodsen’s lead with a blazer, but combine it with a tie as a twist on the Blair/Elle look.
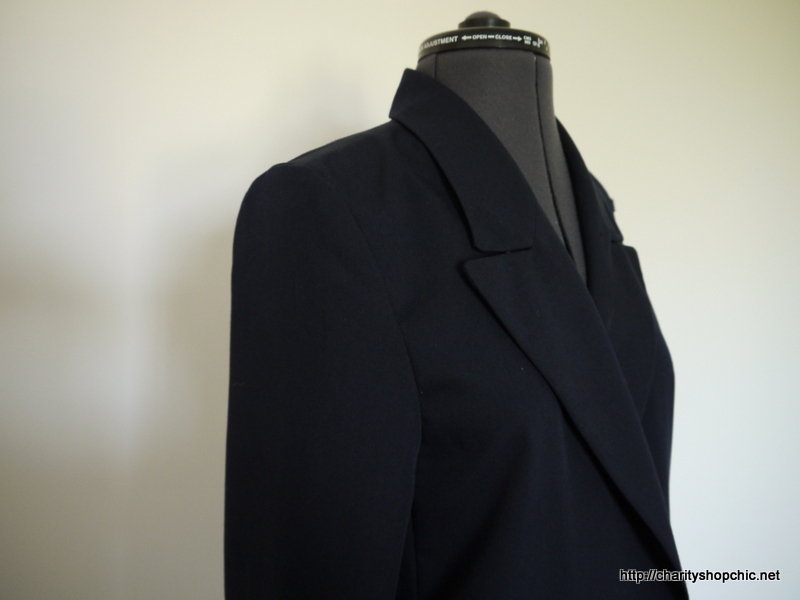
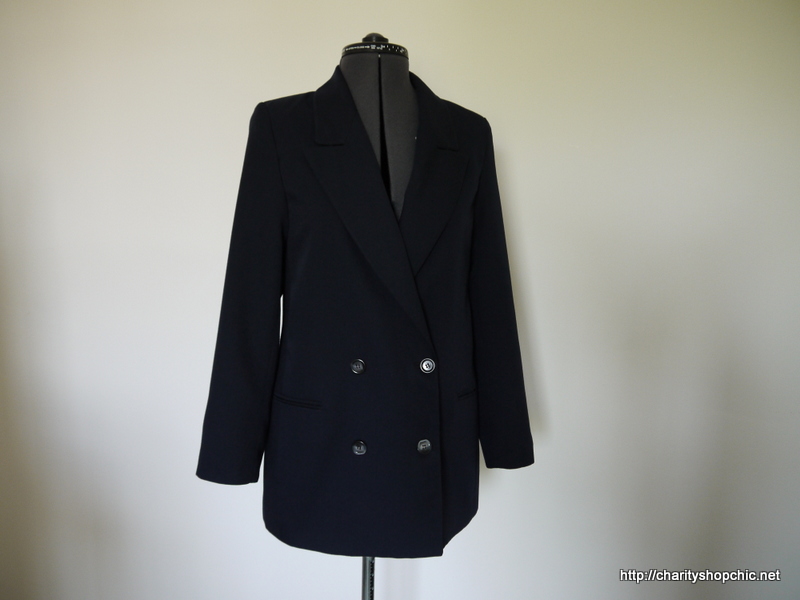
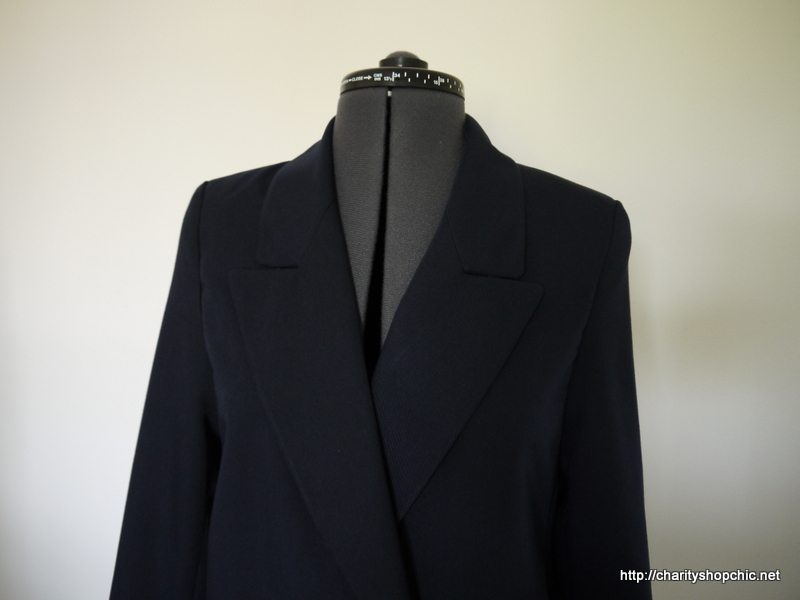
Here are the blazer and tie I picked up on a trip to Orpington. The blazer was £7.99 from Oxfam while the tie was around £1 from Save the Children, if I remember correctly (ties were half price). The tie is 100% silk and not covered in food stains, which I counted as a win. The blazer was in reasonable condition although it didn’t fit at all.


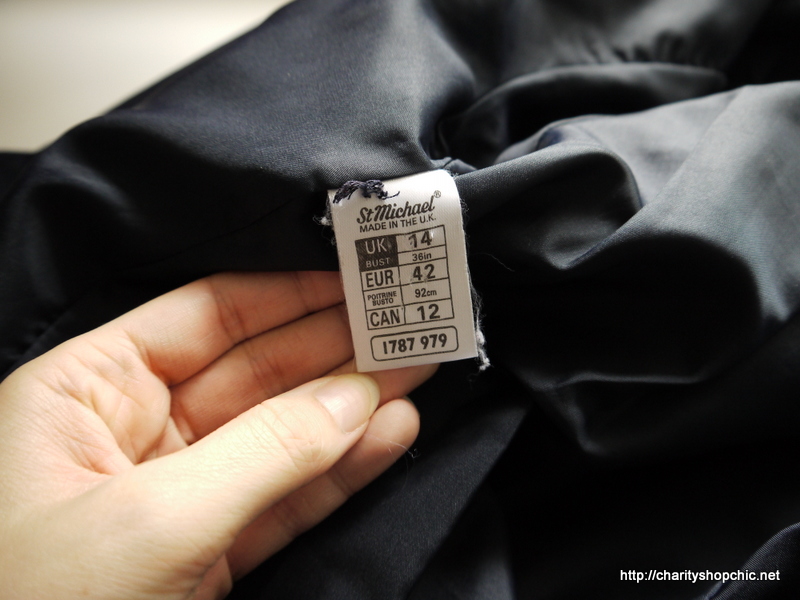
On closer inspection, the blazer sleeves had clearly had their length altered at some point, though it’s unclear whether they were lengthened or shortened.
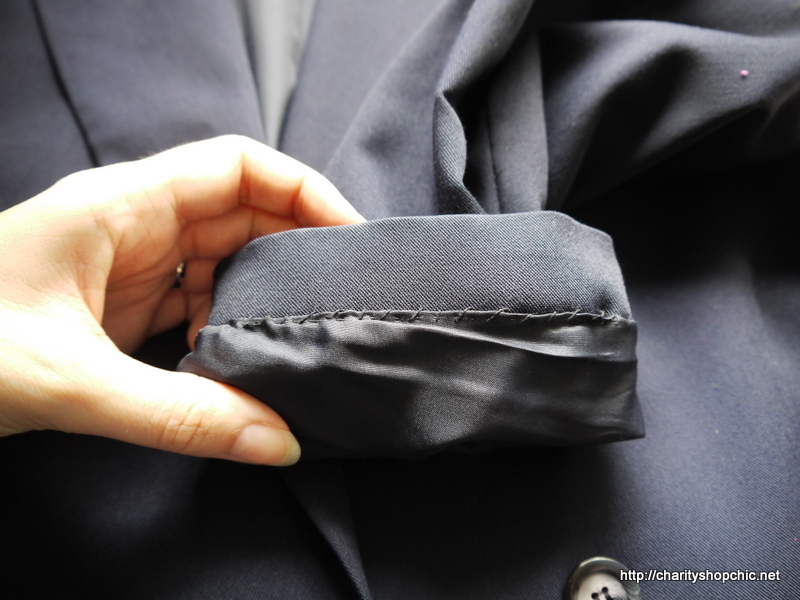
To resize the jacket, I started by removing the sleeves, which meant disassembling the sleeve heads.

I drew around the shape of the armhole to use as a template later.

Then I pinned out the excess around the body while wearing the blazer (my dressform is modelling it here, obviously).

The blazer has a side panel which intersects the welt pocket at the side front. I took in 2cm from the side front, tapering to zero before the pocket, and 3cm tapering to 2cm from the side back on both sides.


The blazer already looked better. Based on the length of my own shoulder, I marked roughly where the sleeve head should be on the jacket, about 4cm from where it was.


I then pinned on my template, positioning it based on the bottom of the existing curve and the marked shoulder point.

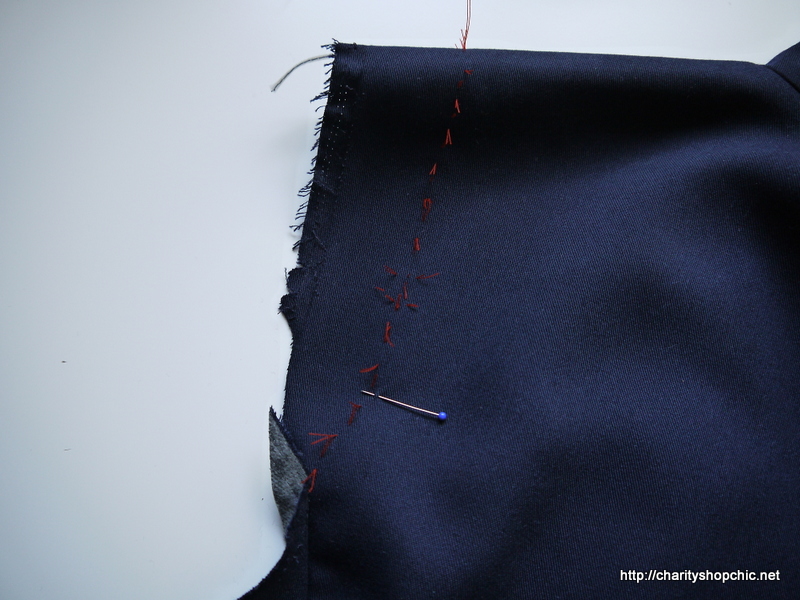
I sewed big stitches (basically tailor’s tacks) along the lines.
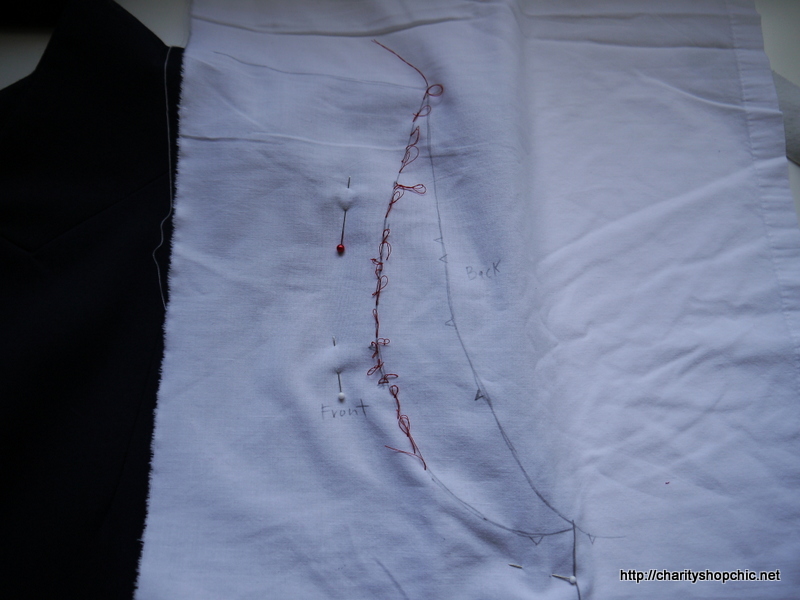
When I cut the stitches to remove the template, I was left with a cutting guide for my new armhole.


Of course, I did the same on the back.
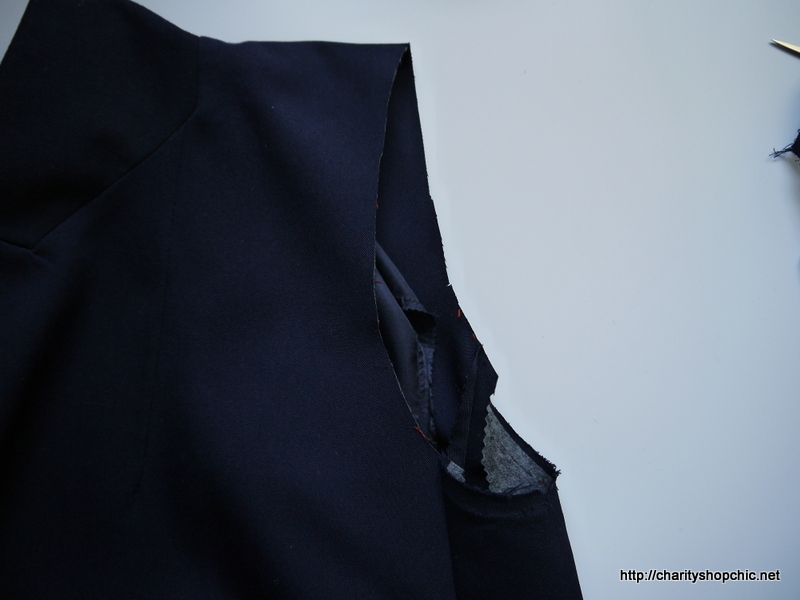
I took a deep breath before cutting, but the result looked good.
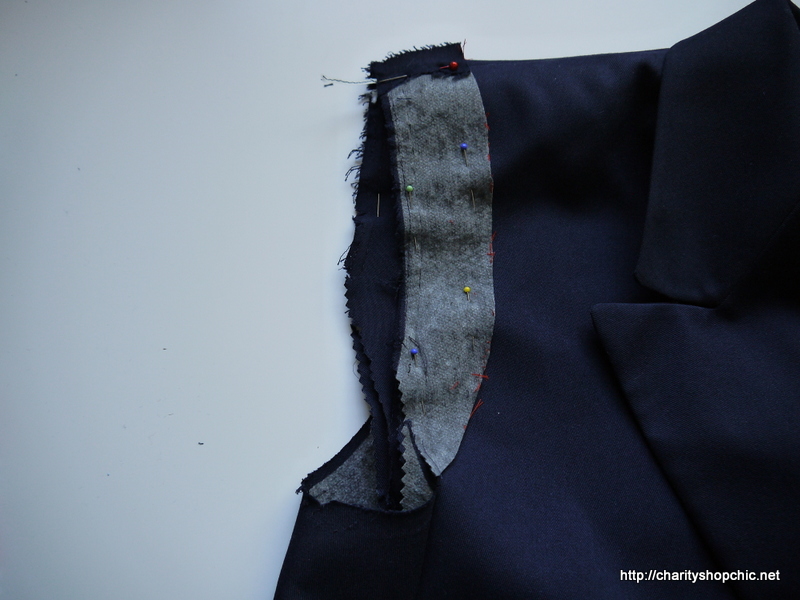
Rather than repeat the process on the other side, I pinned on the section from the other sleeve and used that as a guide for how much to cut off.
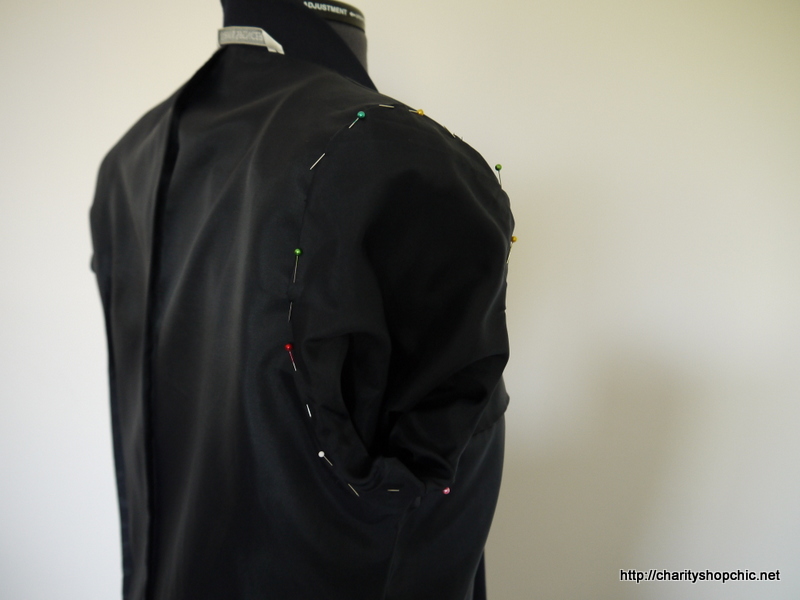
Then came the pain of resetting the sleeves. I use the traditional gathered stitch and 100,000 pins method.

Despite my worries, the sleeves went in well, which I am attributing wholly to getting the armscye curve accurate in the first place.
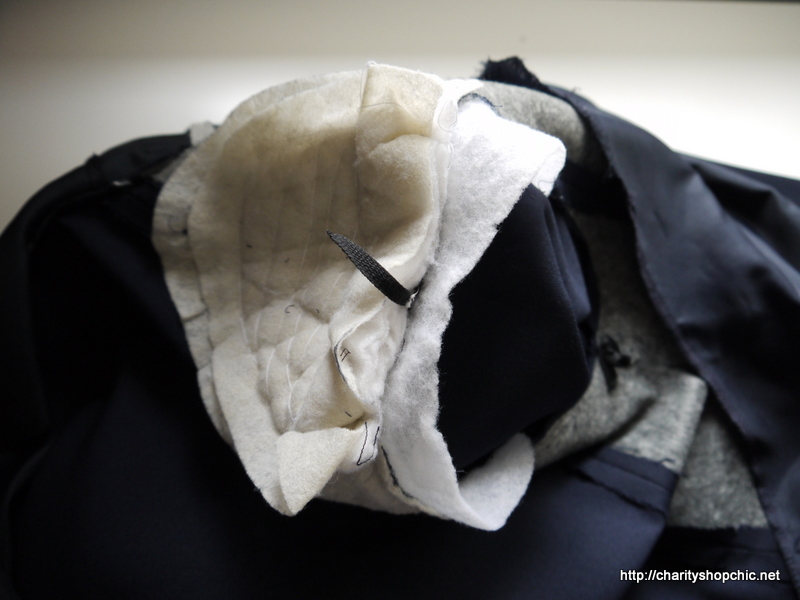
I then had to reattach the shoulder pads and sleeve cap padding. I had to cut the shoulder pads down a bit because they were now too long for the shoulder!

It was coming along nicely!
The lining I actually draped on the stand and sewed by hand. It was a totally different shape than the shell and I didn’t want to go through the whole process again.
The result is reasonable but not perfect.

Once the blazer had been refitted, I tackled the tie.
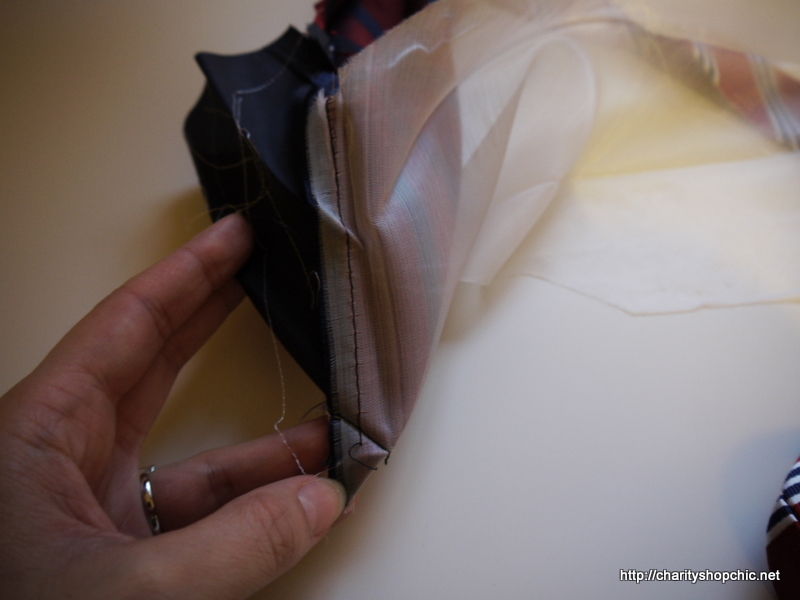
Ever wondered what’s inside a tie? A tie is basically a bias-cut piece of silk, with some padding and some small pieces of lining at each end.
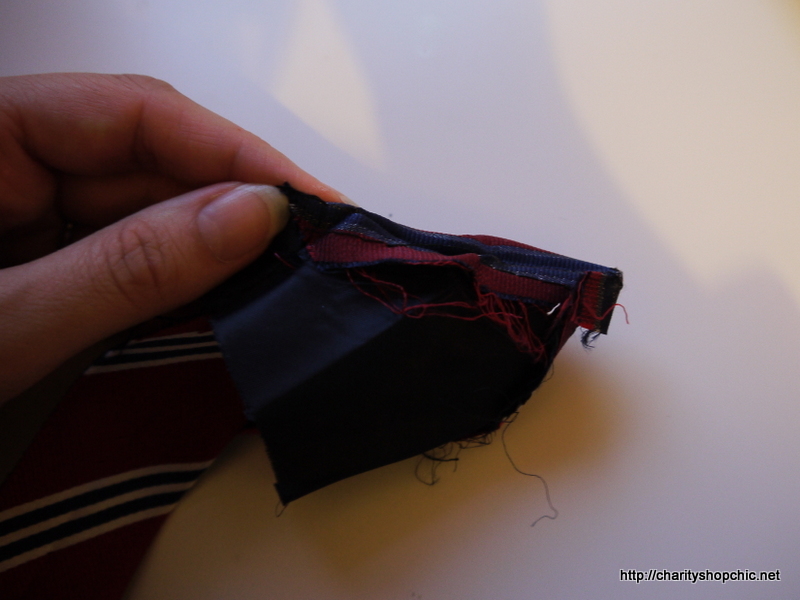
Here’s the small end.
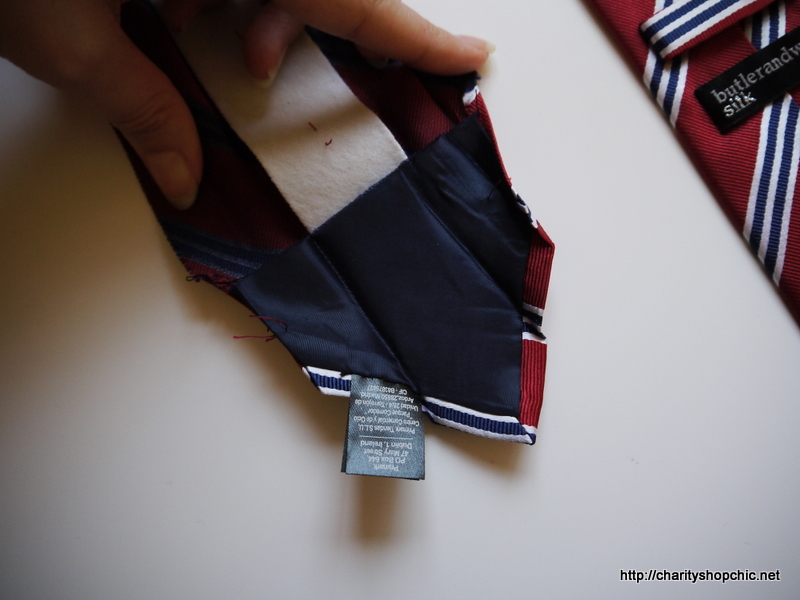
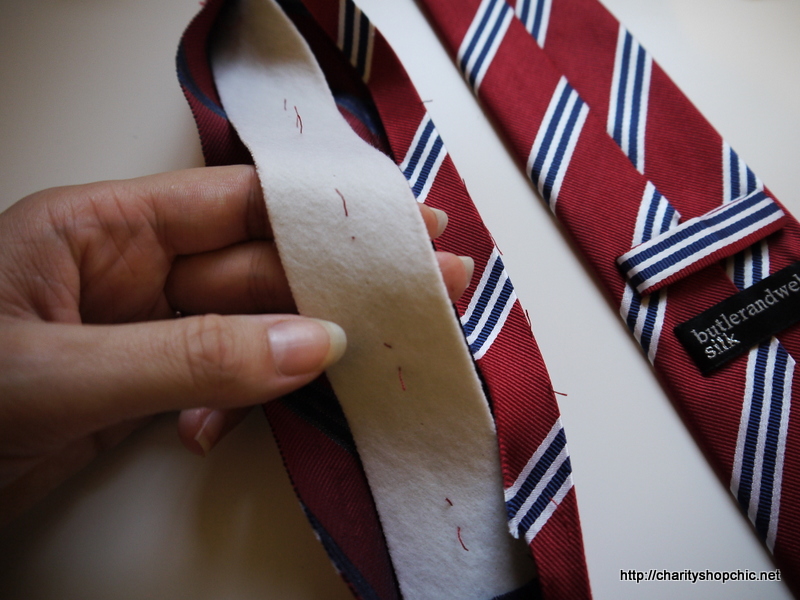
The padding is actually really thick. The seam up the middle of the tie is sewn by hand through two layers of silk, catching the padding. Note that the top layer of silk isn’t caught, so the stitch is invisible.
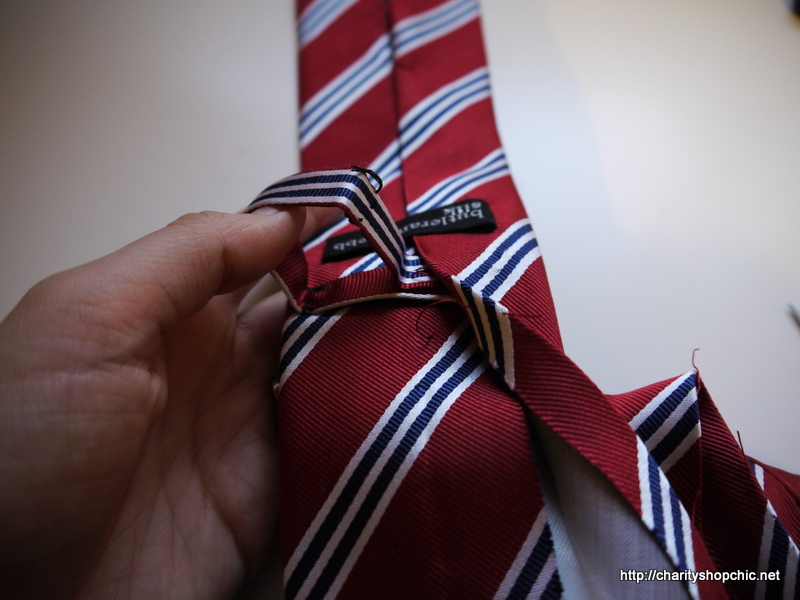
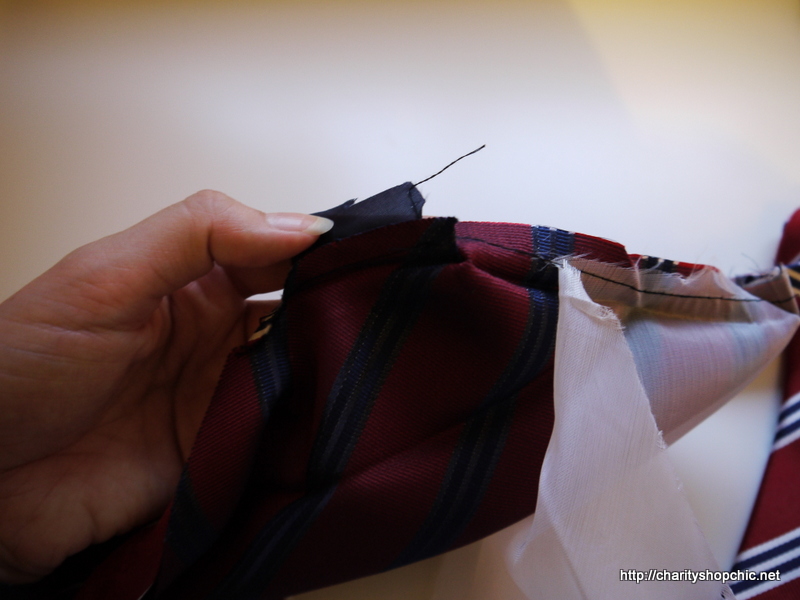
There’s usually a loop sewn in towards the big end as well. This is the only part cut on-grain.
Here’s the big end, which has a layer of bias cut (I think) poly organza to help the silk keep its bounce.

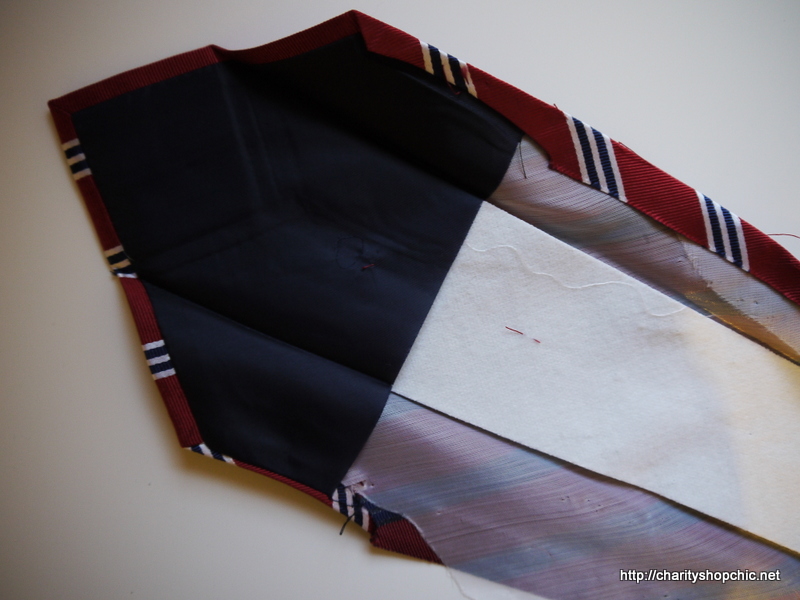
The corners are sewn as mitres, but it was a bit beyond me to figure out exactly how this is worked and in what order.
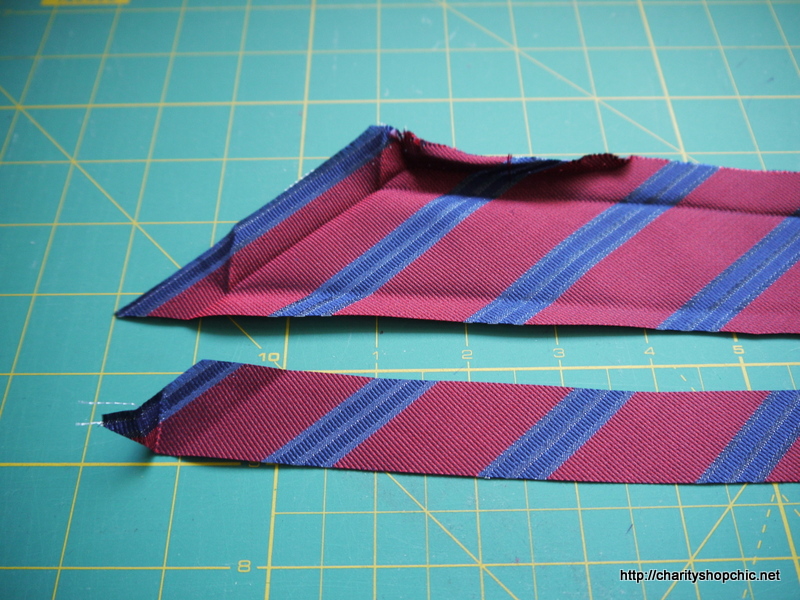
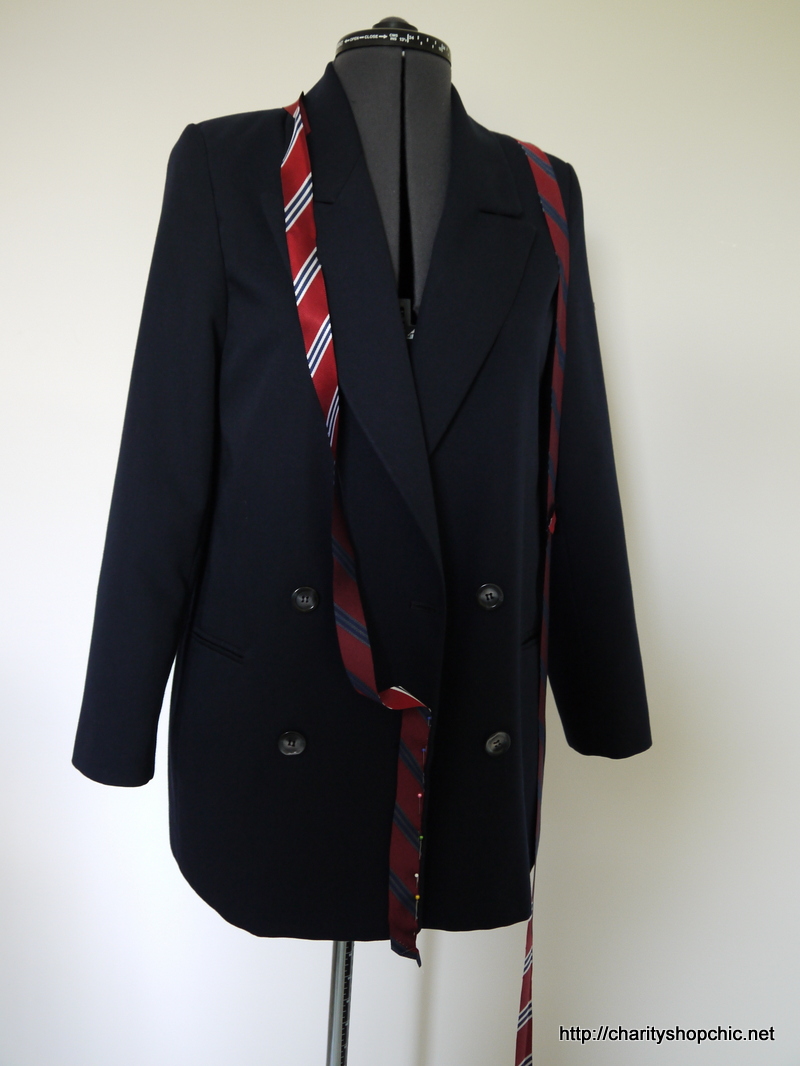
Anyway, once the tie was completely deconstructed, I cut some strips for my binding. I wanted to bind all around the front opening and lapels, plus the hem, so I measured the jacket to work out how much I’d need. I then measured the length of the tie to figure out that the strips would have to be rather thin. Of course, since the tie is already cut on the bias, I cut strips down the length of it for my binding.
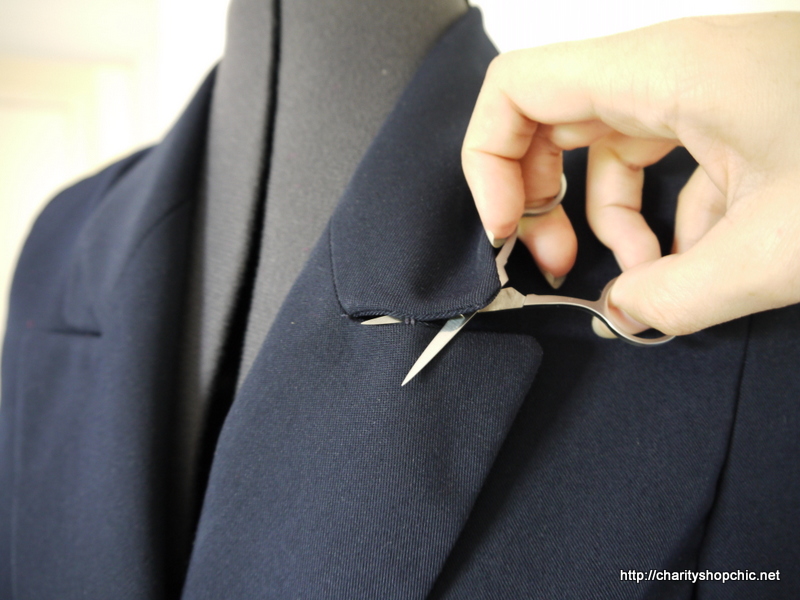
I cut the stitches holding the lapel points together so I could bind around them!
My process for this was a little unorthodox. I pinned the binding to the jacket right sides together, then sewed it on. Then I turned the binding to the wrong side and stitched-in-the-ditch to secure it. The raw edge was left open on the wrong side, because the strips weren’t wide enough to be turned under again. I figured the edges wouldn’t fray so everything would be peachy. Of course, I had forgotten that halfway down the front opening, at the break point of the collar, the right side changes to the wrong side. This made it very difficult to attach the front strips in one go. In the end, I fudged it, but I don’t think you can tell if you don’t know that’s what happened.
I pivoted the corners the same way you would for quilt binding.

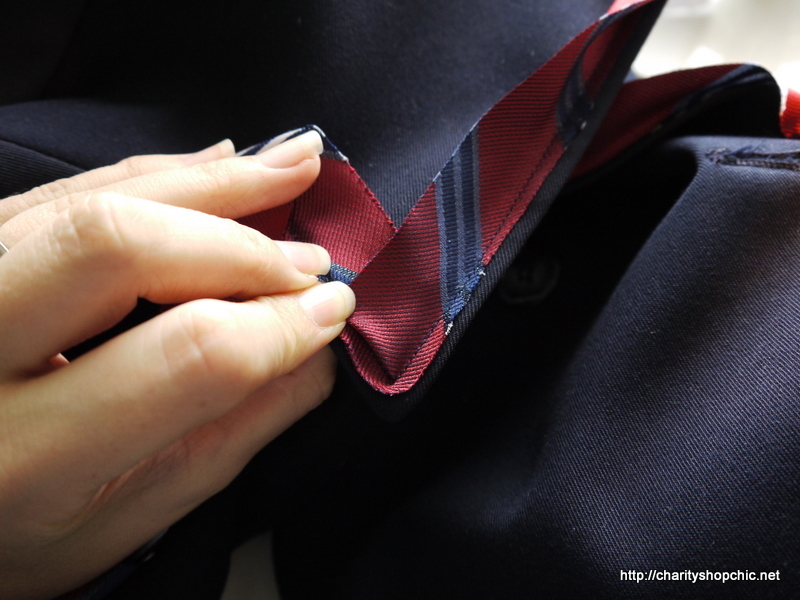
For the lapel points, I couldn’t get a good result with a continuous piece, so I cut them off and restarted with the end turned under.


For the interior corners, I cut two triangles from the offcuts and sewed them on by hand to cover the join in the binding.

After a mammoth task applying all that binding, including restitching the hem binding numerous times, my thoughts turned to adding a badge. A blazer isn’t a blazer without a badge, and Serena’s Ralph Lauren design has a very large crest surrounded by what looks like quite a lot of silver goldwork. Goldwork is the art of embroidery using metal threads, typically used for ecclesiastical robes and military insignias on uniforms. I’m not a goldwork expert but I have taken the goldwork course at Mastered.com (actually, I am the student that was filmed learning the techniques at Hand & Lock in London for the online course).
Anyway, the design of the badge took a little thought. After briefly considering the coat of arms of my alma mater (very impressive but four complete lion shapes in goldwork was probably too complex for a first project, I thought), I decided on the coat of arms of my home town. Whitby’s coat of arms is based on three coiled serpents representing the story of St Hilda casting the snakes into the sea, where they became ammonites. The full crest has an anchor and other nautical paraphernalia honouring the town’s link with the sea, as well as the white rose of Yorkshire x3.
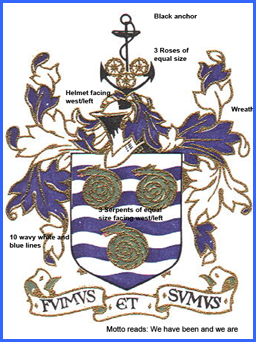
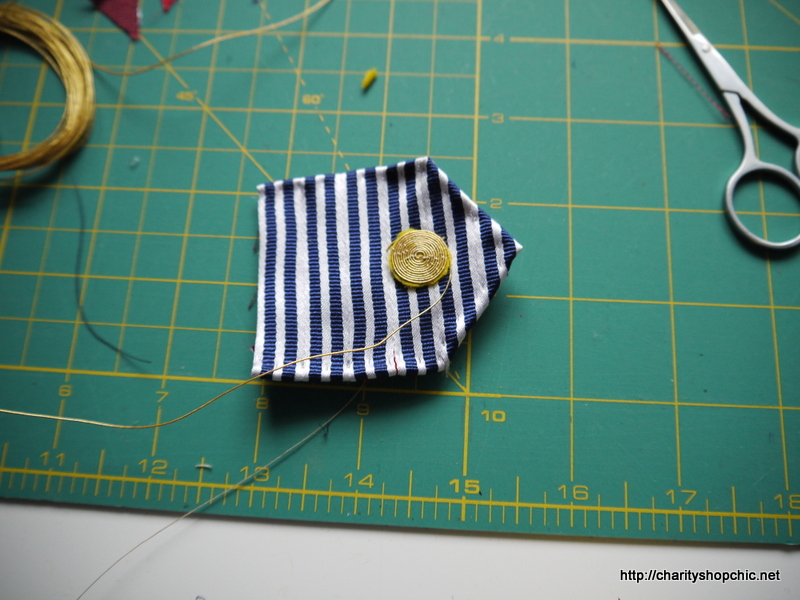
So I decided to go with a simplified version, as seen on the town council’s crest as well as the badge for Whitby Town FC. The design is blue and white stripes representing the sea, with the three coiled serpents. I was particularly happy about the blue and white stripes as that matched the tie.


For the goldwork serpents, I used Japanese thread, which is commonly used in goldwork. It’s normal thread with gold foil wrapped around it. You apply it using couching, which is basically sewing it to the background with small stitches. Goldwork designs are typically worked on felt as a form of padding.
I started to experiment to see if I could make a spiral by ‘plunging’ the end of the thread (poking it through to the wrong side) then gently wrapping the thread around, securing it with the stitches.

This was only intended to be an experiment, but I liked it so much I cut it out and applied it to my badge.

The badge is cut from pieces of leftover tie. I used the final rounds of the Japanese thread to cover the edge of the felt, giving the circles a slight 3D look.

The end of the gold thread is then ‘plunged’ to the wrong side of the badge.

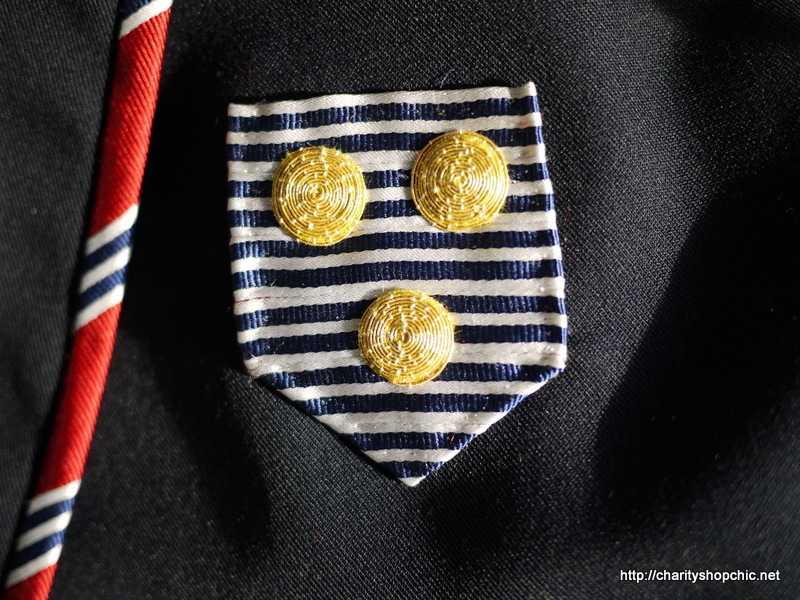
The two other spirals soon followed.

Here’s how the final badge looks, applied to the blazer. Looking at it now, I realise that some are anti-clockwise and some are clockwise, and the plunged ends should be all at the top of the spirals, but overall I’m really happy with it as a first goldwork project.
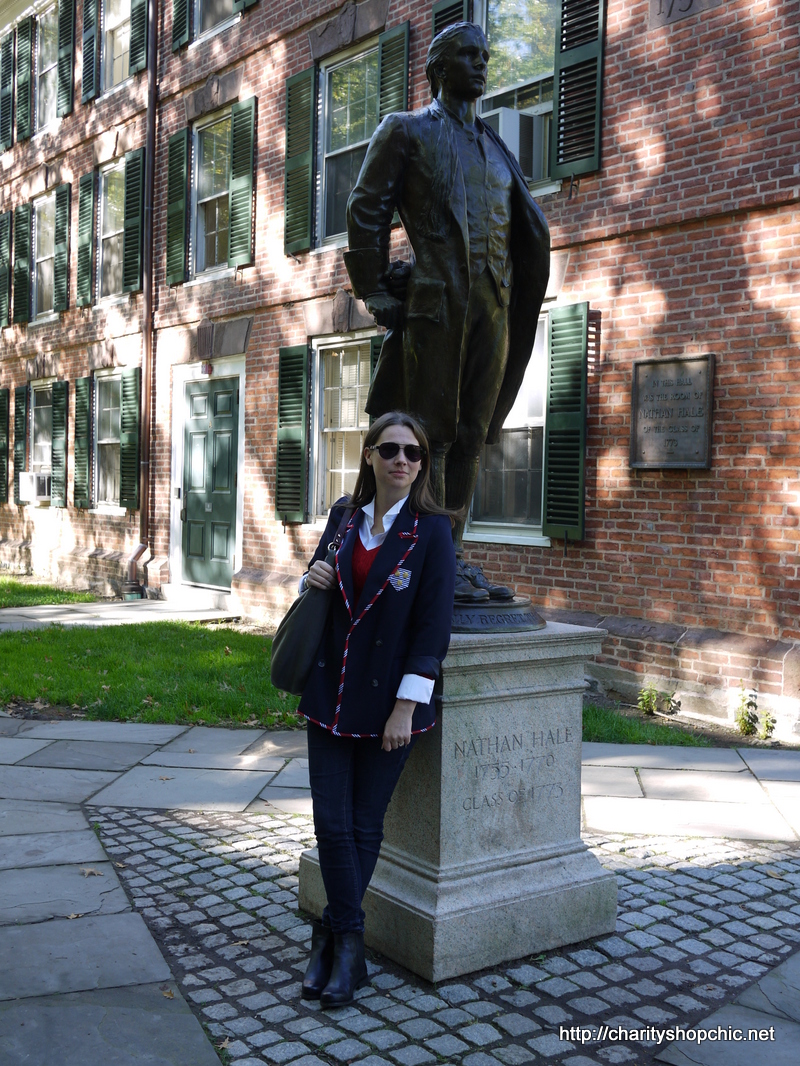
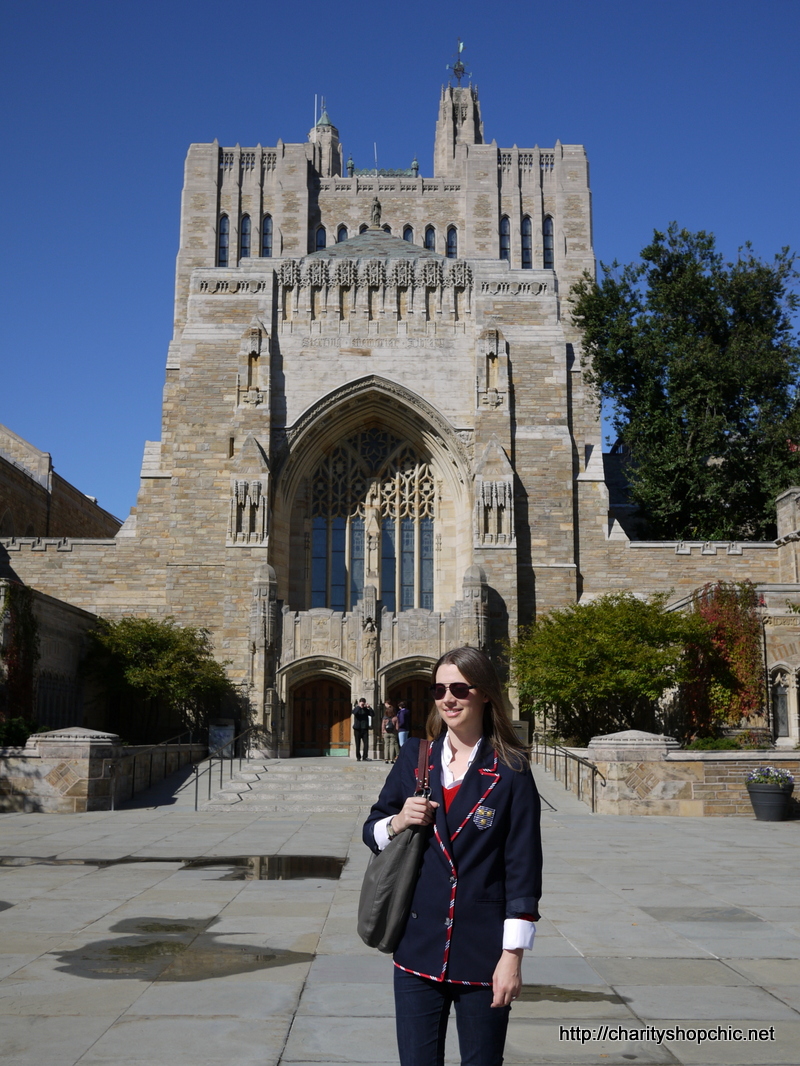
And the moment you have been waiting for… here is me wearing my blazer on my trip to Yale. Overall I was a bit worried that the look was more ‘Grange Hill Chic’ than the rowing blazer look I was going for, but I loved wearing it all the same. You can see that I am wearing the sleeves rolled up because they turned out far too short as a side effect of shortening the shoulder line. An unintended consequence, but truthfully I’d probably be wearing it like that anyway.l
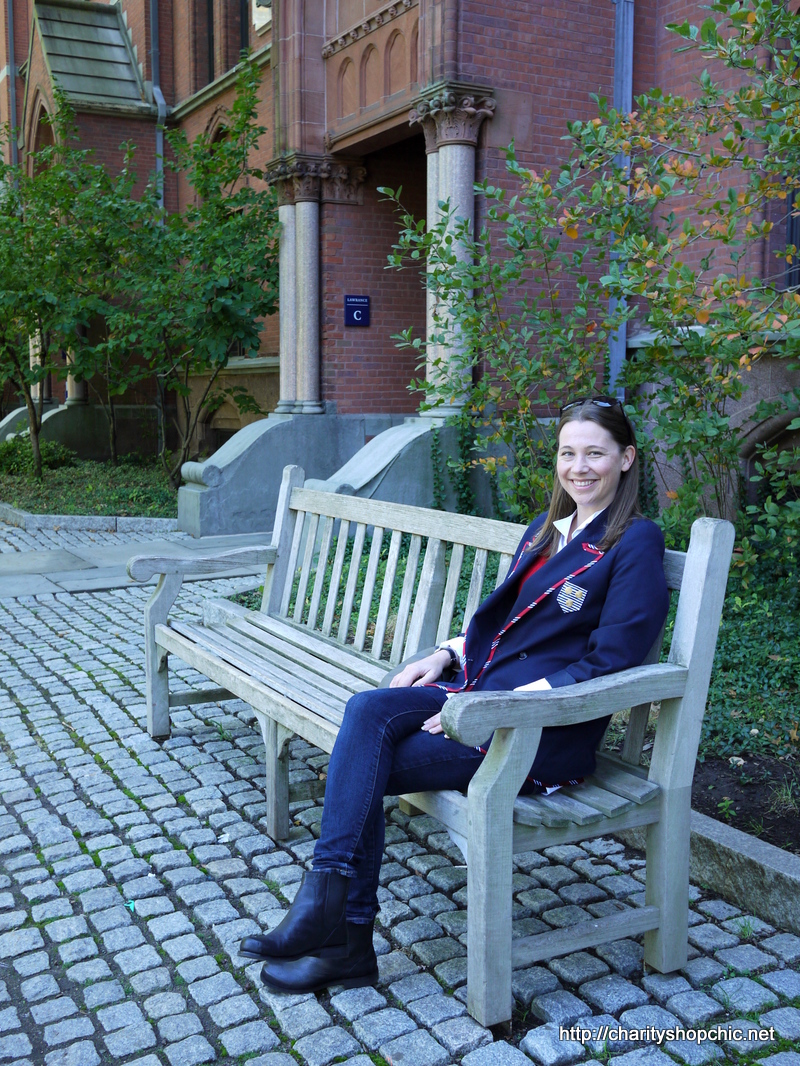
This brick building, Connecticut Hall, is the oldest part of Yale.

You can see that I’m inspired by Serena’s jeans, black boots and white blouse combo.

Here’s me with the famous American spy from the Revolutionary War, Nathan Hale. He is the state hero of Connecticut!

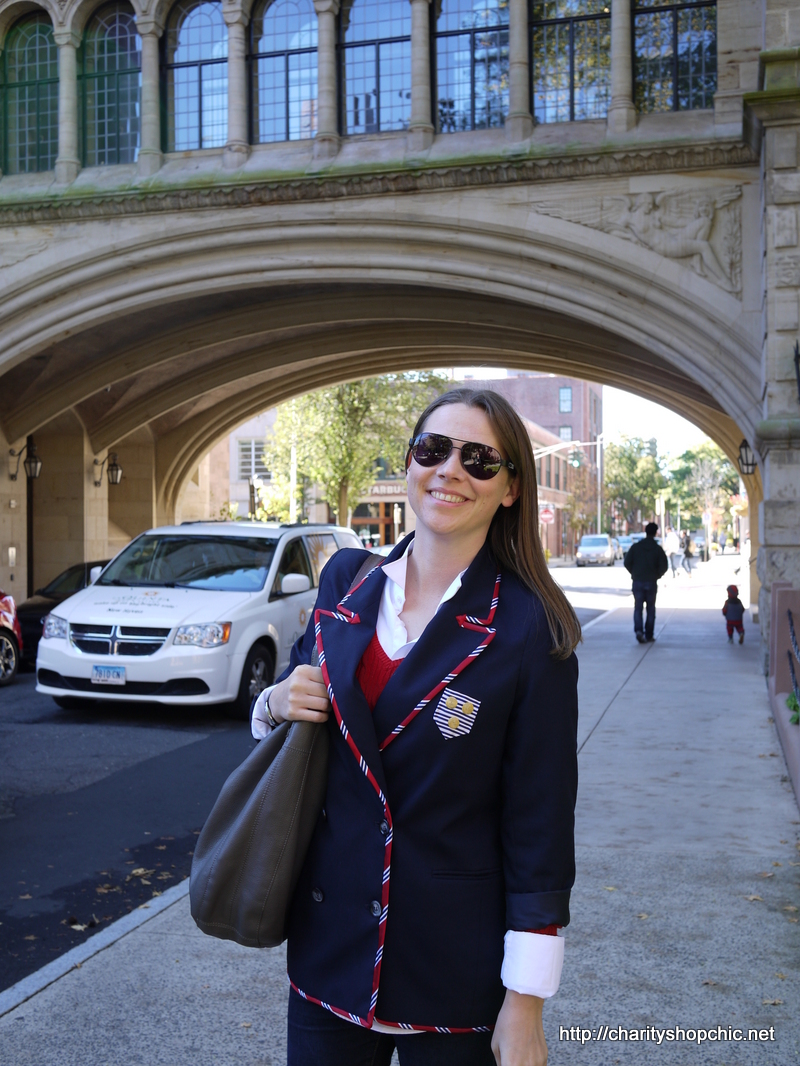
Here’s a better close up of the blazer with it done up.

Ooops, my bad, that’s Elle Woods again. I did sit around in the Quad to see if Luke Wilson would show up, sadly no dice.
This last one is my favourite picture from the whole day. The Beinecke Rare Book & Manuscript Library is a truly stunning piece of modern architecture, well worth a visit.

Stay tuned for more US adventures coming soon!

Oh my goodness what an amazing job! That tie trim looks superb and love the story behind your crest too :)
Fab pics – v jealous (and looking forward to seeing more pics and projects ) of your trip to the states. Am determined to go next year! :D
http://www.mancunianvintage.com
Thank you! Sorry for the long post, it’s a bit of a stream of consciousness but hopefully it all made sense… you should get yourself out to NYC or California, it’s great fun! And they have thrift shops!
You don’t know how excited I was to see a new blog post from you pop up on my bloglist! Fantastic job on the blazer, especially setting those sleeves back in. Love the tie trim, so neat, and the crest is so clever, well done!
Hi Claire, glad you are enjoying reading! The sleeves went in almost too easily, but the result is good… overall I’m happy!
You are a genius! Never would have thought of using the tie as binding on the jacket! LOVE IT! Keep up the great work!
Thanks Elaina, once you realise a tie is essentially a long piece of bias cut material it’s a natural jump to bias binding!
That looks like it was truly an exercise in frustration! I was particularly interested b/c I have a great blazer that I’m going to do some deconstruction to. It’s a man’s coat, but the lining is navy with red binding! I got so excited when I saw it, I had to buy the coat. Now you have me thinking I should do some binding on the outside as well…..Wheels are turning…….
It was a lot of work, yes, particularly the binding which was just that bit too thin to enable it to be applied properly in a way that looked good on both sides. Your coat sounds interesting – my advice is to cut your binding nice and wide!
Oh My God it’s awsome!!!
Thank you very much, glad you liked it!
Wow. Very inspiring AND helpful. Thanks for sharing!
You are welcome! Thanks for reading!
Fantastic as usual! The trim around the lepels ia great. And the badge – just perfect.
Thank you Nicole :) I attracted more than a few stares walking around Yale in this!
You are adorable!! I love Elle and Legally Blonde too! This post made me smile. Glad you had a great trip! Looking forward to see more.
I’m glad this made you smile, I certainly had fun wearing this around Yale! I definitely had Elle Woods in mind when making it.
i love this! great work, totally inspiring! and i hope your visit went brilliantly! i was following it eagerly on twitter ;-)
You’re the inspiring one, I hope you wear your Serena blazer often! I was actually thinking of making a Serena-copy blazer from scratch but changed my mind when I saw it had already been done, and so well! I loved my US trip, wish I could get out there more often…
Okay, this is seriously awesome! I’ve always been too afraid to take in a good blazer like that, I think I won’t be able to assemble it right with all that lining and stuff. You boldly went where I have never been before! Kudos!
Thanks, glad you like it! Taking in jackets is tricky and time consuming, but not impossible. My advice would be to practice, as they are all constructed similarly. Have fun!
quel incroyable travail pour un résultat magnifique.
Merci beaucoup! :)
OMG !!! what you succeeded todo with this tie! A wonderful idea! THANK YOU for sharing.
Thanks Liochka, there wasn’t much tie left when I finished!
Such a clever idea to use the tie as trim – I’m now eyeing off all my husband’s ties! I love this blazer and it is so preppy as to be perfect.
Thanks, Sue! I love the preppy look. Depending on the width you want, you can get quite a lot of binding out of each tie. I’m now considering it for seam binding on other projects.
Great job. A lot of work but the end result is really cute, perfect for the occasion. I like the use of little cut out triangles to tidy up the binding it’s very effective
Hi Tracy, thanks for commenting! Glad you liked the blazer. The triangles solved a problem but it would have been better to bind the corners properly somehow…
Wow, all that effort was so worth it! You definitely look like a Waldorf!
Or even a Van der Woodsen! Thank you for commenting!
You picked some great style inspiration and I am majorly impressed with your DIY skills. Great jacket.
Jennifer Jayne xx
jenniferjayne.blogspot.co.uk
Thanks Jennifier!
Yet another stunning piece of work, Sally. You constantly amaze me.
Thanks so much, Kim. I really enjoyed working on this one.
I’ve missed your blog posts – and now find out you were nearly in my backyard (live in New Hampshire, not far from Connecticut! Love the blazer. May try this – but on a blazer that fits me, as I’m not as ambitious :)
Maddi
That’s kind of you to say, Maddi. You’re right, this would have been a lot easier on a well-fitted blazer, but I do like a challenge!
This is a fantastic remake, particularly the technique for keeping the armscye curve and translating that back to the garment. Superb.
Glad you found it useful and thanks for commenting!
My favorite design element are the little triangles on the interior points of the lapels!
JJ
http://www.dressupnotdown.blogspot.com
Ha, thanks JJ, they were an unintended addition but it works well enough to cover the raw ends!
Wow. I am in awe. What a lot of work, and how impressive. I enjoyed reading about every stage of this, thank you!
Hi Winnie, you are welcome! It was a bit of a stream of concsiousness but I hope you followed it OK. Now to find other places to wear it!
Love it! That binding is genius. So we’ll applied with the arrow points.
Eat your heart out Elle
Ha, yes I do have my style icon Elle Woods to thank! Thanks for commenting, Amy :)
Great blazer! I love the detail of the binding! And thanks for the tutorial, I just thrifted a blazer that is way too big, so now I have the perfect post to turn to when altering it!
Sounds great, Birgit – definitely trace the armscye curve and make a note of where the notches are so you can get the new armhole right, it makes a big difference! Have fun!
I love what you did with the tie! Very smart.
Thank you! :)
Marvellous! your work is so neat and you follow through so well. i love the idea of using ties as binding. i will look out for interesting ones next time i am at the opp shop
Hi Catherine, thanks for the kind comment. Ties make great binding, the only problem is making sure you have enough. Have fun!
I can’t even…I mean the amount of detail you put into this just makes you the best! I’d wear this any day. Congrats! Again!
Thanks Jasperizer! Glad you liked it!
I discovered your blog a few days ago, and have been up late reading into the archives. I’ve been refashioning for almost 50 years, my first models were my barbie dolls! It is so satisfying to find a gem in the thrift shop and reuse the item or fabric for our current needs. I got a kick out of you deconstructing a tie, as I did that many times making child size ties for my sons back when they were small and we were hideously poor. But honestly, I got much more contentment out of that than I would have just purchasing things in a store new. I’m perverse that way I guess.
Your sewing skills are top notch, something I have found sadly lacking in some of the refashioning blogs I have found before now. Bravo.
Hi Suzi, thanks for the supportive comment :) I agree, refashioning is very satisfying… I haven’t been going as long as you have but I still enjoy the hunt for a good bargain and the satisfaction of a project well done!
Wow! You are so talented! I always look forward to your posts! By the way, I was watching The Devil Wears Prada with Meryl Streep and Anne Hathaway recently and I noticed this jacket that looks almost exactly like the one you created here. Just wanted to share because this is awesome!

This is the link of the picture if you want to check it out:
Do you know what, Charlotte, I totally had this blazer in mind when I first came up with the idea of binding a blazer edge with a tie, so I’m kicking myself for not including it here. It was many months ago so I filed it under ‘someday’, even researching pictures of the same blazer from Chanel cruise collection, 2005. I guess I just got caught up with excitement for my trip to Yale and forgot the original provenance of the idea!
Here are some of my pinned images of it.
This is such an epic refashion! The creativity and the labour and vision that went into this…..unbelievable!
Thank you – it certainly was an epic but it’s an idea that’s been festering for a while, so I’m glad I got the chance to finally try it out! And in such a magnificent setting too :)
Love your blazer! You have impressive sewing skills. I don’t often like most of the refashion I see online because most don’t have advanced sewing skills and can only do very basic changes to a garment, and it often ends up fitting worse than before. Your stuff is by far the best I have seen. You seem to truly understand how a garment is supposed to fit. Thanks for the inspiration!
Thank you, Pam! You are very kind. I feel sad when people dismiss refashioning as being for people who can’t sew and am on a one-woman crusade to change that perception :)
I am a year late with this message, but I just discovered your web site. I enjoy your meticulous methods, but the reason I am commenting on this particular refashion is how you did the sleeves. I recently took up a blouse that was too big and redid the sleeves by trial and error. Copying the curve of the arm scye, seem so simple that now I am going to look for a too big blouse or jacket to redo.
Hi Gail, thanks for reading! I’m so happy you can use this idea on your blouse. Best of luck with it!
Oh wow Thais is amazing and thank you for sharing the process! I love how you used the tie!!! I’d love to see more from you:) thanks, Ines
I eenjoyed reading this