
Wedding Dress: Part 2 (Muslin)
This is the second post in my series about my wedding dress. Today I’m going to be talking about the muslin I made and how it helped me finalise the shape of the dress and the underskirt.
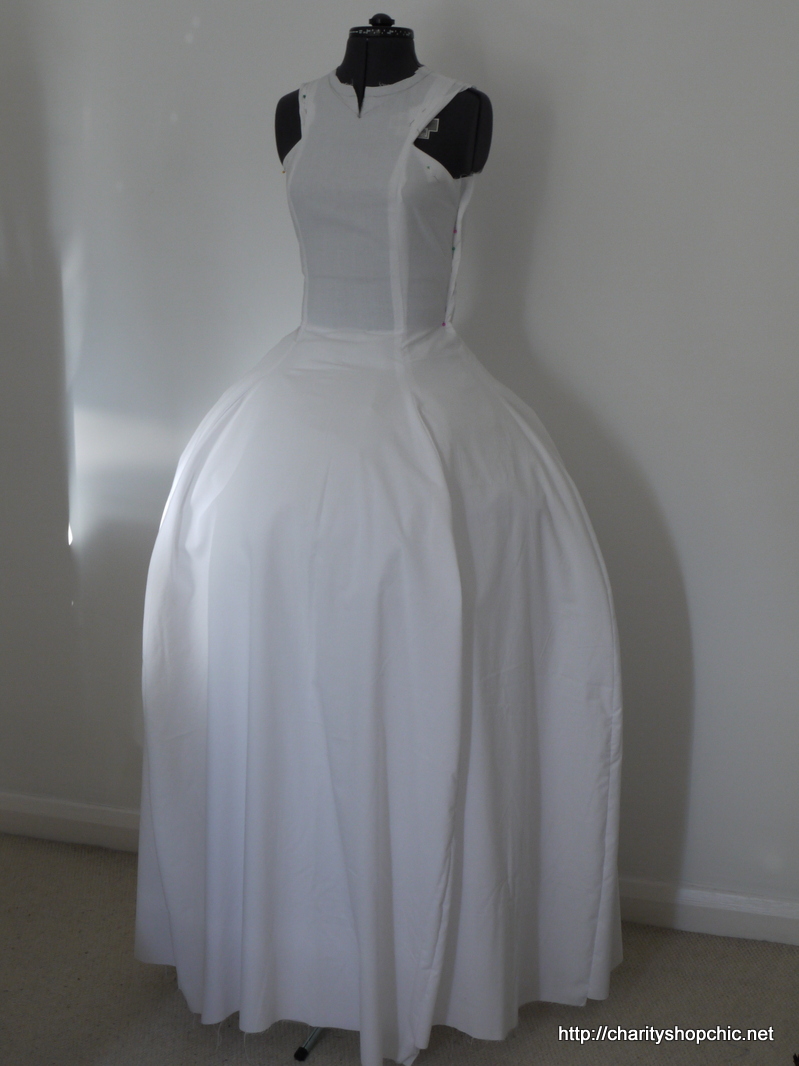
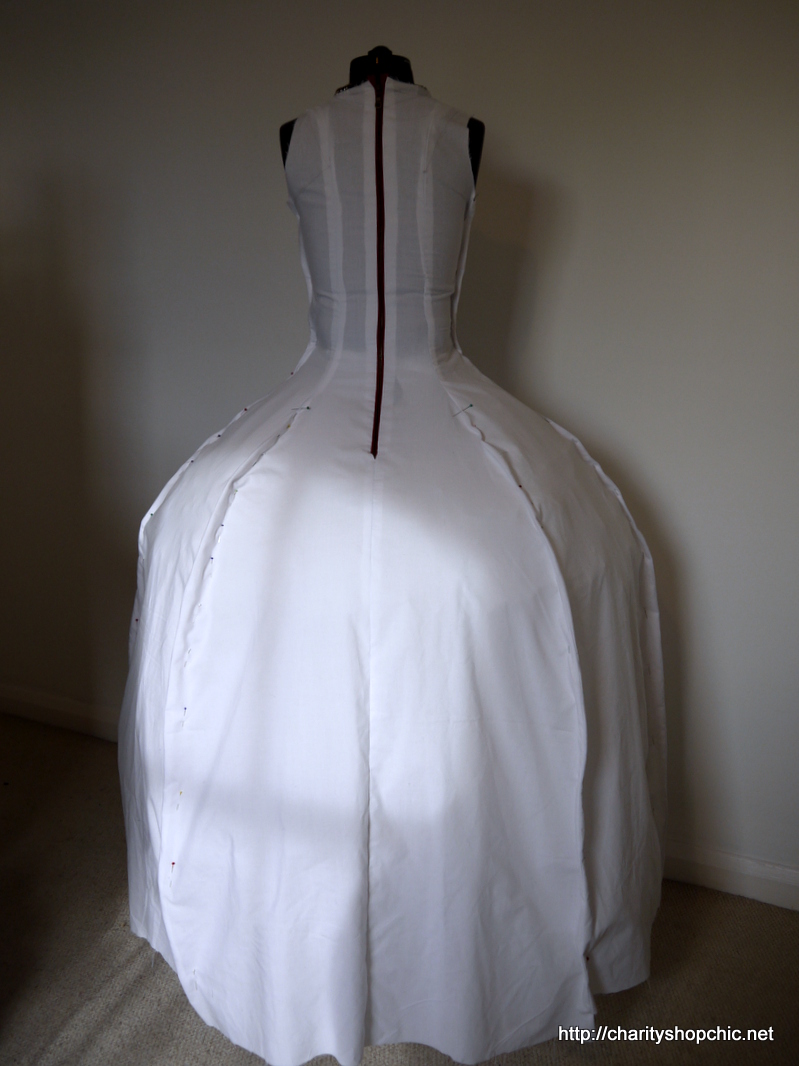
I started with my own copy of my Martini pattern as a base – not that you’d ever know it, looking at the shape – because it had had many fitting tweaks and was the most up to date version of a good fit. But it helped me get the fit right straight away. I had to mash several pieces together and redraw them all and… well I ended up with this (below). I played around a lot with the shapes of the arm holes and neckline and I removed most of the fitting ease from the bodice (the top half wanted to be pretty much skin tight as it would be over a corselette). The skirt shape was a pretty exaggerated bell.

You can see I’ve drawn on the back armholes in pencil.

A close up of the bodice… I tried it with a necklace as that’s how I intended to wear it.

Here’s the shape of the skirt panels; they are massive.


To get a better idea of the skirt shape, I needed to make an underskirt. Here’s the rough structure I came up with (this is not a muslin – I just tweaked this one until it was right for the final dress). It’s a poly satin tube tapered toward the waist. This will be covered in tulle/net ruffles to give the dress volume, while keeping the tulle from my legs so that I could walk. It looks a bit rough here because this is the wrong side – the right side is towards the inside.

The structure is stabilised by hoops made of flexible plastic boning. Since the top hoop bears the weight of the skirt I put two hoops there (it wasn’t enough in the end – more on that later).
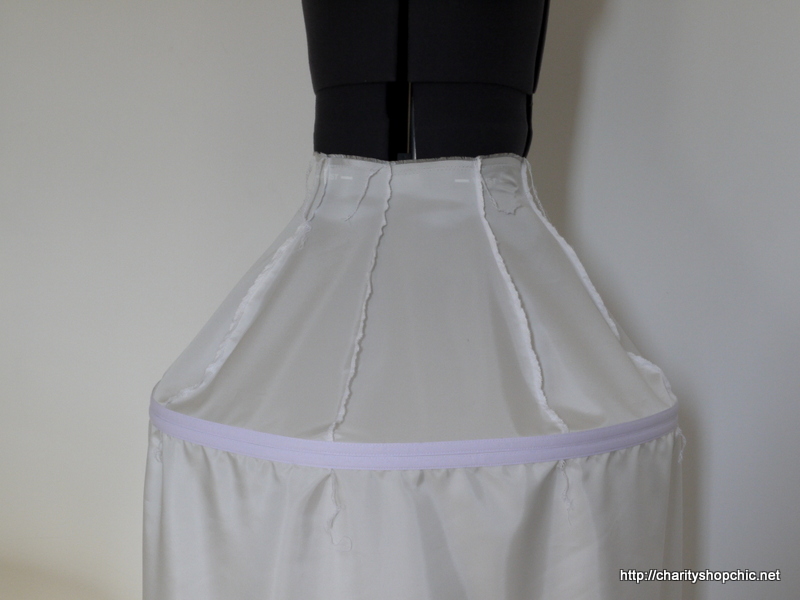
This stuff is lightweight and flexible, the idea being that the hoops would squish a bit for the purposes of sitting down and/or hugging relatives on the day. It’s basically a thin strip of plastic encased in cotton so it can be sewn straight to the fabric.

The back of the underskirt is open so that it can come on and off separately to the dress.

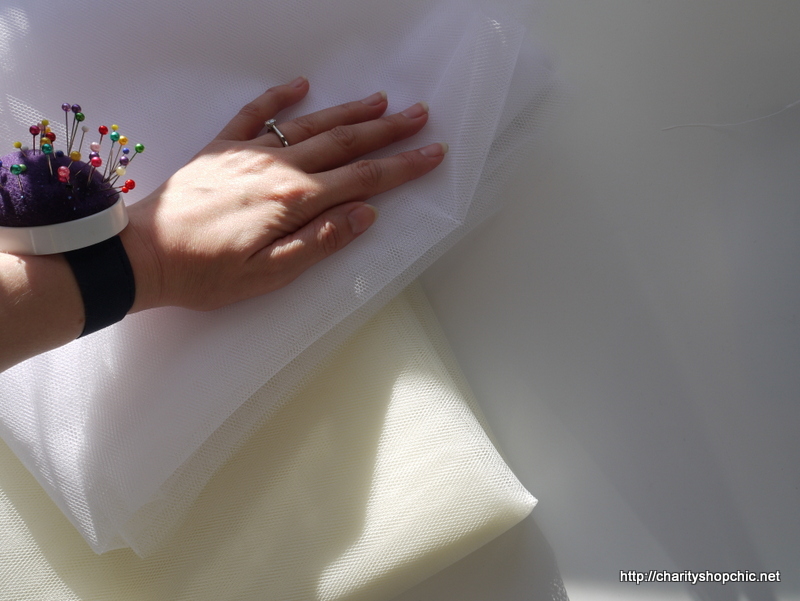
To match my fabric, I ended up with one layer of white and one layer of cream tulle on every layer. No big deal since it isn’t really seen anyway.
Here’s the start of adding many, many, many ruffles. You can see what I was imagining for the shape here. I had some shorter ruffles and some longer, with the shorter ones where the skirt curves most.

I tried the muslin over it to check it was working out OK.

It was taking shape! Here it is after adding a few more layers of tulle.
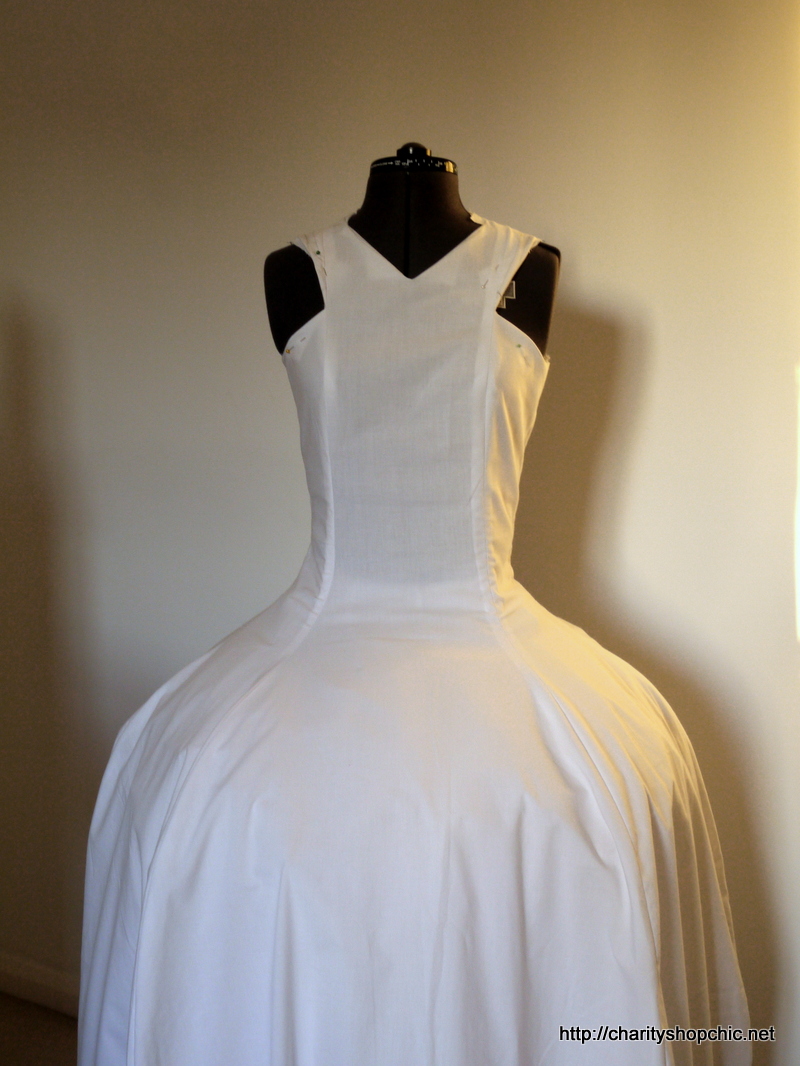
I was still toying with the idea of a rounded neckline to match the necklace at this point.

The structure of the underskirt needed a little work. I decided it was best to leave this completely separate from the dress so it could be taken on and off separately, if required. It therefore got a separate waistband (made of white grosgrain) and a bow to hold the back shut to hold its shape.

There was a LOT of tulle in this thing. This isn’t even it all.

At this stage I re-evaluated the shape of the skirt. It was looking a bit too big over the underskirt which was spoiling the shape. So I took a couple of centimetres off each seam to control the volume, and tweaked it until I was happy with the shape.


I think we’ll leave it there for today. The next post will talk about the internal structure of the dress and the corselette!

Now that is a big dress. How does it work sewing your wedding dress, while living with the your soon to be husband? Do you hide the dress? Is that impossible? I always wonder about that.
Yup, it’s a monster ;-) The sewing room was on lockdown, with the door firmly shut, for 6 months while this was being made, totally off limits. It meant I had to do his ironing during that time, but it’s a small price to pay ;-)
Yes that slight tapering of the shape is a big improvement to the balance of the dress. It’s so interesting to see how the shaping is achieved with such an impressive understructure. It is going to be amazing.
Agreed – the skirt was a bit too wide. The original pattern was drawn on paper with the skirt panel width based on a rough estimate of the final circumference of the skirt in mind. It was a balance between making the underskirt bigger and making the skirt smaller, trying to get the proportions right. So the muslin really helped!
The underskirt gained more and more tulle through the process – it was an absolute monster by the end!
I am really enjoying watching your design come together. I am so impressed.
Thanks, Ann! I’m so glad you’re enjoying reading.
Reblogged this on vintagethrifter51.com and commented:
I just love this gal’s projects, she is so talented and adventurous to make her own wedding dress, I can’t wait for the finished results!
Thanks!
So pleased to come home to the second instalment this evening! This is looking amazing already!!
Thanks so much, glad you’re enjoying reading :)
Wow! That is a massive skirt. Looking forward to your next post already.
Yup, it’s huge! Next post will be here in a few days…
And that is why we make muslims, right?! Especially for something as important as this!
Loving this!!! What a fun adventure, the way you are posting this!
Thanks MJ, yes, muslins really help, especially when designing something from scratch like this. Glad you’re enjoying reading! Stay tuned for the next installment!
What a great sewing adventure, i am off to look at installment one now – you have me hooked! Jo x
Haha, enjoy! There are many more installments to come…
Wow, this looks impressive just a muslin! Can’t wait to see the real thing! Your last post got me looking at B&J fabrics. So many yummy fabrics, but I’ve resisted as my stash is about to take over the living room.
B&J seem to have some great stuff but I only use it for eye candy – shipping to the UK from the US shops is pretty pricey!
I’m so impressed already and I think the hardest is yet to come with the corselet. I’m getting married next year but my skills are nowhere near yours so I just bought a dress. I am planning to make the table runners and the bouquet (out of brooches) though.
Looking forward to your next installment!
Oooh a brooch bouquet sounds lovely! It will be nice to have something handmade with you on the big day.
You remind me of those Disney Princesses with their bell shaped skirts. Now I know what’s underneath! Looking forward to seeing the next steps.
Haha, thank you, I think! ;-)
Oh it’s meant as a compliment. I was always fascinated how they made those dresses. When they did a real live movie the actress always wore a perfect copy of the illustration – fascinating!! Haha, sounds like what I am trying to do in DESIGNIN’ DECEMBER – make a copy of a designer outfit!
That is gorgeous! I saw the Dior exhibit this past summer and there was one room with the muslin drafts/underpinnings and this really reminds me of that, especially since that shape was part of your inspiration. I wish my skills were good enough to make my own wedding dress one day! It’s fascinating to see the process. Can’t wait to see the rest :)
Thanks, Lea! The exhibit sounds right up my street. Glad you’re enjoying reading.
WOW. The underskirt you created really adds a lot of drama to the shape of the dress! I am LOVING these posts. You’re amazing.
Thanks Michelle and I’m so happy you’re reading! The underskirt certainly is a monster. Can’t wait to show you the final dress.