
Wedding Dress: Part 5 (The fabric and The Dress)
I hope you’re as excited to talk about my fabric as I am!
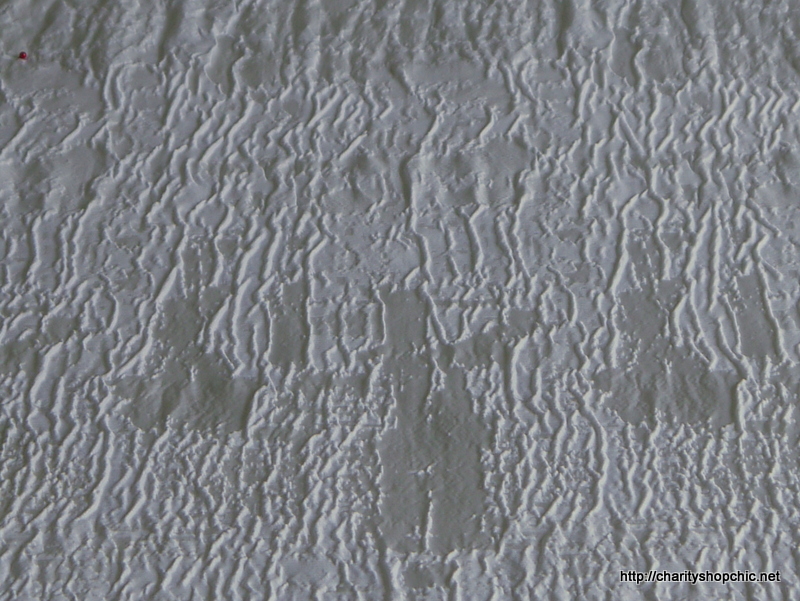
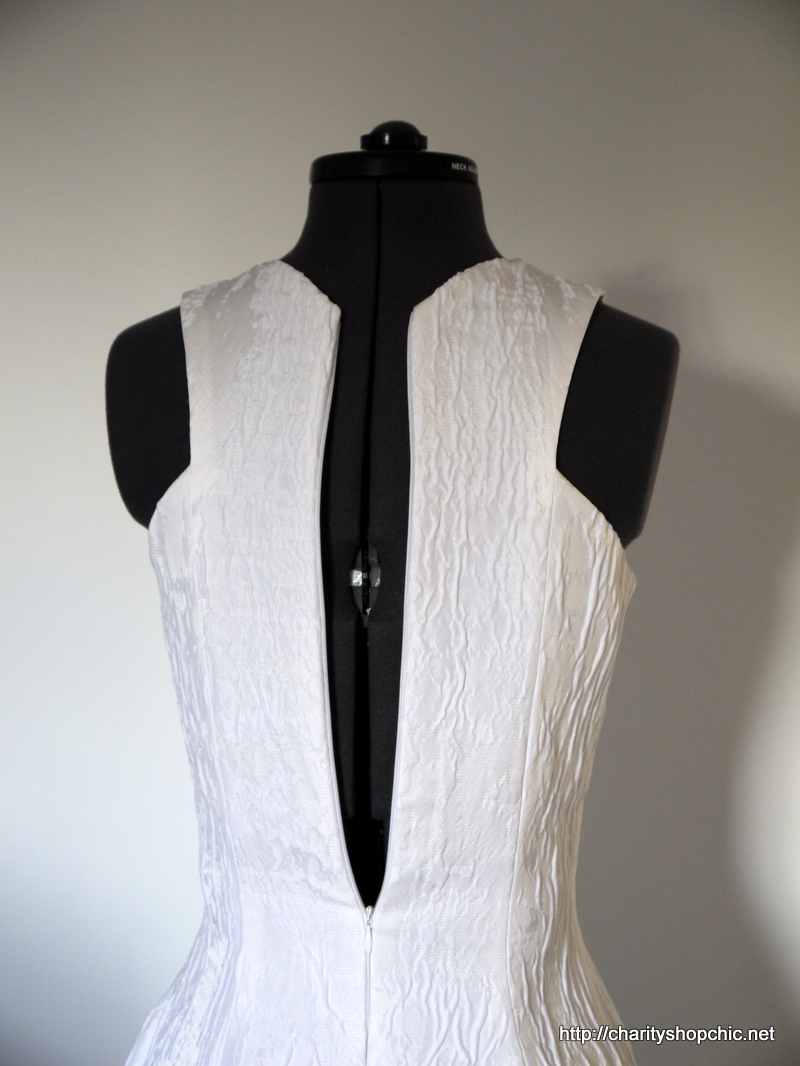
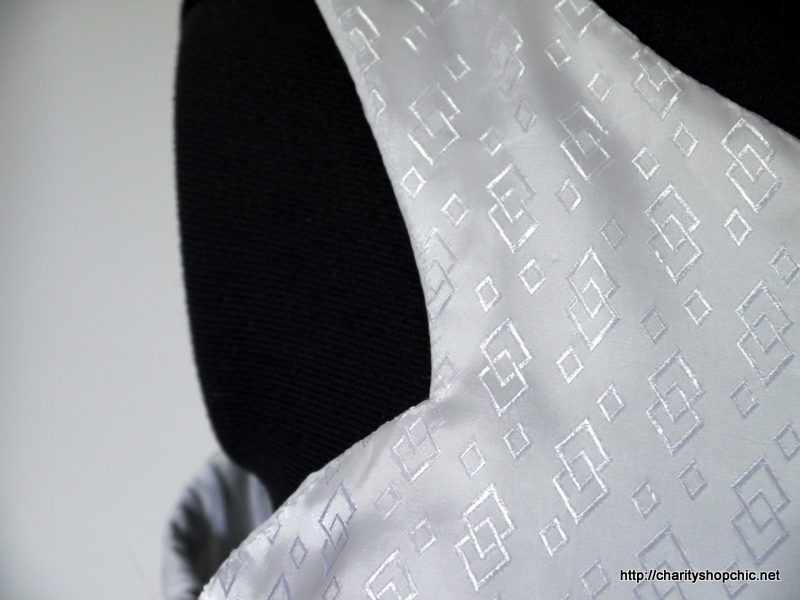
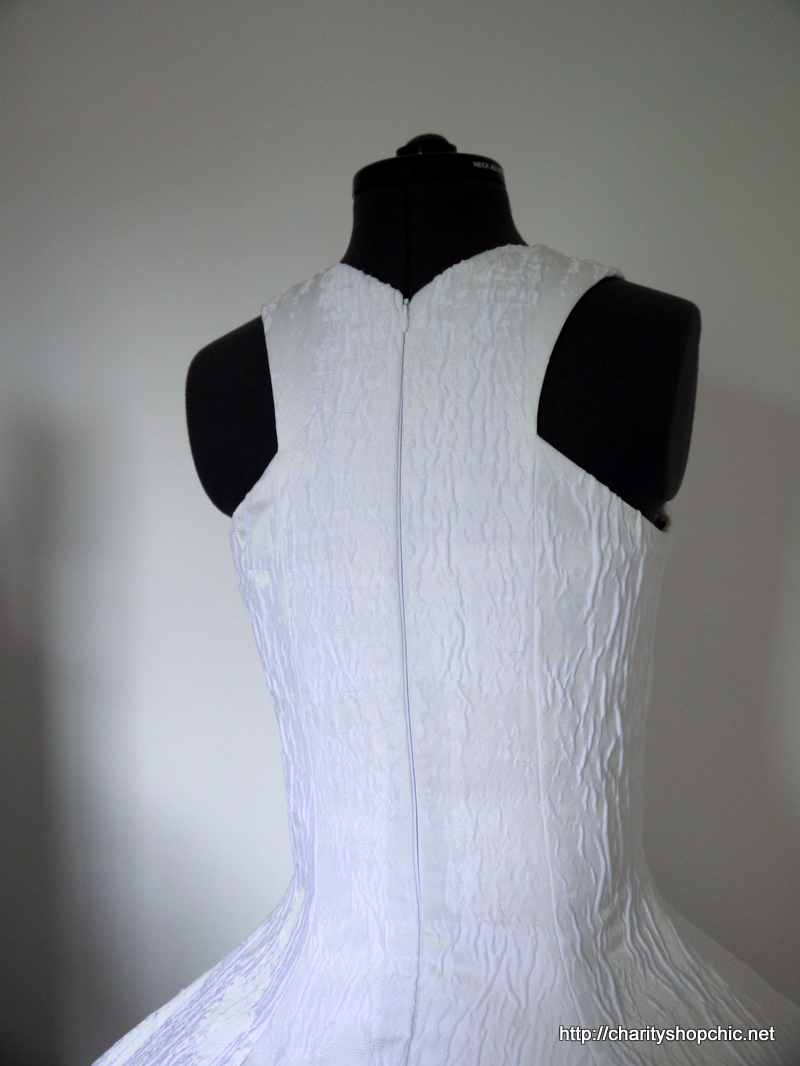
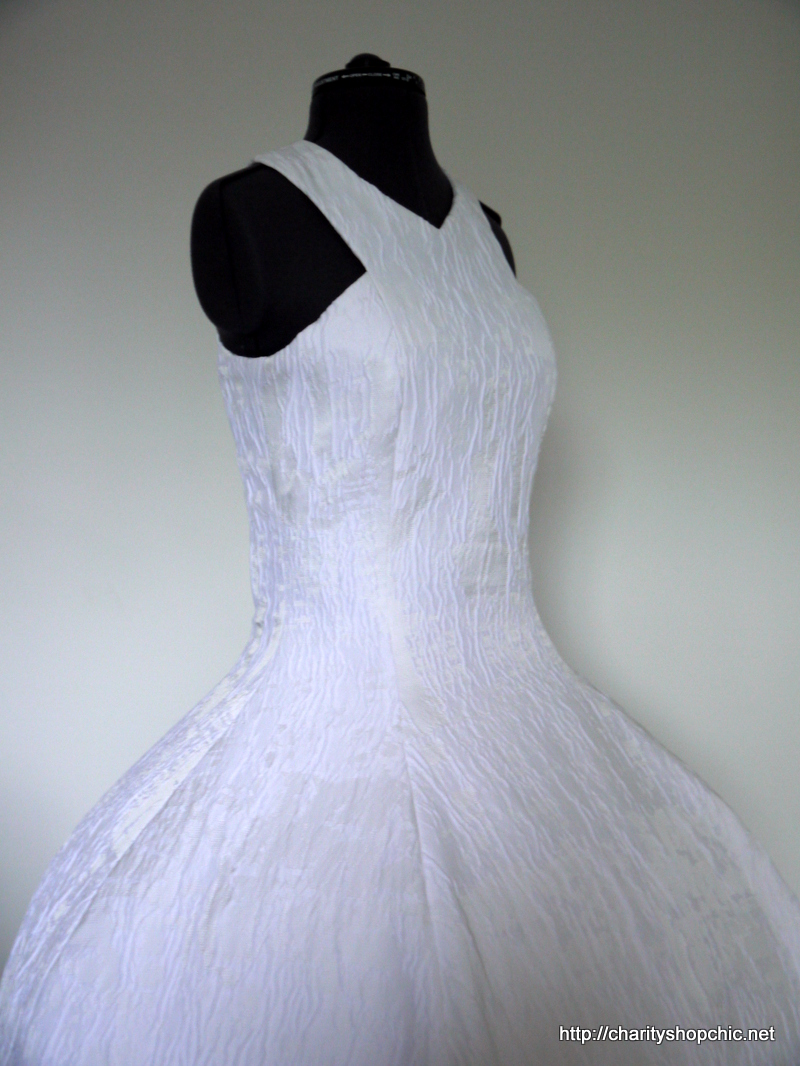
I bought my final fabric from Misan Fabrics in London (unfortunately they don’t have stock online so I can’t point you towards the exact fabric). It’s pretty special. It’s a cloque jacqard, mixed fibres. Parts are white, parts are off-white. Parts are shiny, parts are not. Parts are rippled, parts are flat. Hopefully you can see what I’m talking about below.
The whole thing is textured. Quite unusual for a bridal fabric, but I love it.
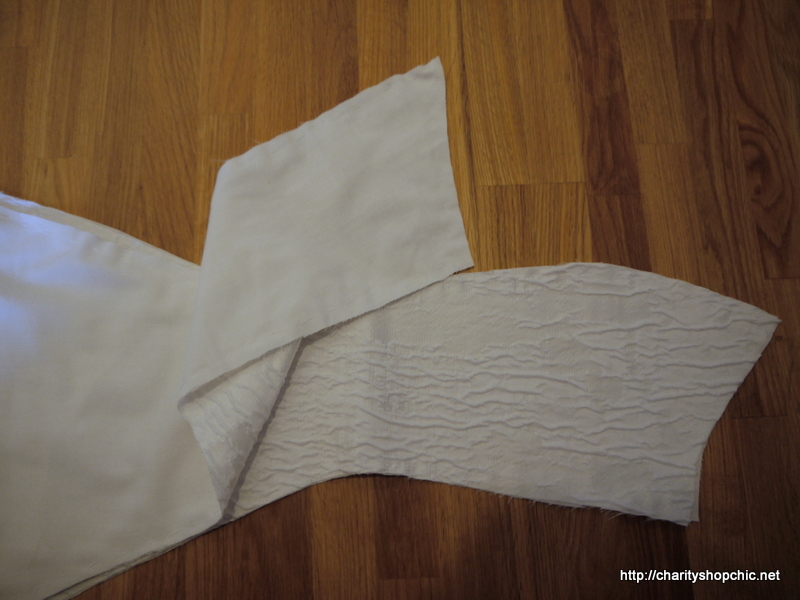
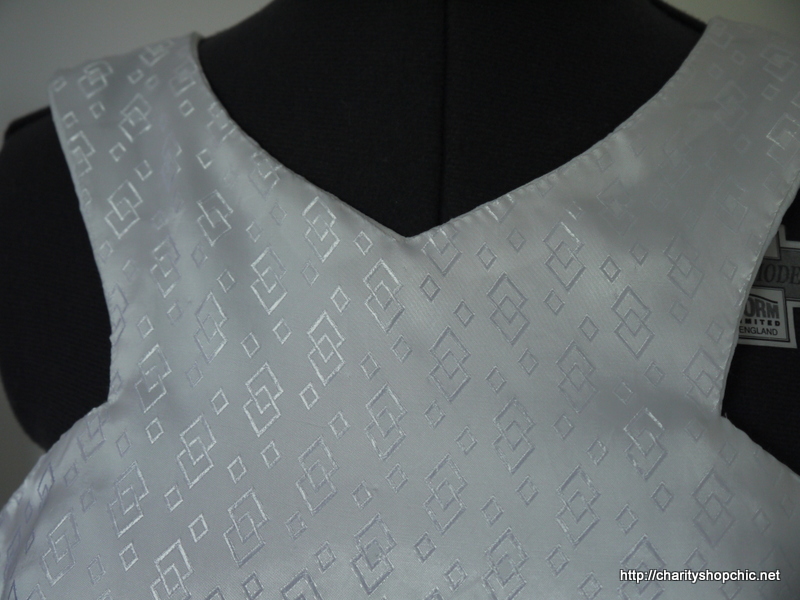
I transferred my adjustments from the dress muslin to my paper pattern and started playing with the placement. Right up until the moment I laid a long length of the fabric out on my kitchen table, I’d thought of it as abstract, which of course it isn’t. There are clear repeats in the pattern forming ‘bands’ of similar blobs all the way down. This presented a dilemma; whether to cut the pieces to preserve the ‘bands’ all the way around the dress, or whether to do something different? To make things worse, I had just over 6 metres of fabric and was cutting around two fabric flaws/stains. After much placing and pinning, and replacing, and repinning, I flipped some of the pieces upside down so that there would be no band effect on the dress, to try and make it look as abstract as possible. It took a few goes pinning it all so it would fit and avoid the stains at the same time (and my table is only 2 metres long), but eventually, I took a deep breath and started cutting.

Being white and off-white, I was worried that the fabric might be a little transparent, and also knowing the skirt had to create a clean line over all those net ruffles… I made the decision to underline, and I’m glad I did. I had a pile of old white poly cotton sheets to work with and they did really well adding stiffness to the fabric, though they did add a reasonable amount of weight.
I hand basted the underlining to the dress fabric in the seam allowance of all the pieces (not a small task).
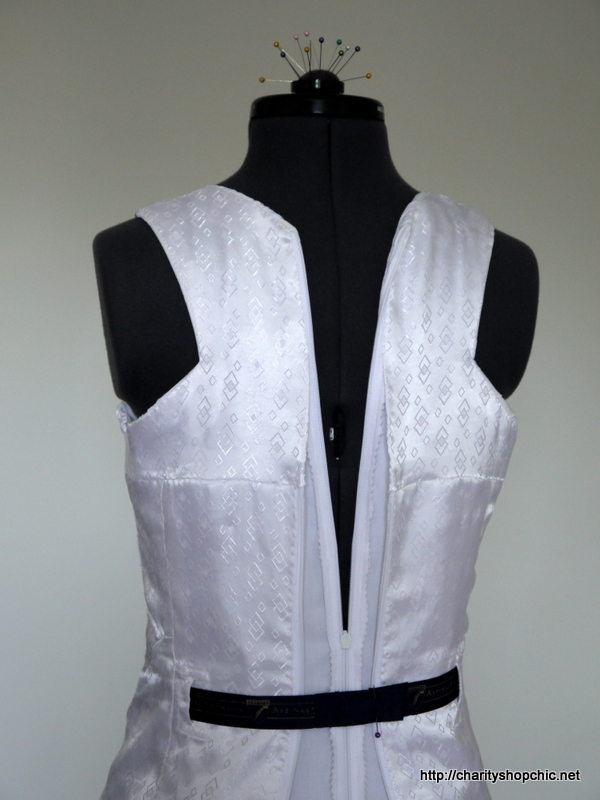
I also reinforced the neckline, armholes and zip opening with strips of silk organza.
After sewing the panels up, it was really starting to come together.

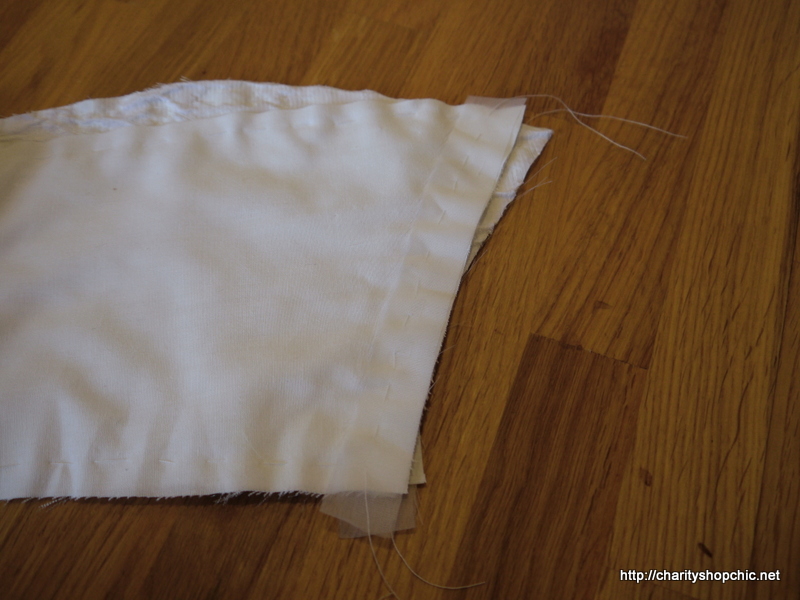
Then came the task of finishing the edges.
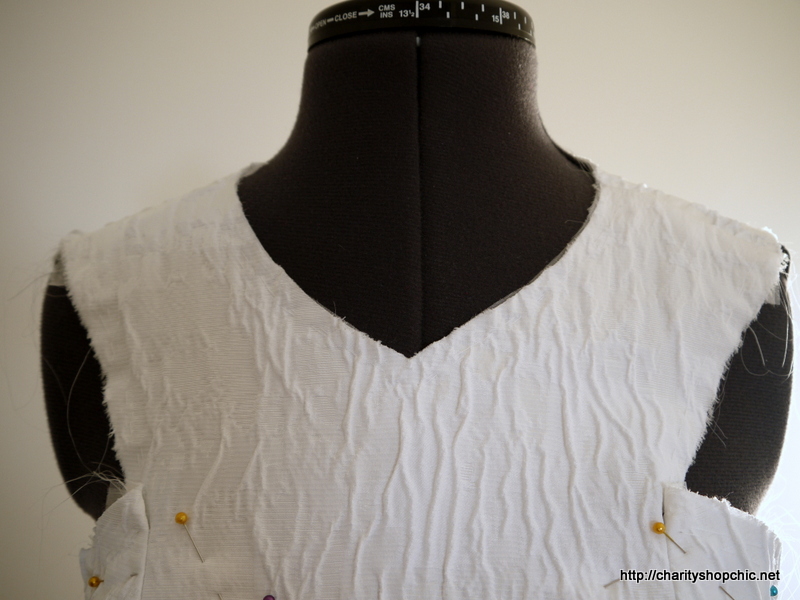
The first thing I did was to add extra reinforcement at the point of the V. I used a square of silk organza.


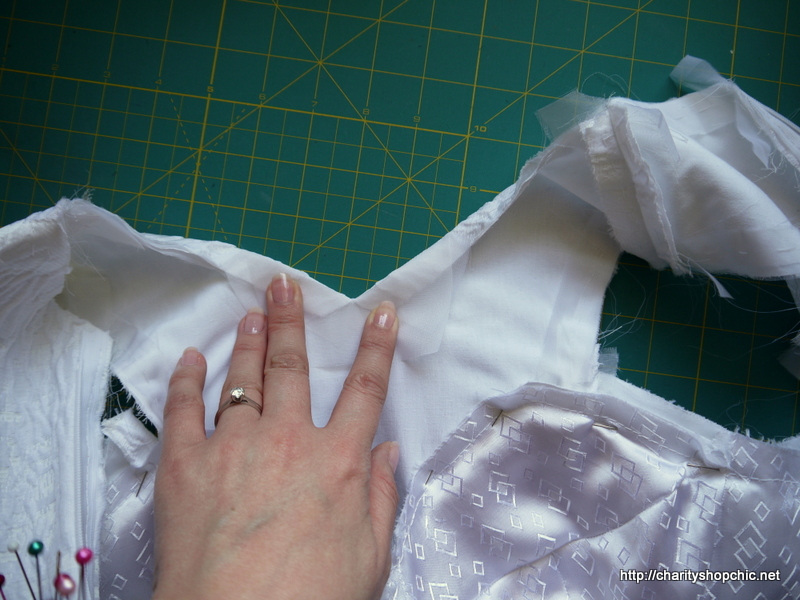
Here’s how it looks after pressing – pretty neat!
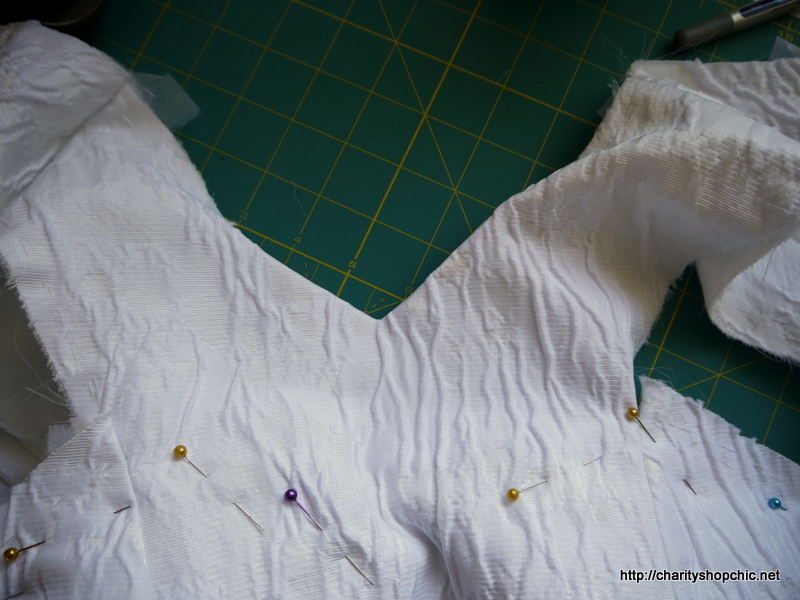
I pinned the seam allowances of all the edges under until I was happy that they were even.


Then I catch stitched all the seam allowances to the underlining and pressed.

I was really pleased with it at this point because it was really starting to feel like a real dress and the end was in sight!

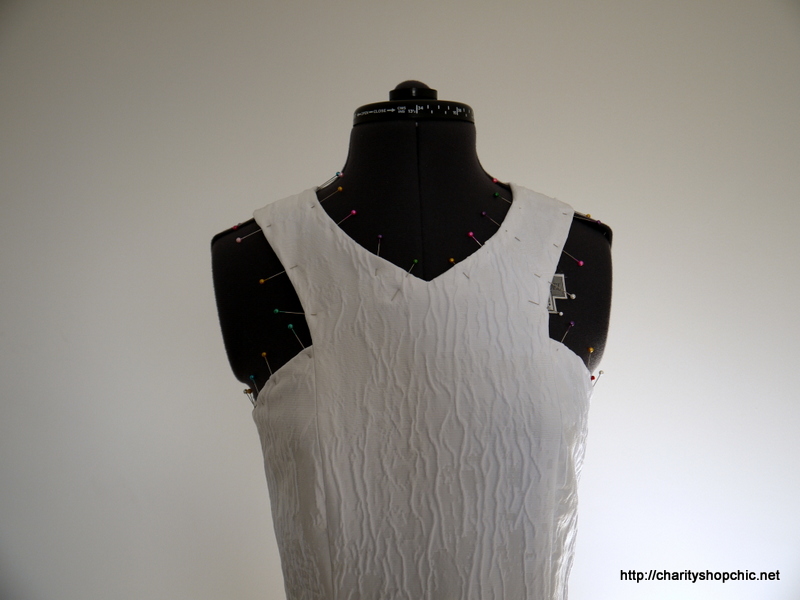
To line the top part of the bodice, rather than cut a lining from my pattern pieces, I draped it from a scrap of lining material, being careful to maintain the grainline of the lining on the vertical.


I sewed it to the dress with tiny stitches.
Same at the back!


I tried the whole thing on over the corselette to determine the exact position of the corselette relative to the dress. Marking the position carefully was critical and I took it on and off a few times to check. When I was happy with it, I put the inside out corselette over the dress and trimmed the lining to reach it.
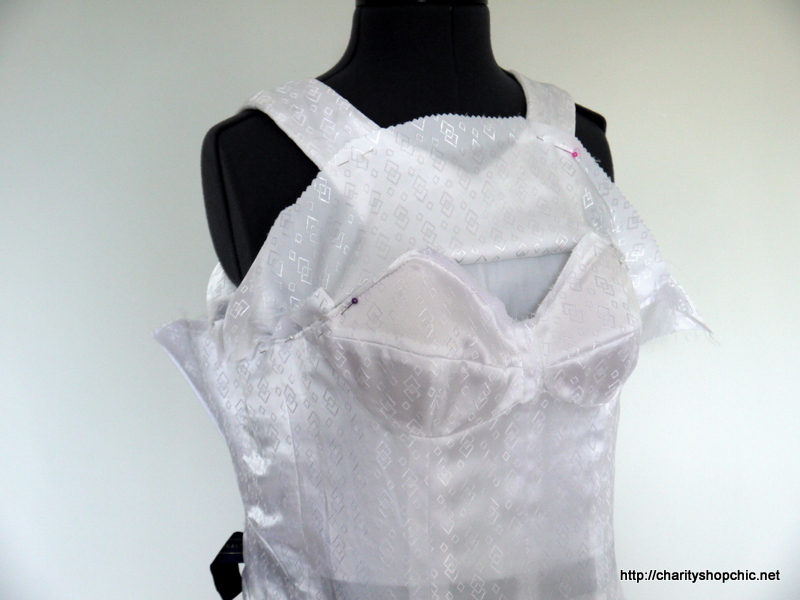
I sewed the bodice lining to the corselette with the same small stitches.

Note that the lining is attached to the dress only partly at the zip edge – it’s attached to the corselette below that, to allow for some movement between the layers.

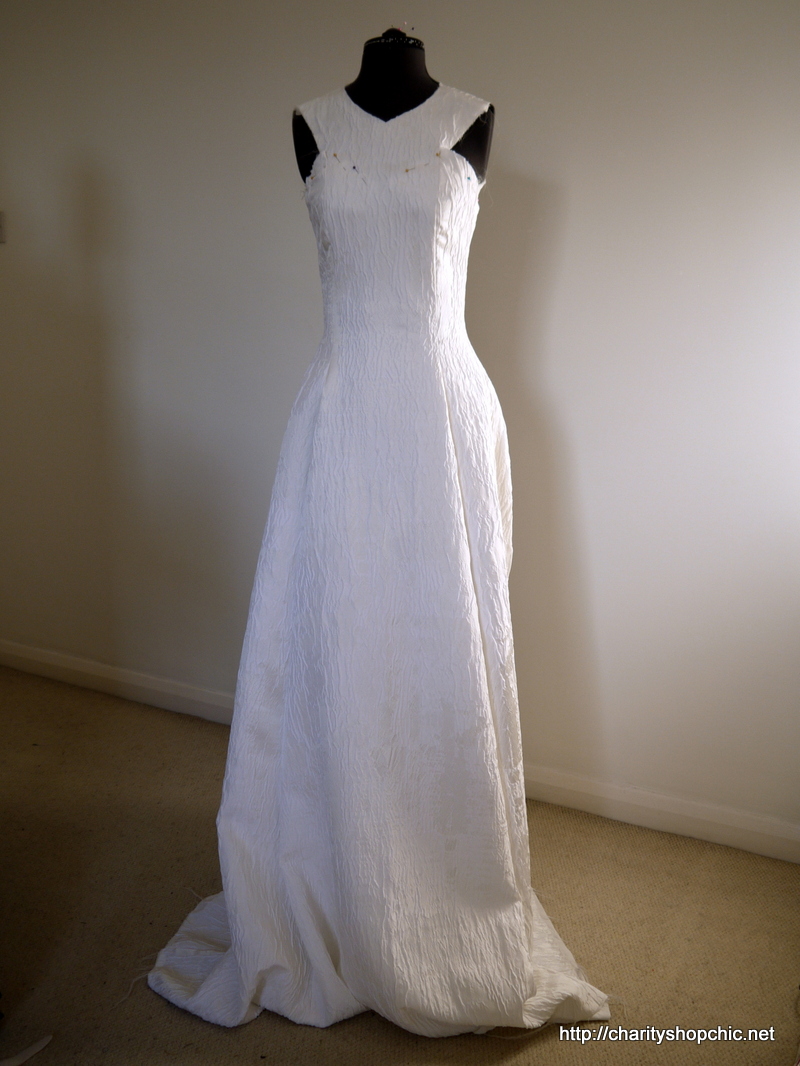
Here’s the whole thing the right way out… quite a few photos, just because I can ;-) I think you can see the fabric better here as well.


Just one more post to go before the big reveal! Stay tuned to hear about my veil.

Gorgeous fabric! Can’t wait to see you in the dress!!
Stay tuned MJ, not long to go now until the big reveal!
It’s looking amazing! It’s going to be a beautiful dress!
Thanks Jules – and thanks for reading!
Reblogged this on vintagethrifter51.com and commented:
So beautiful and so beautifully done.
Thanks Vintage51, glad you like it.
What lovely fabric. I am thoroughly enjoying this series. It is so fun to watch a dress go from inspiration to reality.
Thanks Sarah, glad you like the fabric. It’s a bit unusual for a wedding dress but I love it!
Love the fabric choice!! Stunning!!
Thanks Amy, me too!
I can’t wait to see it!
Don’t worry Lisa, it’s coming soon!
Its looking amazing sally! Such gorgeous work
Thanks Jo, it’s been hard work but wait til you see it on! :)
Wow!!! I can’t wait!x
Thanks Kezzie!
wow! this is fascinating and beautiful!
Thank you – so kind of you to comment.
It is beautiful!!! It has been so interesting to see all the work that goes on “underneath” to make the structure of the dress and to give it the shape and so on, I really had no idea. The fabric is beautiful as is the whole dress! I look forward to seeing more! xx
Thanks Amy, really glad you’re enjoying reading and you’re finding it interesting. There are only a couple more posts to go!
Your attention to detail is inspiring! I’m about to tackle my own wedding dress, and reading your posts is very helpful :) Can’t wait for the reveal!
Thanks so much for commenting, I’m so happy you’re finding this series useful. Good luck with your dress!
There are no words! Your attention to detail and the thought you have put in to every element of this dress is amazing. I cannot wait for the next post!
Thanks Sue – it’s been a lot of hard work but I was so pleased with it in the end! There’s only a couple more posts to go now…
I love what the fullness of the skirt is doing without the petticoat underneath. Beautiful. Incredible fabric. It does look abstract cut and pieces together like that.
Thanks Kate, I think abstract was definitely the way to go, rather than trying to match it in any way. Thanks for reading!
I love reading your construction posts – as a relative novice (but enthusiastic) dressmaker, I often use hints and tips I read on your posts to make things easier for myself. I’m vaguely considering making my own wedding dress so I’ve been following this post with avid interest. Beautiful job!
Thanks so much V, I’m so glad you’re enjoying reading! I hope you do decide to make your own dress – it’s a lot of work but so worth it when you can wear it on the day and feel proud. Good luck with it!
I am in awe!
Thanks JaneyB! :)
I am going to feel so sad when this series is done. Its beautifully written and illustrated, the dress is looking fantastic so far! I check back daily to see if there’s been another post, I’m definitely hooked!
Thanks Helen, I’m so happy you’re enjoying reading! Glad you like the dress as well. I can’t wait to show you the final wedding outfit!
I would never have been able to visualize that fabric turning into a beautiful wedding dress but you definitely seem to have done it. Can’t wait for the reveal. Please, please hurry up!
HAHA don’t worry, it’s coming soon! Yes, the fabric is a bit unusual but I love it…
Lots of brilliant technique here. I love the fabric too and the way it just flares out is amazing. The zig zag armholes are special and I love the way you lined the bodice. It’s a beautiful piece of work and I am enjoying following along.
Oh I can’t wait to see it on you!!!!
I am loving these posts and all the geeky sewing details (not calling you one, just I like it!!) Jo x
I simply “ooh” and “ah” every time I read the next blog post about your wedding dress. Seeing it become a reality (from paper drawing to actual fabric) is incredibly inspiring!
Oh my! So pretty. I love your fabric, the texture! I’m looking forward to the next post!