BONUS POST: Wedding Dress Refashion!

Calm down, I didn’t refashion my actual wedding dress. It’s been put away in two specially made garment bags for safe keeping.

But I did refashion “a” dress to wear at “a” wedding…

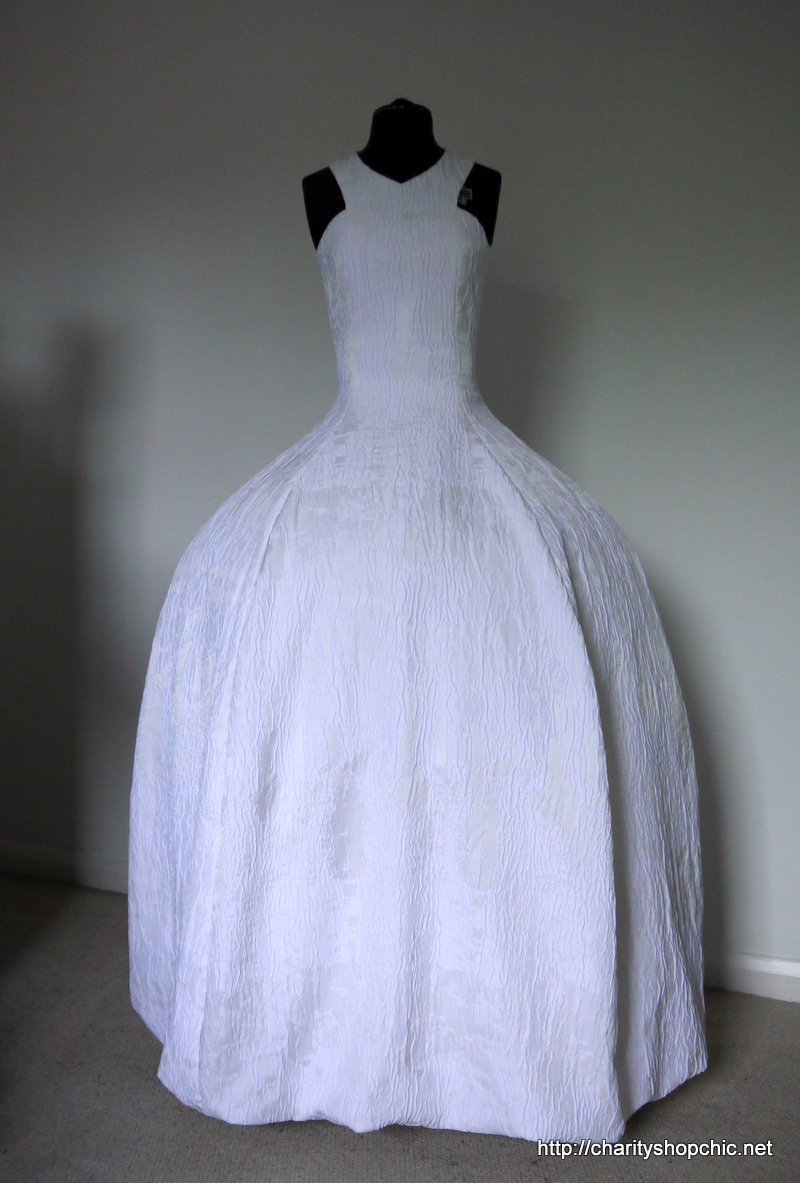
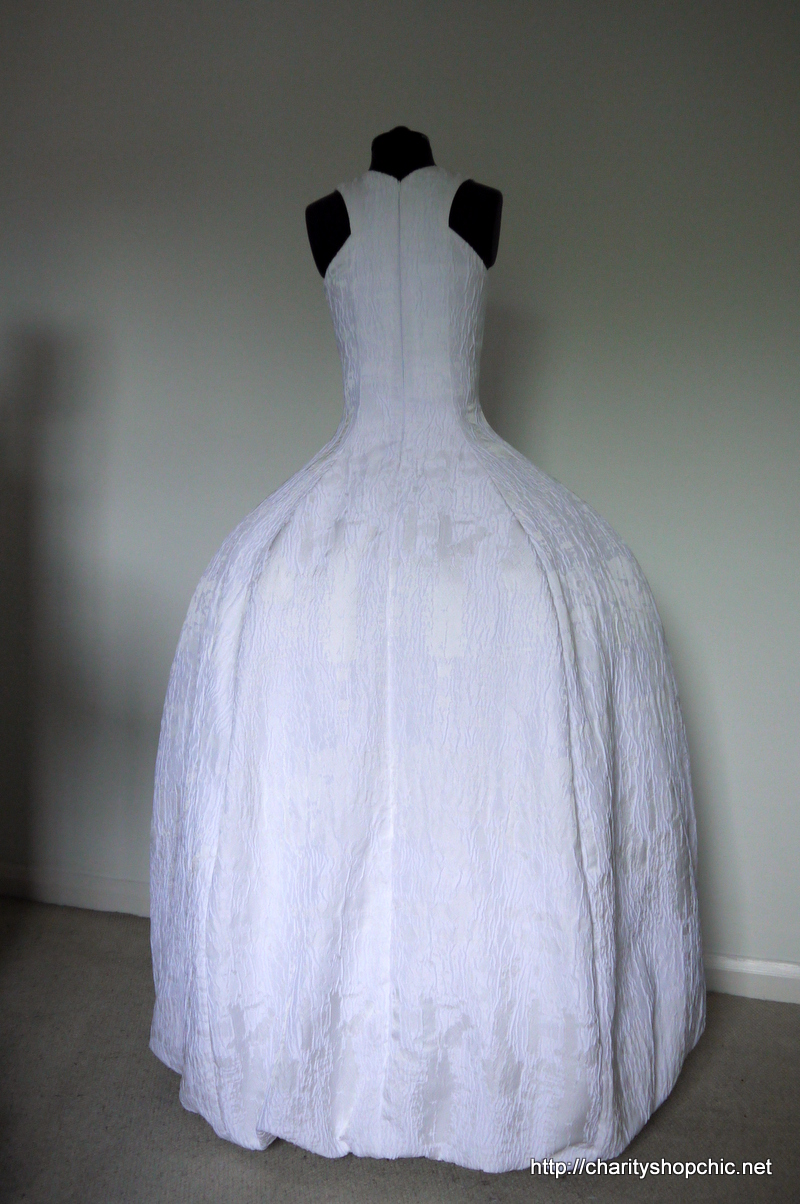
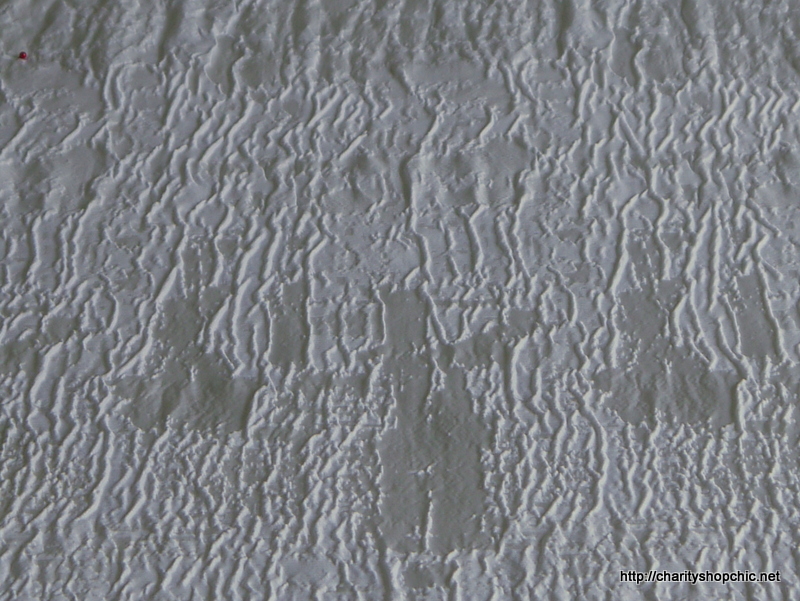
I bought this vintage (wedding?) dress in a shop in Deptford a few years back. The fabric is so, so pretty, but as much as I tried to believe it did, it just didn’t fit. The waist was far too high. The bust was too big. The torso was too short. The sleeves were too short. Basically it was made for a much shorter person.

P1190035

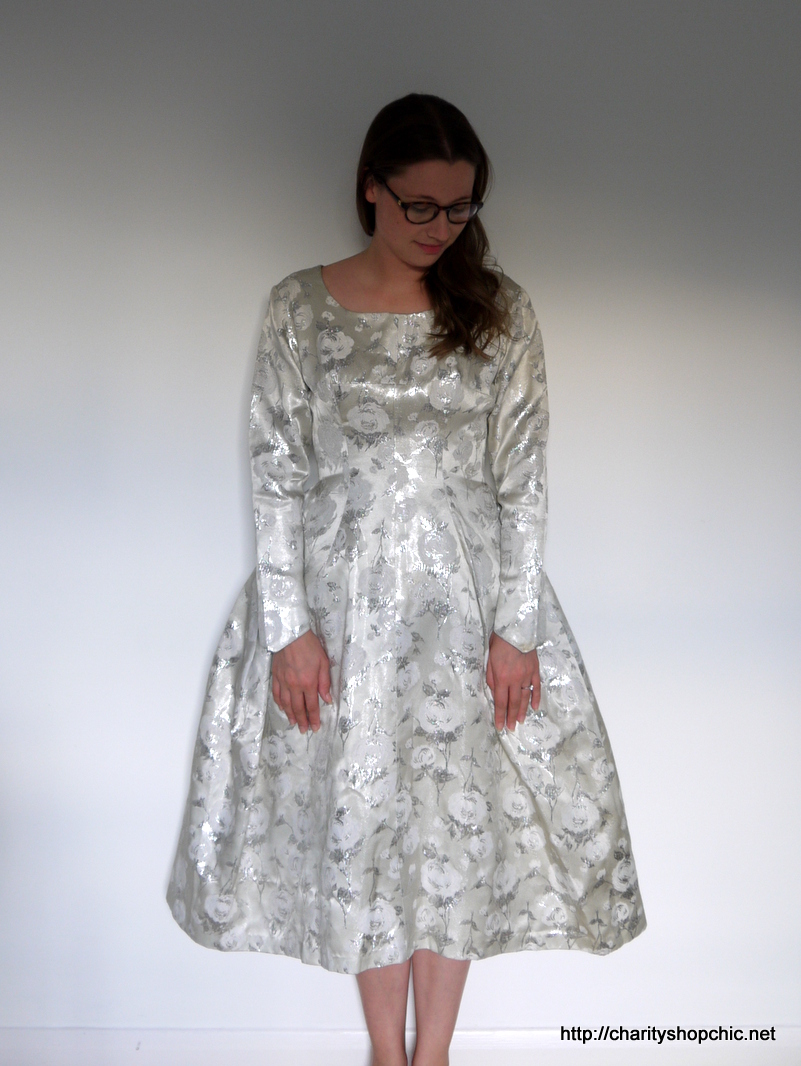
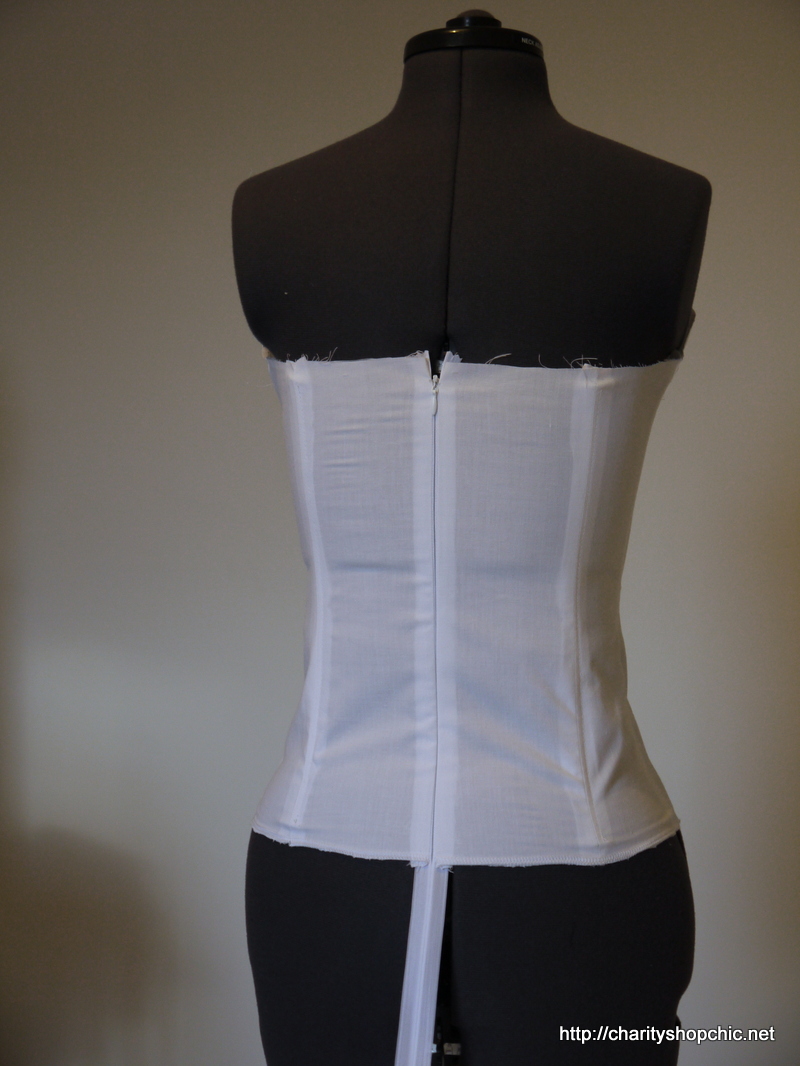
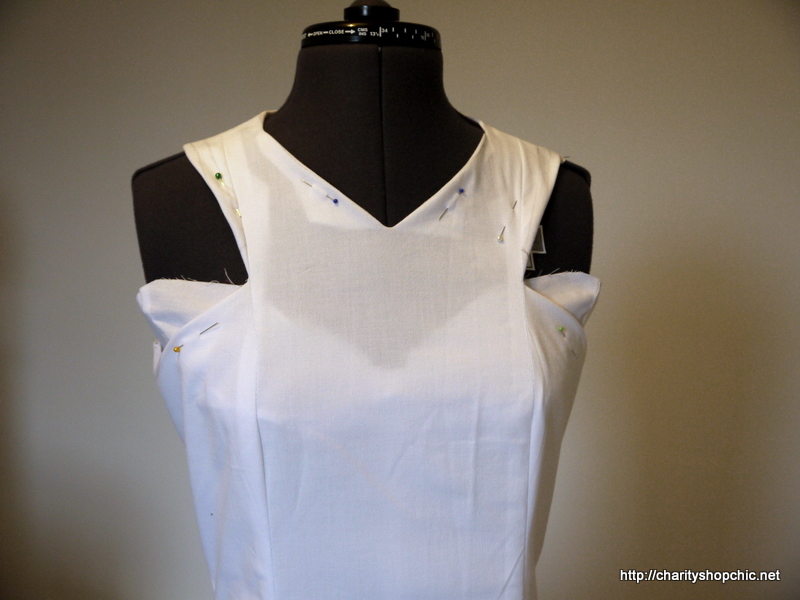
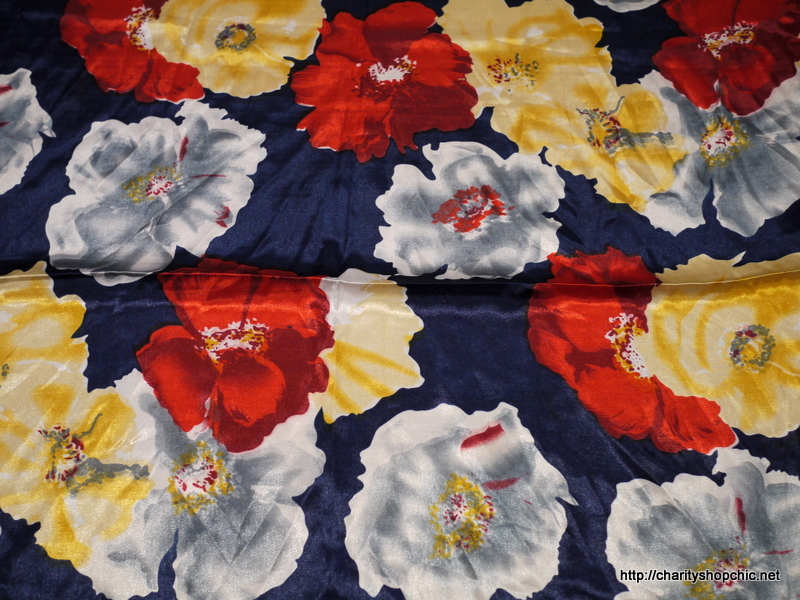
My plan of action was to remove the sleeves and make the bodice longer by chopping it off above the bust and adding a (longer than the original) contrast section instead. I considered adding a transparent section like you see on some wedding dresses, but didn’t really give it any serious thought until coming across this old blouse in my stash. It’s rayon and very thin, and the perfect colour to match the cream tones in the dress.

P1190043

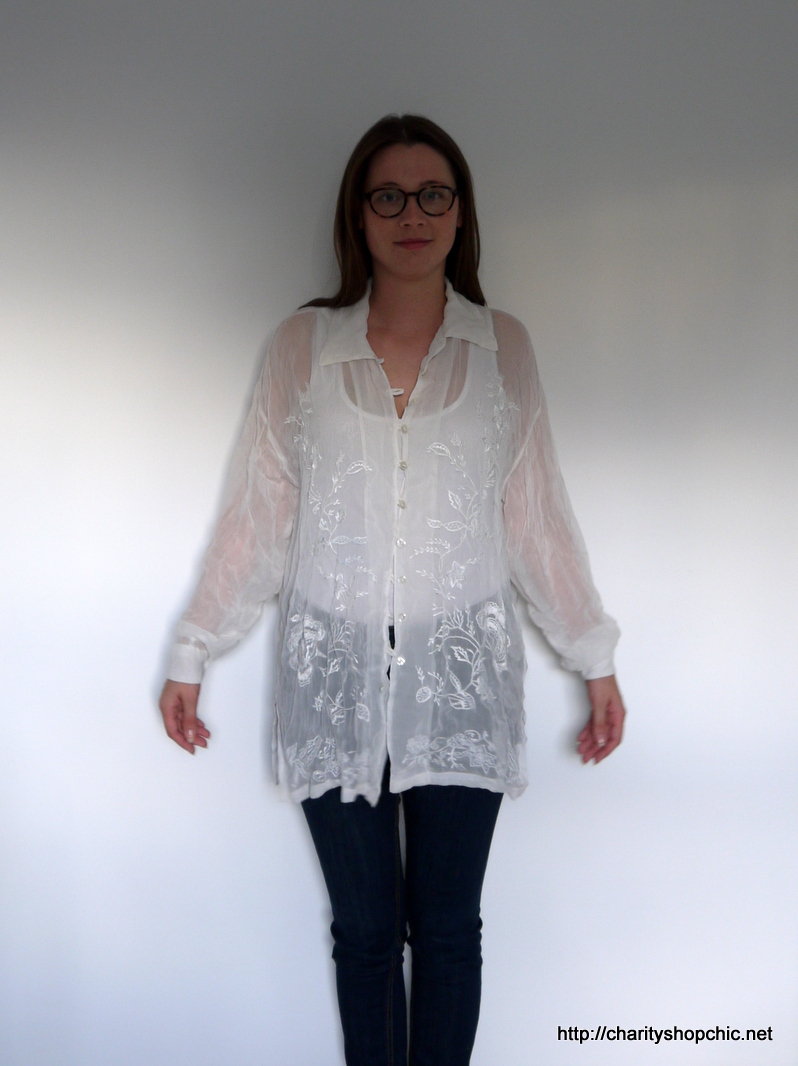
For the record, the blouse was purchased at the Mind shop in Whitby for £4.50.

P1190048


Continue reading

Wedding Dress: Part 7 (The Big Reveal)

I hope you’re still following along this epic series and haven’t gotten too horribly bored by the whole thing. It will be over soon, I promise!

I’ve written at length about all the different parts of the dress… the corselette, the underskirt, the dress shell and even the veil, but seeing at all come together was a very satisfying moment.

P1180547

P1180548

Continue reading

Wedding Dress: Part 6 (The Veil)

Let’s talk veils! There was no doubt in my mind that I wanted a veil, and I quickly earmarked the kind of thing I was looking for (white, long, nothing that comes over the face). Here are some of the images I was working from.

v1 v2 v3 v4

Since I had to give up the idea of embellishing the dress because of time constraints, I thought it would be safe to play around with embroidering the veil and making a jeweled ornament for the comb – both could be abandoned at any point and a plain veil made in half an hour, if the deadline got too close.

Since my wedding motif was a star, stars were the obvious choice for the embroidery. I did quite a few samples, trying to make a star shape that looked as good on the front as it did on the back, which turned out to be tricky – the veil is of course seen from both the inside and the outside, so it was important that the reverse looked good. Also, there couldn’t be any stitches on the reverse outside the shape of the star, because the veil tulle is of course see through, so they wouldn’t be hidden. I considered this star stitch before dismissing it because thread showed through to the right side between the points of the star. What I eventually settled on was a modified raised fishbone stitch, times five for each star. I don’t mind telling you I got halfway through doing these stars in pink before deciding it was too harsh against the white dress and switched to silver. Metallic thread was not terribly easy to work with, so I ended up with a satin grey.

P1180559

Continue reading

Wedding Dress: Part 5 (The fabric and The Dress)

I hope you’re as excited to talk about my fabric as I am!

I bought my final fabric from Misan Fabrics in London (unfortunately they don’t have stock online so I can’t point you towards the exact fabric). It’s pretty special. It’s a cloque jacqard, mixed fibres. Parts are white, parts are off-white. Parts are shiny, parts are not. Parts are rippled, parts are flat. Hopefully you can see what I’m talking about below.

The whole thing is textured. Quite unusual for a bridal fabric, but I love it.

P1180203

I transferred my adjustments from the dress muslin to my paper pattern and started playing with the placement. Right up until the moment I laid a long length of the fabric out on my kitchen table, I’d thought of it as abstract, which of course it isn’t. There are clear repeats in the pattern forming ‘bands’ of similar blobs all the way down. This presented a dilemma; whether to cut the pieces to preserve the ‘bands’ all the way around the dress, or whether to do something different? To make things worse, I had just over 6 metres of fabric and was cutting around two fabric flaws/stains. After much placing and pinning, and replacing, and repinning, I flipped some of the pieces upside down so that there would be no band effect on the dress, to try and make it look as abstract as possible. It took a few goes pinning it all so it would fit and avoid the stains at the same time (and my table is only 2 metres long), but eventually, I took a deep breath and started cutting.

P1180204

Continue reading

Wedding Dress: Part 4 (Skirt Lining)

Hi folks, hope you’re still following this series and haven’t gotten too bored with the whole thing! Today’s post is a quick one about the skirt lining and some of its features.

Full disclosure: I wasn’t planning on having a skirt lining at all, the dress was going to just be on top of the underskirt with a regular hem. I bought horsehair braid for a nice crisp hem and everything. But then I changed my mind.

I wanted a bubble hem – to keep the volume of the skirt all the way down to the ground and give it more of a rounded, bubble appearance. To get the bubble effect, you make the lining narrower and shorter than the skirt, and join them together right sides together. The skirt is gathered onto the lining and the whole seam is hidden on the inside.

The point is, this can only work with a lining because it has to be held up from the inside all the way round. So, I cut a lining, following the shape of the original skirt (luckily I had metres and metres of fabric).

Here it is, wrong side out over the underskirt. You can see that I’ve made it narrower at the hem by simply tapering the seam allowance. Note that this only happens in the bottom fifth of the skirt as the underskirt tulle wants to be unimpeded to produce the volume required above that.

P1180526

Continue reading

Wedding Dress: Part 3 (The Corselette)

Welcome back folks, today we’re talking corselette construction!

Firstly, I need to give a big shout out to Laura Mae at Lilacs and Lace as her post on corselette construction here is absolutely excellent and formed the basis of what I ended up doing. Thank you Laura Mae! There are not many resources out there on corselettes so do read Laura Mae’s very informative post if you are thinking of doing something like this yourself.

I also read Susan Khalje’s “Bridal Couture” from cover to cover (it’s OOP – HOW IS IT OOP???!! – and very expensive online but Clare was kind enough to lend me her copy – and to show me her wonderful wedding dress that she made in person!). This book is highly recommended to anyone thinking of making their own dress as it covers every aspect of construction. Some of the styles are a little dated but the information is brilliant.

Here’s my muslin for the corselette section, which is loosely based on Burda 02/2011 #113, extended to the high hip and with a few other tweaks.

P1180119

Note that I used an invisible zip here as the least bulky option. I hadn’t heard that you are apparently not supposed to use them in wedding dresses because they are apparently not strong enough (I read that somewhere recently). For what it’s worth, my dress used two invisible zips, one in the corselette and one in the dress itself and they were absolutely fine. Anything other than a concealed zip down the centre back would have ruined the line of the dress, IMO.

P1180122

Here’s how it looked under the dress muslin – I trimmed away a bit of what was showing through the armholes in the final version.

P1180126

Continue reading

Wedding Dress: Part 2 (Muslin)

This is the second post in my series about my wedding dress. Today I’m going to be talking about the muslin I made and how it helped me finalise the shape of the dress and the underskirt.

I started with my own copy of my Martini pattern as a base – not that you’d ever know it, looking at the shape – because it had had many fitting tweaks and was the most up to date version of a good fit. But it helped me get the fit right straight away. I had to mash several pieces together and redraw them all and… well I ended up with this (below). I played around a lot with the shapes of the arm holes and neckline and I removed most of the fitting ease from the bodice (the top half wanted to be pretty much skin tight as it would be over a corselette). The skirt shape was  a pretty exaggerated bell.

P1180086

You can see I’ve drawn on the back armholes in pencil.

P1180087

Continue reading

Wedding Dress: Part 1 (Inspiration)

Hello Everyone. I want to talk to you about my wedding dress!

As you may or may not have heard, I got married a few months ago, and yes, I made my own dress! It’s been an absolutely epic project taking the best part of 6 months continuous work (free time and weekends only). I want to share the whole process with you in a series of posts, as it’s really too epic for one post alone. I’ll start from the beginning and take you through all the interesting (and the mundane) sewing details over the coming days. Note that this is obviously not a refashion but it’s a personal sewing project that’s been very important to me, so I hope you’ll indulge me. I’m not going to reveal final pictures until the end, so you can enjoy the journey as I did from start to finish in chronological order, I hope that’s not too frustrating.

Where does one start when making a wedding dress? When you’re making your own, you can have literally any shape imaginable. You can use literally any fabric and have as much or as little detail as you like. So narrowing it down was tough. The main criteria for me were that I wanted something that suited my personal style (which I think of as classic, elegant and with a slight ‘fashion’ edge – at least, that’s what I aspire to) as well as a figure flattering shape (which for me means exposed shoulders, fitted waist, not strapless). I briefly considered a fitted skirt before coming to my senses and realising there are hardly any opportunities to wear something ball-gown like, and came up with my design motto, “Go Big Or Go Home”…

I looked at lots of designers, lots of bridal sites and even tried some dresses on to get a feel for the shapes. Here are some of the images I was working from.

dior2

Jennifer Lawrence in Dior.

Continue reading

Super Scarf

P1190866

So… I’ve had this scarf for a little while. A few months. It’s got a really pretty colour scheme and is shiny without being too shiny. I bought this in Sweden over the summer (in the Red Cross/Röda Korset shop in Arvidsjaur) and if I remember correctly, it was in a sale bin where everything was SEK 5:- (about 50p). Given that it’s marked SEK 25:-, I think I got a good deal. I actually picked up several scarves and doilies from the same bin which have yet to make it to the blog.

P1190868

Anyway, it’s polyester, which is fine, because look at the colours! It’s actually quite a big scarf (a metre square, or so) and I’ve been pondering what to do with it for a while. I was going to cut it into a couple of squares and make a basic top, but wasn’t really feeling like that would do it justice.

P1190867

Continue reading

Red Carpet Copycat: Marion Cotillard in Dior

P1180323

So… this jacket was sent to me by blogger Being Zhenya as part of a blogger swap organised by Martyna at Spoolish and Miche at Buttons and Birdcages about two years ago. Two years?! Yes, I know it’s been a while, sorry Zhenya. I asked her for something to refashion and she sent two great items from the thrift stores of Minneapolis. I’m a bit sad that it’s taken me this long to get to it, but the package didn’t arrive in time for the original post deadline so it went onto the back burner.

Anyway, it’s a poly-rayon women’s blazer in a brilliant cobalt blue.

P1190756

It’s well used and looks a bit sad on the stand.

P1190757

There are a minimum of features – no lining, only one button, no cuff detail, no shoulder pads – there aren’t even any real pockets.

P1190761

Of course, as soon as I saw those pocket flaps, I was like – DIOR FALL 2012 – well, in my defence, it was November 2013 at the time.

Here’s Marion Cotillard wearing the object of our copycat affection in November 2012. It has a lace skirt and jacket style bodice with lapels – and pocket flaps!

mcd2 mcd

Continue reading